Rendering vegetation imposters
Written by Jesper Tingvall, Product Expert, Simplygon
Disclaimer: The code in this post is written using version 10.4.132.0 of Simplygon and Unity 2022.3.37f1. If you encounter this post at a later stage, some of the API calls might have changed. However, the core concepts should still remain valid.
Introduction
In this blog post we will look at two shading tricks that will increase visual quality of vegetation impostors; fading of orthogonal planes and noising of normals.
Prerequisites
This example will use the Simplygon integration in Unity and the URP rendering pipeline. The same concepts can be applied to all other integrations.
Problem to solve
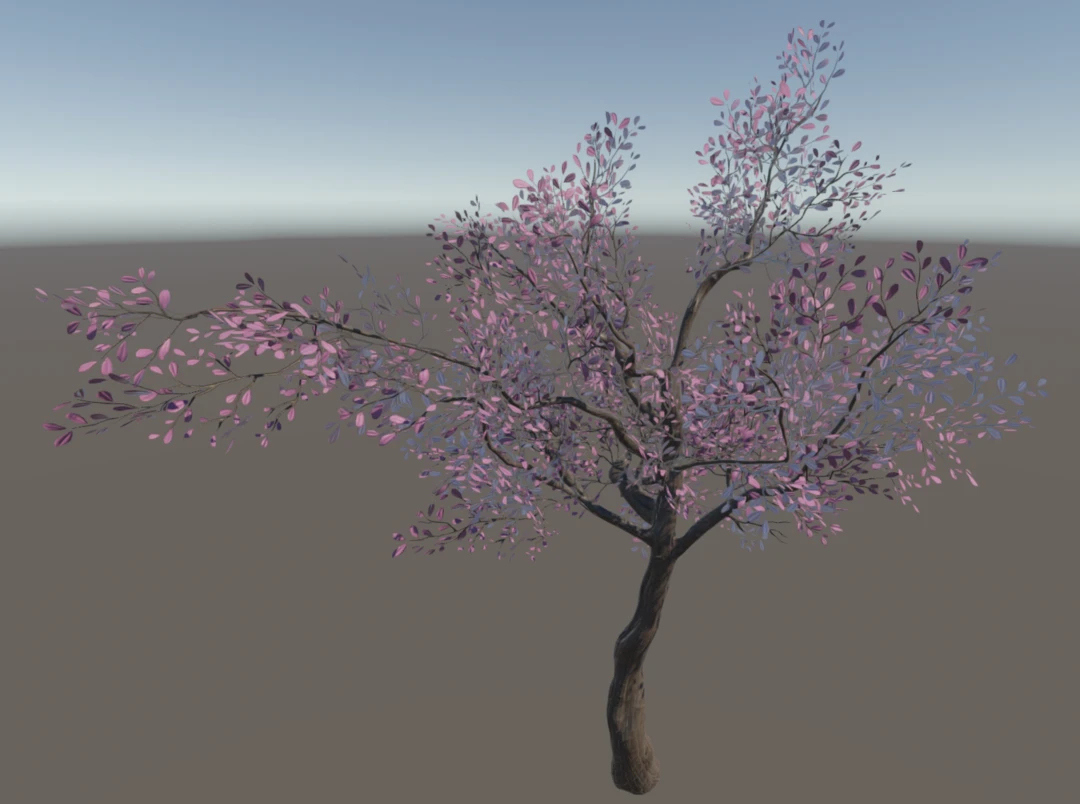
We have a vegetation asset that we would like to optimize for distant viewing. The asset uses a standard Universal Render Pipeline/Lit shader with Base Map and Normal Map channels.
Solution
We will optimize the asset with the billboard cloud for vegetation pipeline.
Create impostor
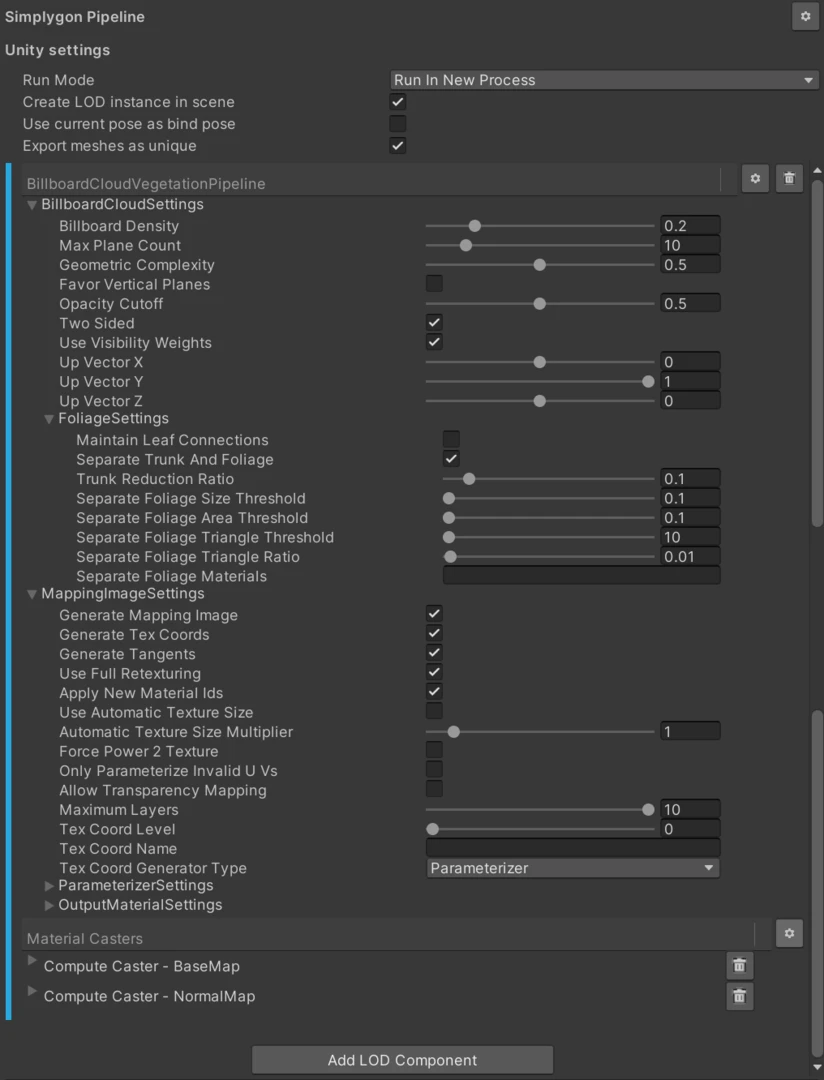
We will use the Template → Advanced → Billboard cloud for vegetation pipeline to create our billboard impostor. We use the following settings. With Separate Trunk and Foliage enabled the trunk will not be included into our billboard, instead it will be handled with triangle reduction. It is also advisable to increase Maximum Layers in MappingImageSettings. This ensures we handle hits on transparent parts. If this is too low we can get a resulting impostor with leafs missing.
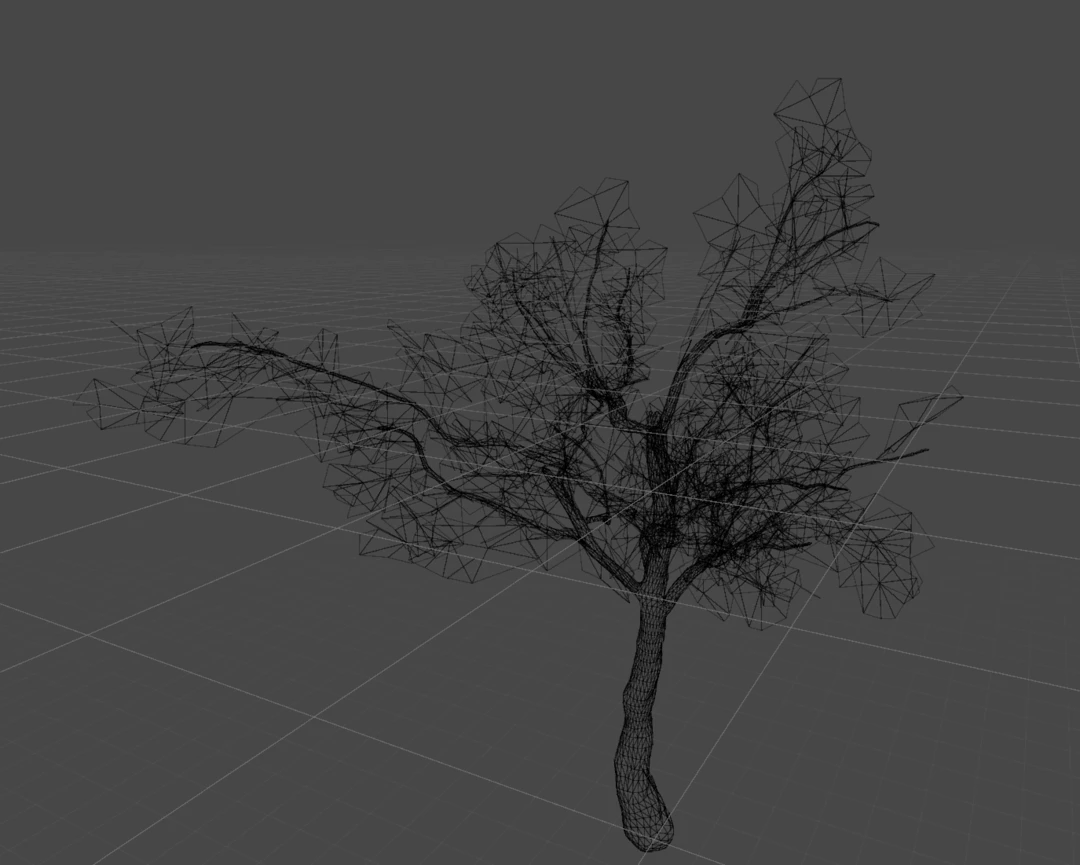
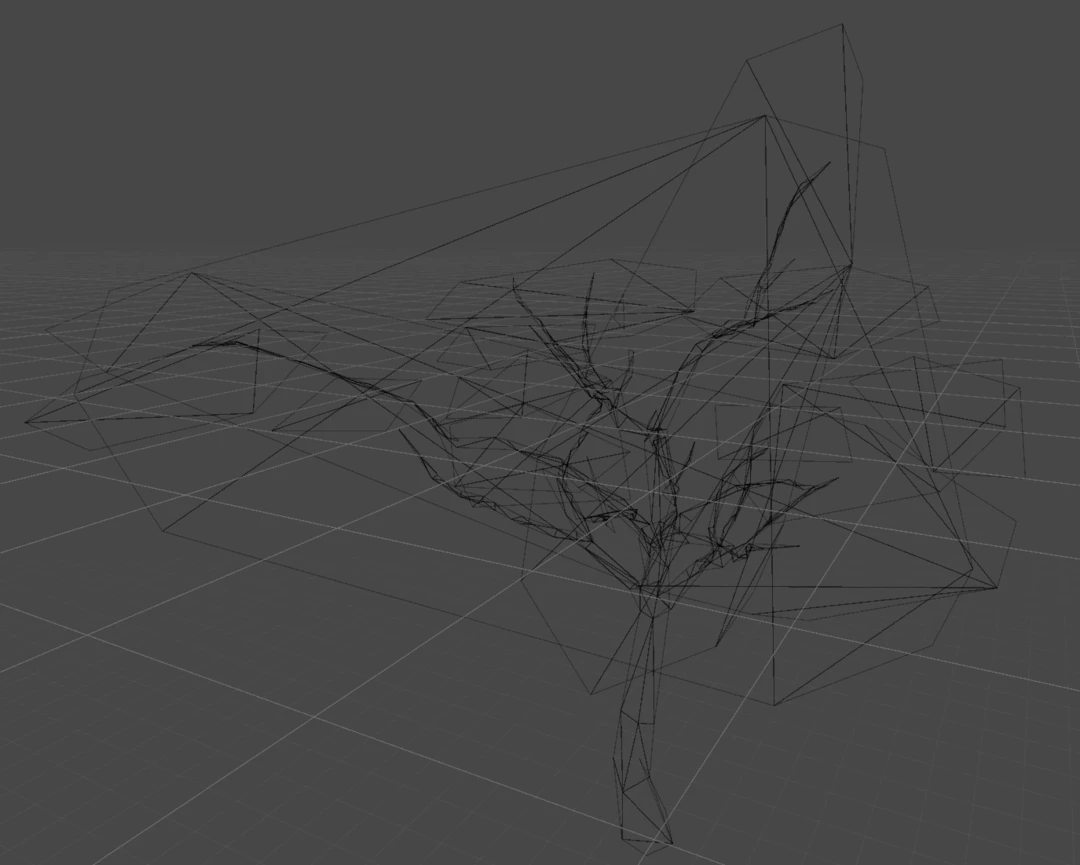
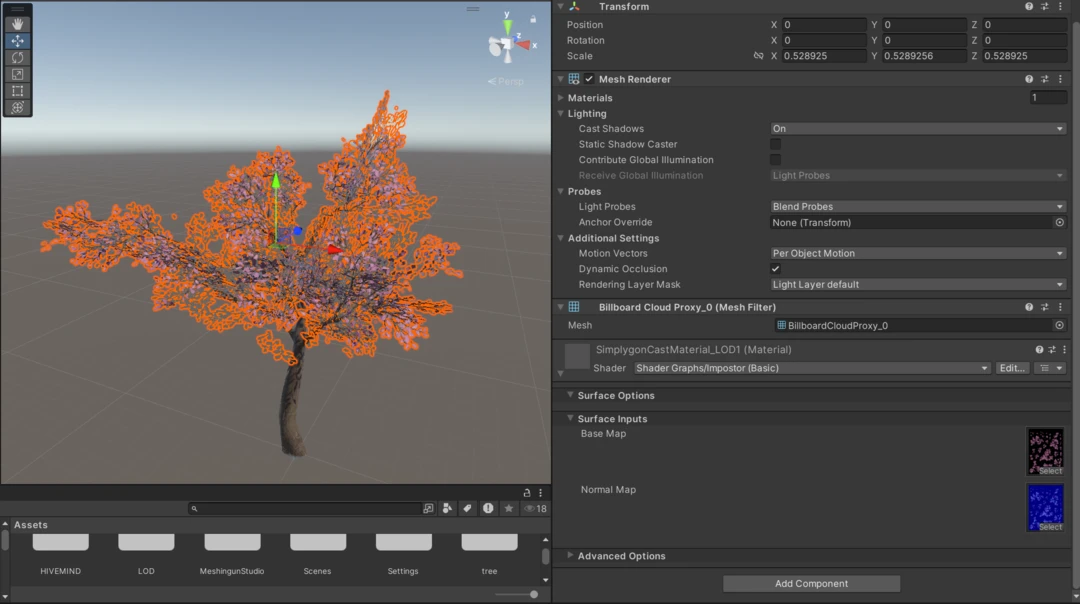
Now let's look at the resulting asset. We can start by looking at the wireframe. Here we can see that our asset has been optimized in two ways. The trunk has been reduced with the triangle reducer and all leafs are optimized into a billboard cloud.
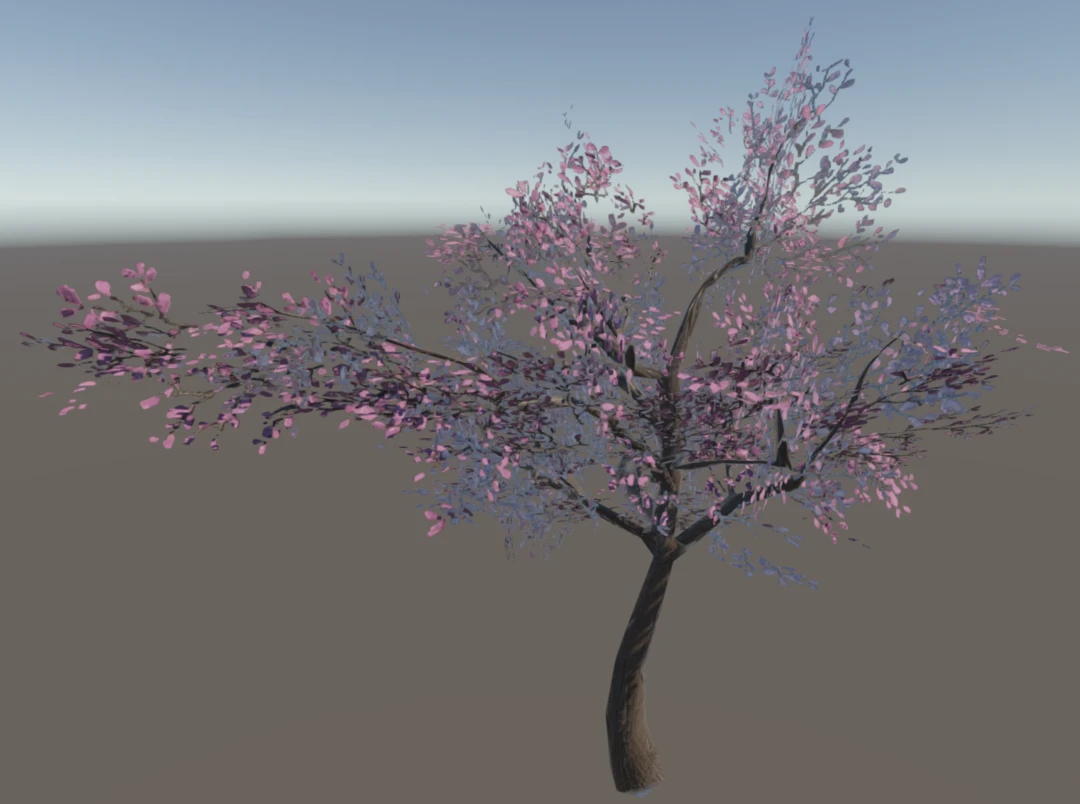
Now let us look at the impostor with default shader. While it does reassemble our original asset there are some issues which we will address with a custom shader.
Custom impostor shader
We will use shader graph to create a custom shader for our impostor. We start simple. Here we just sample a color map and normal map. It is important we enable Alpha Clipping in the shader as our impostor uses it heavily. We also want to check that it should render both sides.
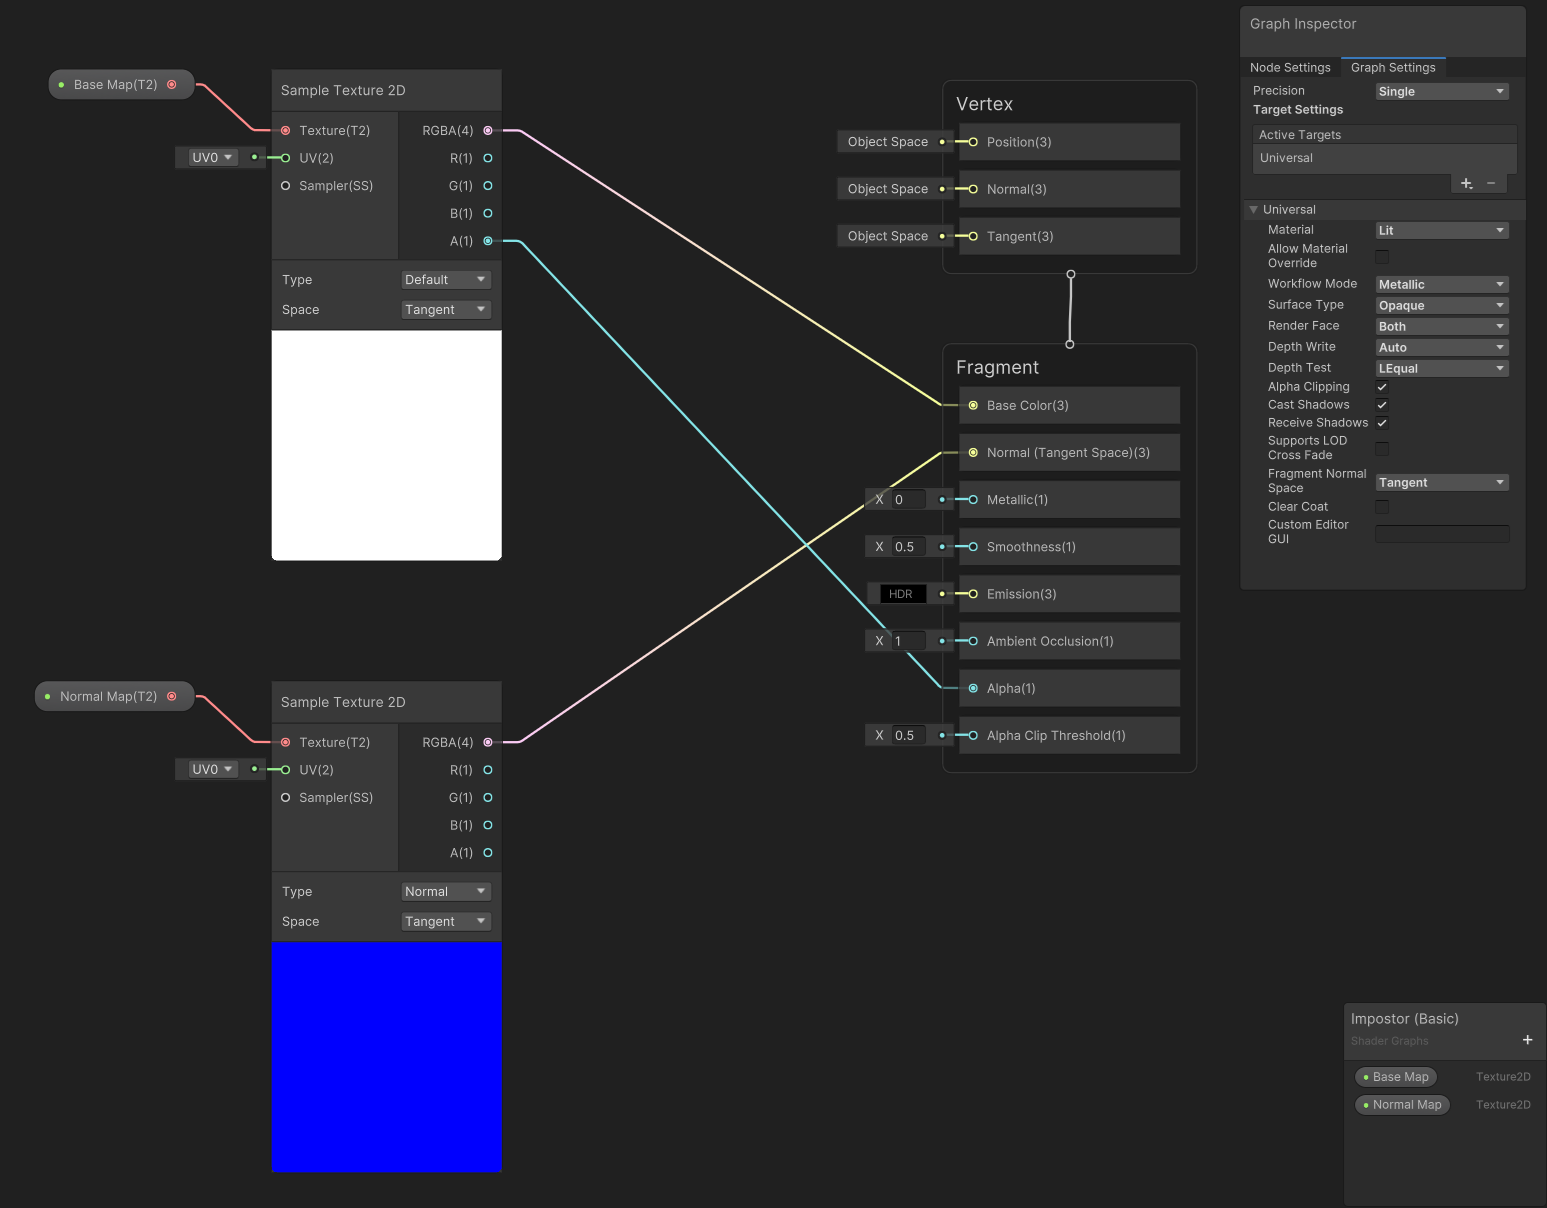
We will use this shader for the generated billboard. The trunk uses the original trunk material.
Fade orthogonal planes
One issue with the current impostor is that when we look at a billboard from side, when it is orthogonal to our camera view direction, then we can see that it is just a plane. The way to solve this is to fade away planes that are orthogonal to our camera direction.
This shader addition does it. Depending on the dot product between camera and plane's normal we dither it away. A gradient allows us to control when it should start to fade.
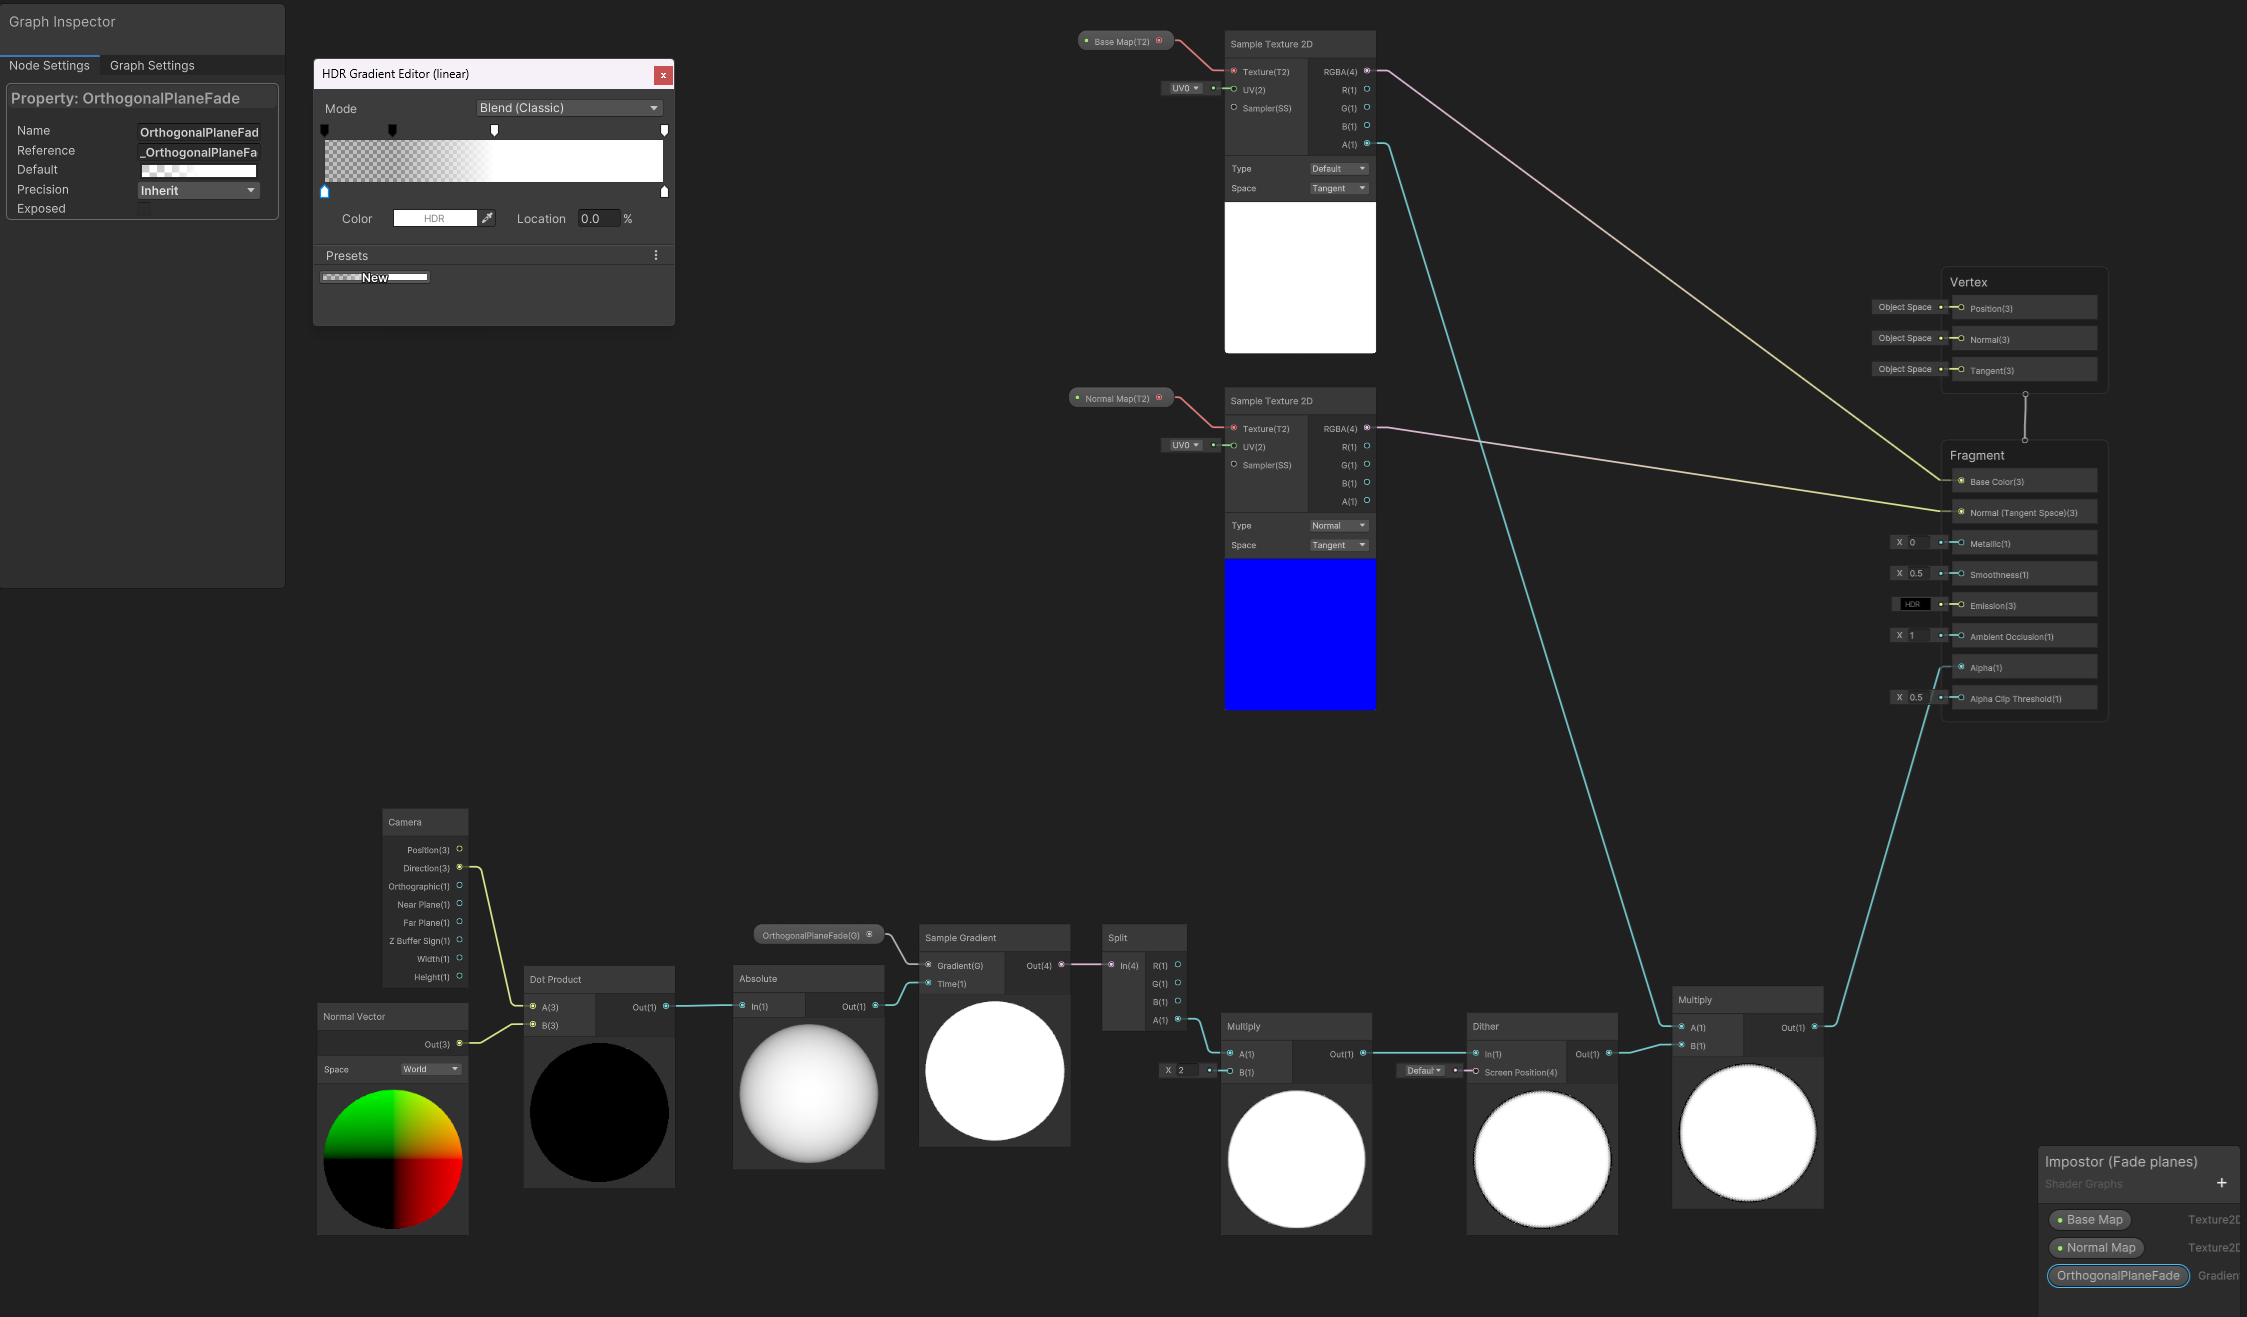
Here is a comparison to the simple shader.
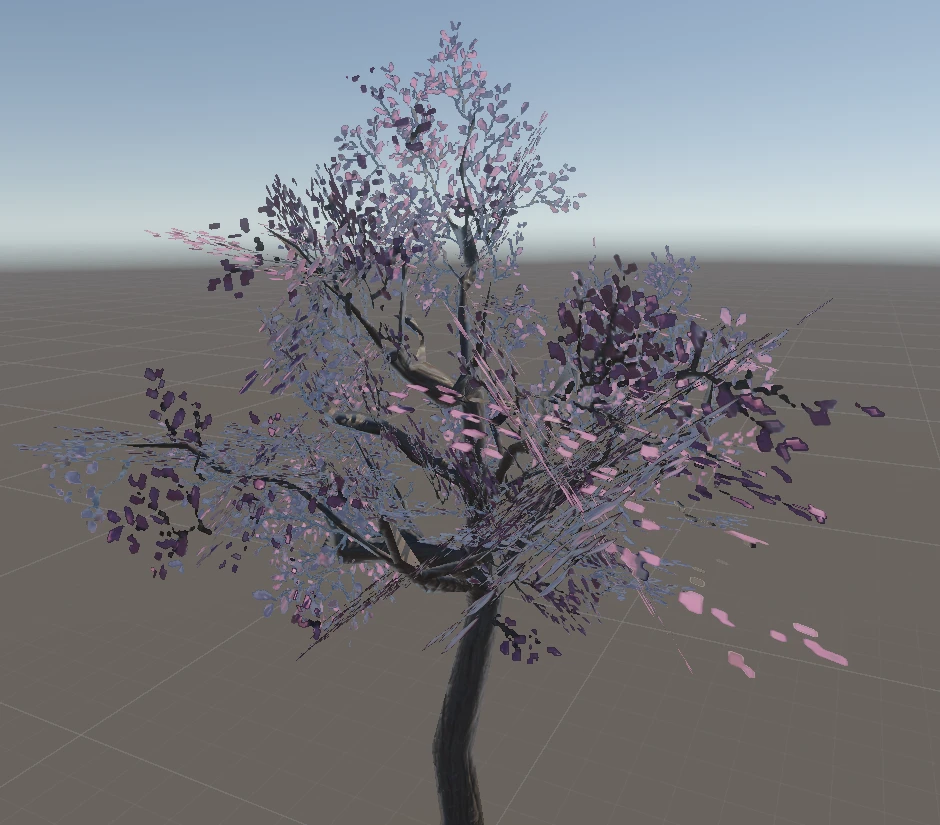
Noise normals
The second issue with our asset is that our generated normal map is quite low resolution. Thus the normals of all leafs on a plane tend to point in a similar direction. This results in a not natural looking asset where large parts of it interacts with light in the same way. In a vegetation asset leafs point in all different directions.
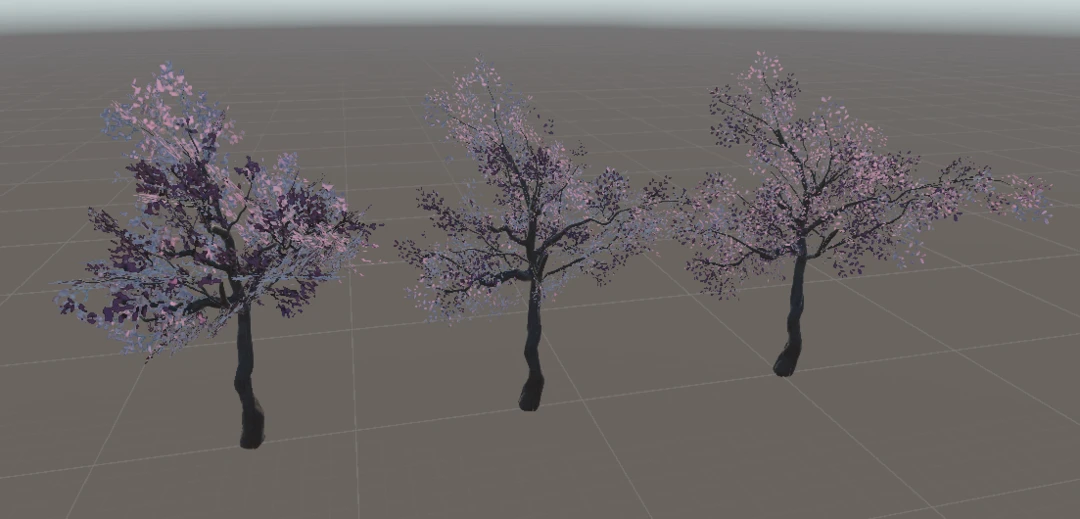
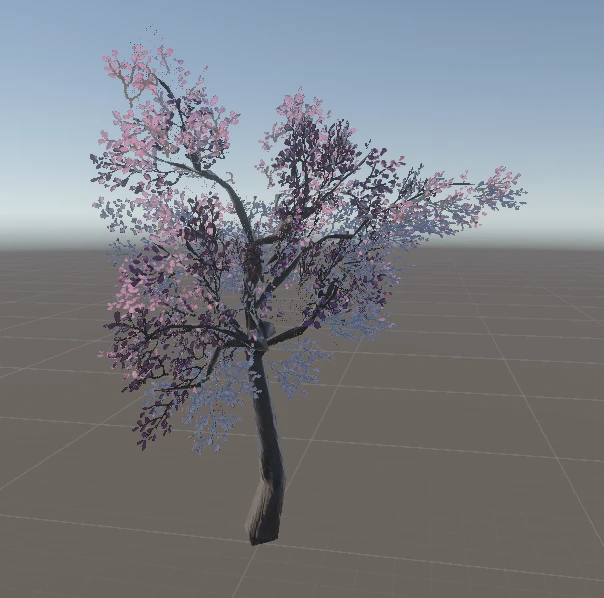
To the left is a impostor with 512x512 texture, middle is impostor at 8192x8192 texture and to the right is original asset. We can see that the low resolution impostor has huge chunks of it where all normals point in the same direction. We can also see that one potential solution is to bake a very high resolution texture.
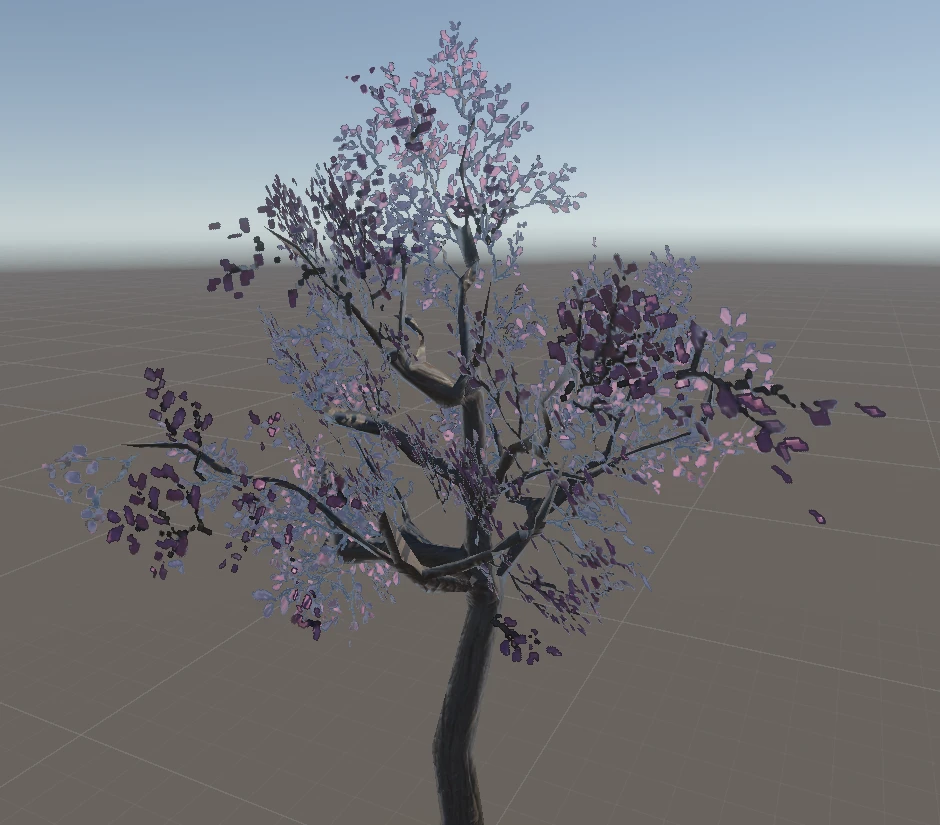
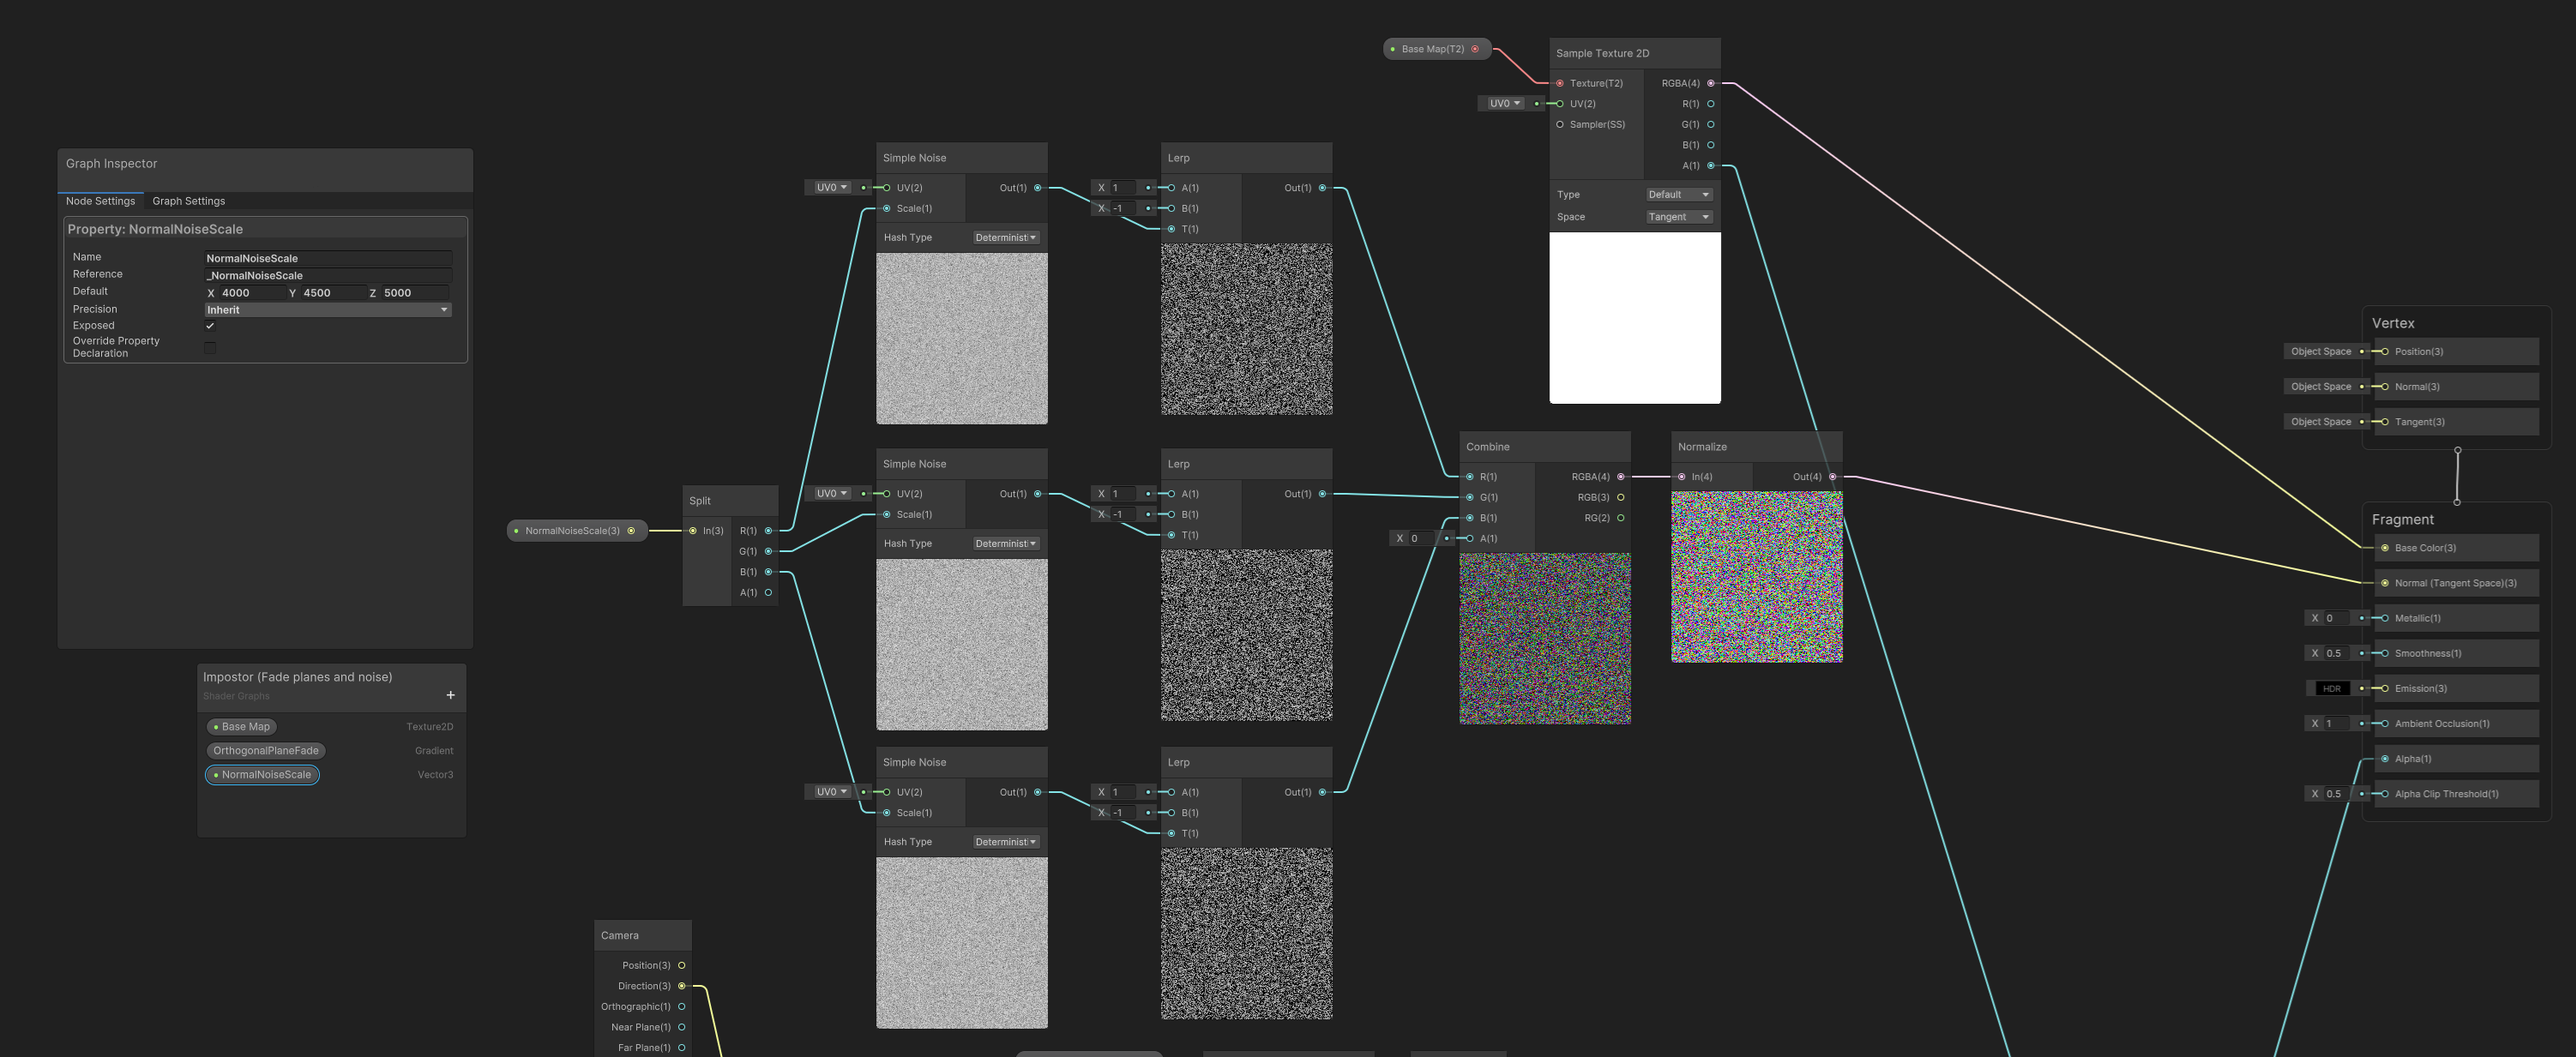
Another solution is to use noise of a sampled normal map. We replace the normal map in our shader with generated noise. We add a parameter which we can scale the noise with. We do not want it to frequent, nor to low frequency. Think that it should symbolize leaves in different directions.
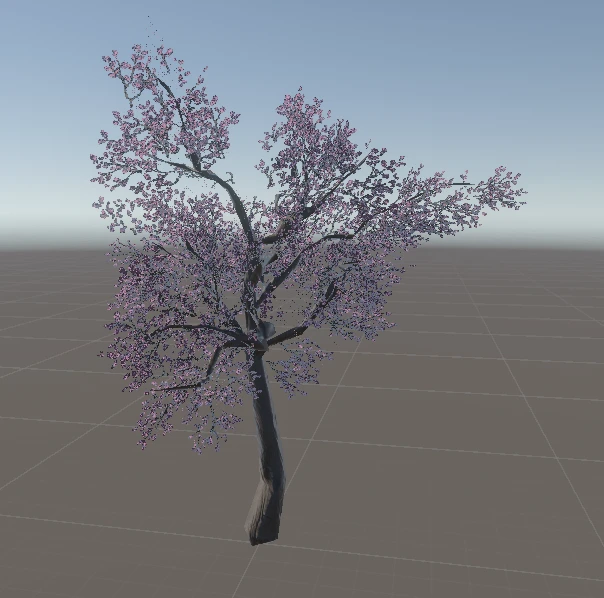
Let's compare how it looks with generated noise versus a quite low resolution normal map. We can see that the large spots of similarly shaded leafs are gone. We also save texture space by not needing a normal map.
Result
Here is how our impostor (to the left) looks in game. To the right we have original asset.
Next step
We now have a shader suitable for our vegetation impostors. What remains now is to fine tune the impostor optimization settings. A good blog that touches upon this subject is Impostor: Billboard cloud for vegetation.
We also want to put the generated impostor in a Unity LODGroup that handles transition between original asset and impostor. It is often a good idea to include a few rounds of triangle reduction and use the impostor as last LOD level.