How to build HLOD clusters for World Partition levels with Simplygon
Written by Jesper Tingvall, Product Expert, Simplygon
Disclaimer: The code in this post is written using version 10.3.2100.0 of Simplygon and Unreal Engine 5.4. If you encounter this post at a later stage, some of the API calls might have changed. However, the core concepts should still remain valid.
Introduction
In this post we'll showcase how to build HLODs for world partition levels in Unreal Engine 5 using Simplygon's new HLOD builder.
Problem to solve
We have a world partition level in Unreal Engines that we want to optimize. We will do this by using HLODs which replaces distant objects with simple proxies.
It does not matter if we are using Nanite or not in our game. When it comes to objects which are far are we still use HLODs for them, even if we are not using traditional LOD levels up close.
Prerequisites
This blog is applicable to Unreal Engine 5.3+. The runtime component of HLOD is still provided by Unreal Engine, so we suggest to read up on how it works.
The level we want to optimize uses world partition. If your level are not using world partition consult Unreal Engine's documentation on how to converting existing levels to use world partition.
Solution
In order to use Simplygon to build HLODs for our level we are gong to create a Simplygon HLOD layer, assign it to the level the build it using commandlet.
Create Simplygon HLOD layer
Start by creating a new HLOD Layer. Right click in the content browser, pick World → HLOD Layer

In the HLOD layer we set Layer Type to Custom and specify that HLOD Builder Class should be SimplygonHLODRemeshingBuilder.
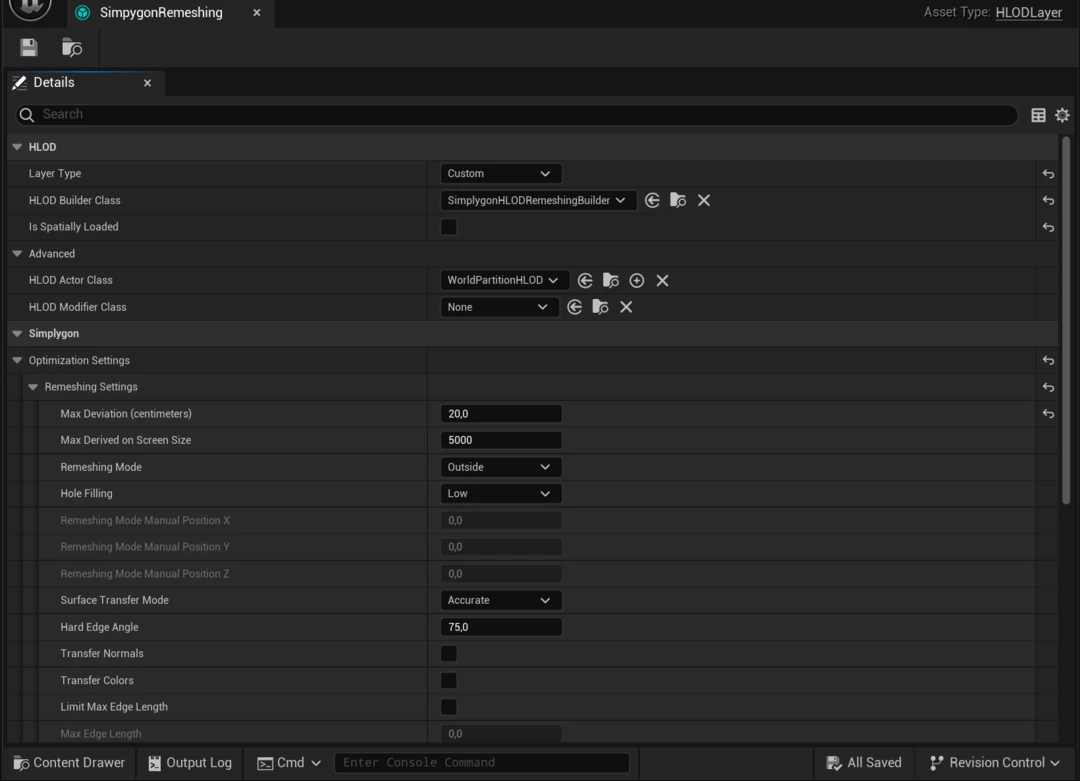
We can find many remeshing settings that we are familar with. To change quality we set Max Deviation. We also add material casters suitable for our materials.
Requirements on level
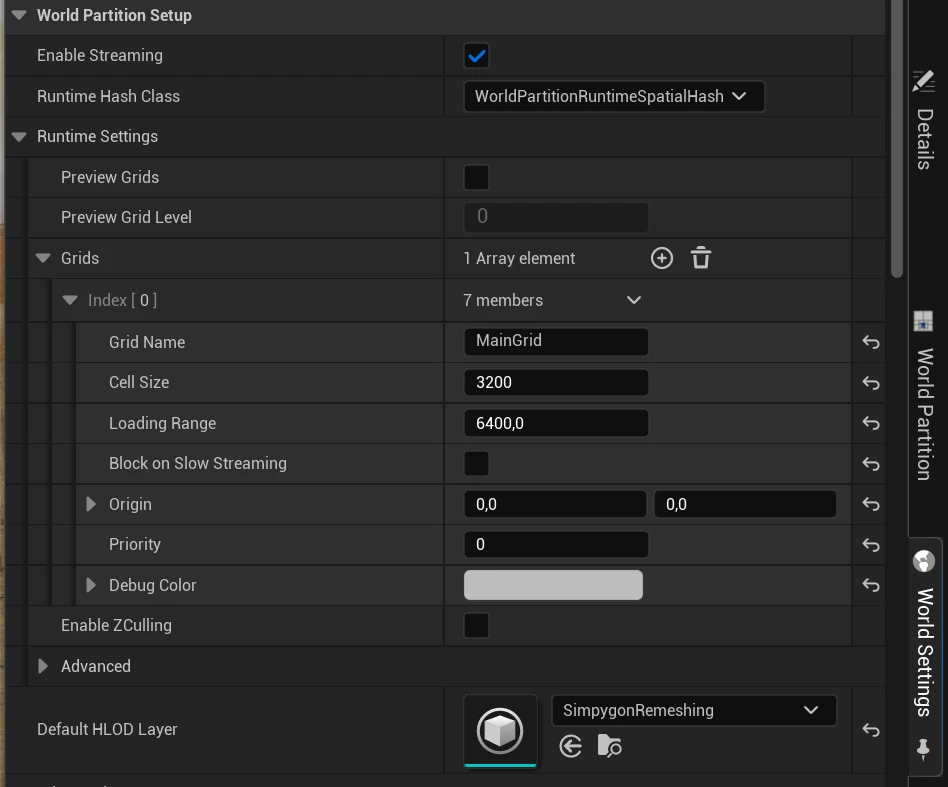
In order to use our HLODRemeshingBuilder the level needs to use world partition. We then go into World settings tab, here Runtime Hash Class needs to be set to WorldPartitionRuntimeSpatialHash. We set the Default HLOD Layer to our newly created SimplygonRemeshing HLOD layer. Here is also the place where we can adjust cell size for HLOD models and loading range.
Build HLOD layer
To build our Simplygon HLOD layer we are going to use a commandlet. Do not have editor opened while building HLODs. To specify that we want to run Simpygon's HLOD builder we need to add the -Builder=SimplygonWorldPartitionBulder argument. We also require -AllowCommandletRendering to do material casting.
We will start by deleting any HLOD that already exists in the scene by running -DeleteHLODs.
"C:\Programs\UE_5.4\Engine\Binaries\Win64\UnrealEditor-Cmd.exe" "E:\UE54hlod\UE54hlod.uproject" /Game/Windmills/Maps/Windmills_Demo_WP.umap -run=WorldPartitionBuilderCommandlet -Builder=SimplygonWorldPartitionBuilder -AllowCommandletRendering -DeleteHLODs
We now need to setup the HLOD clusters and build them. We can do this in the same command by calling our commandlet with both -SetupHLODs and -BuildHLODs.
"C:\Programs\UE_5.4\Engine\Binaries\Win64\UnrealEditor-Cmd.exe" "E:\UE54hlod\UE54hlod.uproject" /Game/Windmills/Maps/Windmills_Demo_WP.umap -run=WorldPartitionBuilderCommandlet -Builder=SimplygonWorldPartitionBuilder -AllowCommandletRendering -SetupHLODs -BuildHLODs -WaitMutex -Unattended
Building HLODs can take some time, so go and take a long fika break while it is processing.

Result
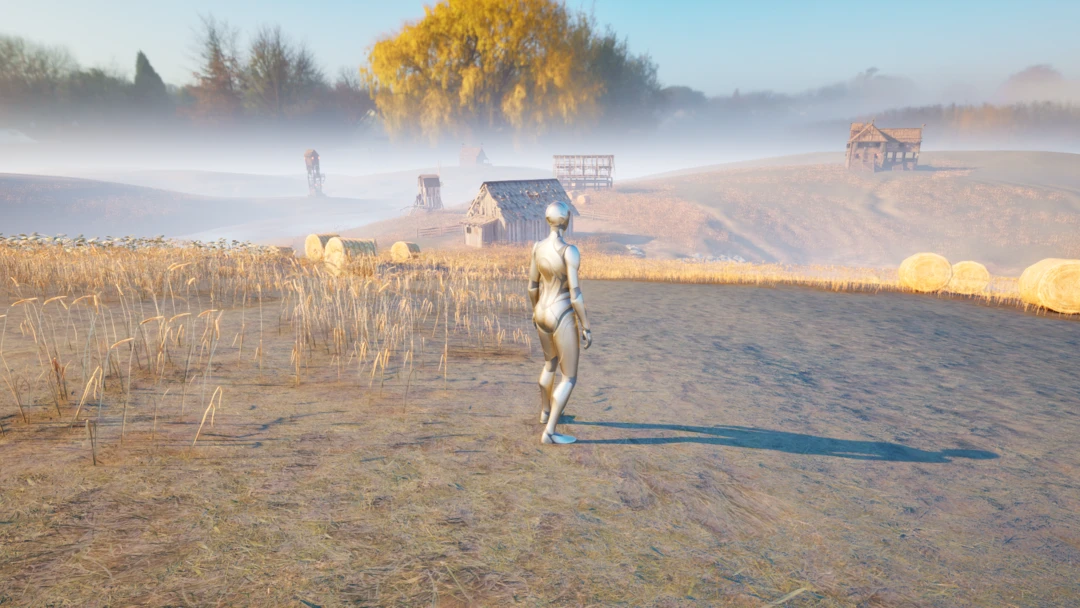
After some time our HLODs are build. Let's inspect them in game. By typing viewmode hlodcoloration we can see which objects in our scene that are HLOD proxies (colored in blue).
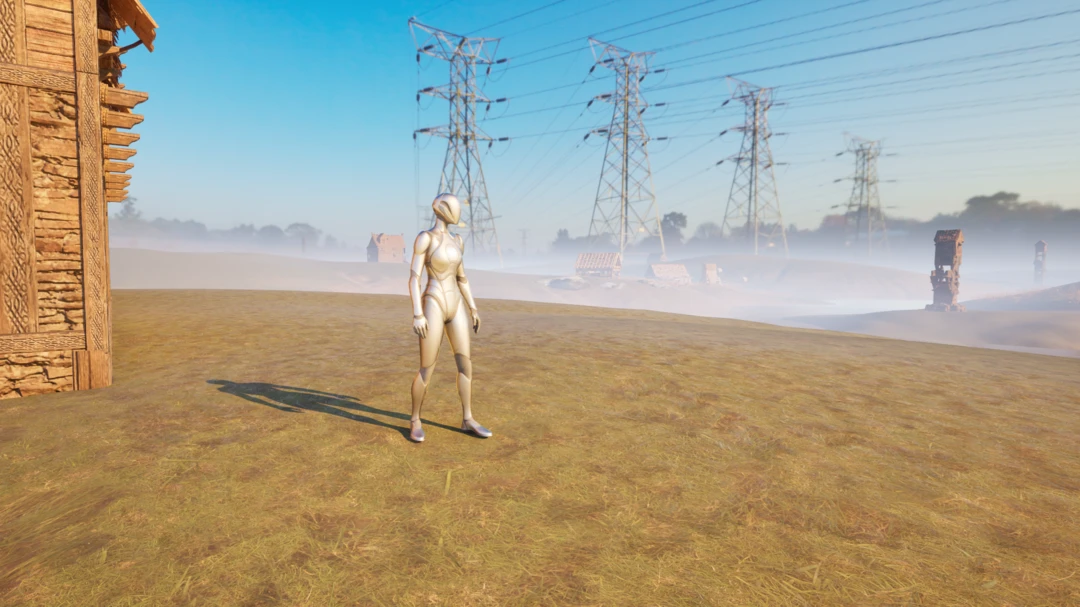
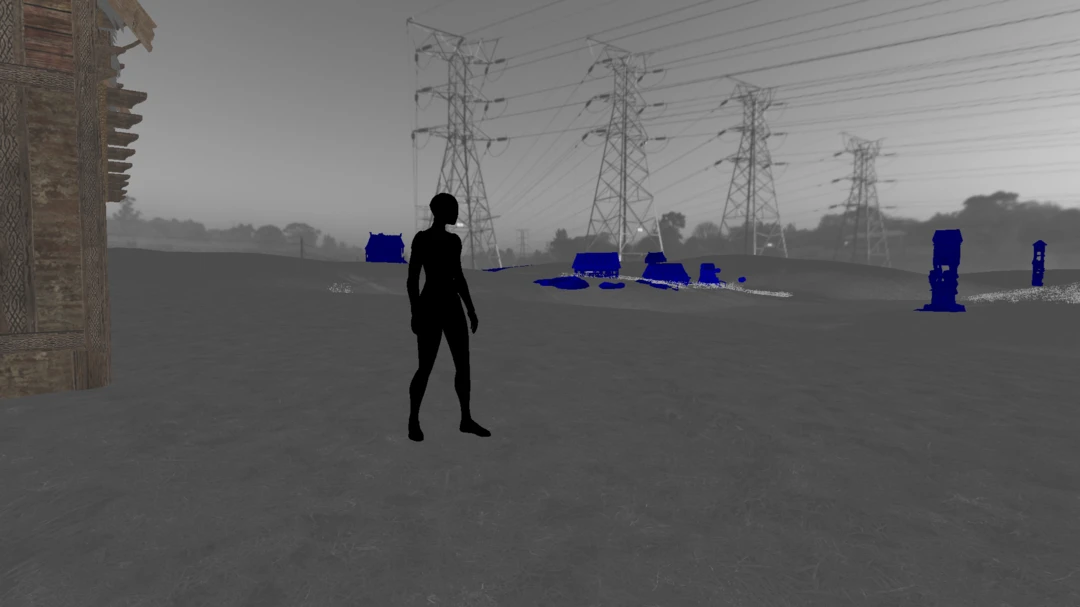
We can play around with different loading ranges by typing wp.Runtime.OverrideRuntimeSpatialHashLoadingRange -grid=1 -range=10 into the console. This allows us to experiment with difference transition distances to switch to HLOD. Here we are setting it way to close, allowing us to inspect the HLOD models up closely.
Future work
We have now showcased how to use Simplygon to build HLODs for a level. Next step would be to figure out which settings that suits our need, balancing visual quality and performance. All that while benchmarking our game to find out where the bottle neck is. The knobs we suggest to use to fine tune HLOD quality are:
- MaxDeviation which controls the geometric complexity.
- TextureHeight and TextureWidth to control texture quality.
- HoleFilling which determines how aggressive holes and cavities will be filled.
We have now build HLODs for a quite small and simple level. If we want to build HLODs for a large open world game just using one computer would not be that efficent. With Simplygon Grid we can distribute the workload to different machines as documented here.