Introduction to material merging in Maya
Disclaimer: The code in this post is written on version 10.4.132 of Simplygon. Should you encounter this post running a different version, some of the API calls might differ. However, the core concepts should still remain valid.
Introduction
When working with 3D assets, optimizing materials can significantly improve performance, especially in game development and real-time rendering. In this post, we’ll walk you through how to merge materials in Maya using Simplygon. We’ll cover both the manual process through the UI and a more automated approach, helping you set up an efficient optimization pipeline. Whether you're looking to speed up your workflow or prepare assets for large-scale production, this guide will help you get started. Let’s dive in!
Supported material models
Out of the box, Simplygon supports Blinn, Phong, and Lambert material models in Maya. If you're using more advanced shaders, you can leverage the Compute Casting API to provide Simplygon with HLSL or GLSL for material casting. However, this blog post will focus on the standard material merging workflow and will not cover Compute Casting.
Material Merging Methods
There are two ways to merge materials with Simplygon: Material Aggregation and Material Casting. The best option for your use case is discussed in detail in Comparing Material Casting and Aggregation and Aggregation and Remeshing – Evaluating the Best Method for Proxy Creation.
In short, material casting is ideal for distant-view objects or those with minimal UV overlap, as it generates new UVs and may require larger textures for visual fidelity. In contrast, material aggregation utilizes existing UVs to merge materials, resulting in higher texture quality suitable for close-up views.
Merging Materials into Multiple Outputs
In this post, we will only cover how to merge materials all input into one output material.If you want to explore how to split inputs into several output materials depending on input material properties, you can check out the following resources:
- Merging Materials into Multiple Outputs
- Aggregation with Multiple Output Materials
- How to Remesh Your House with Simplygon
Trying Material Merging Options in Maya UI
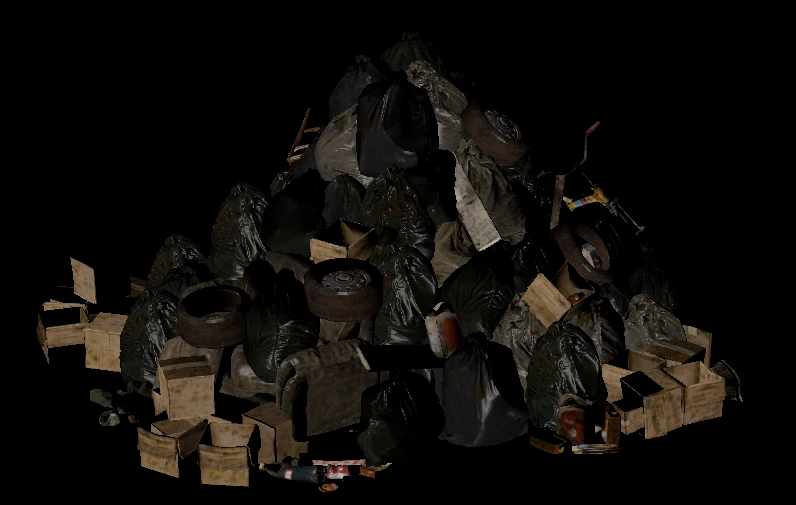
Let's start by testing the two different material merging options on this object using the Maya UI.
Using Remeshing with Material Casting
First, we will try remeshing together with material casting to create a heavily optimized object with only one output material. This approach is especially useful when generating proxies for distant representations of an object collection.
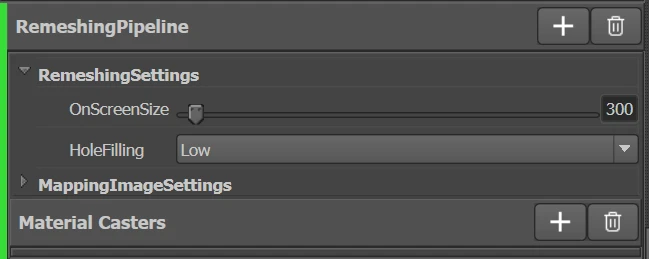
To begin, let's create a Remeshing pipeline in Simplygon with the following settings:
Adding Material Casters
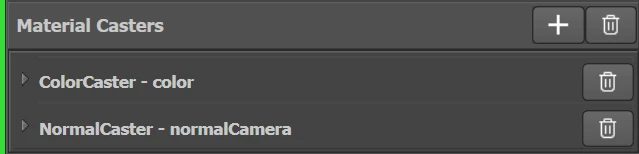
Next, we need to add material casters to the remeshing pipeline. If we have the objects selected, we can use the automatic material caster feature and remove any unnecessary channels. In this case, we will only cast the diffuse and normal channels, so we will remove all other channels, leaving only these two. The setup should look like this:
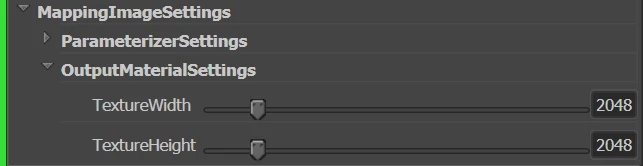
Adjusting Output Texture Size
If needed, we can also adjust the output texture size. The amount of texture budget you allocate depends on the resources available in your game and how far away the proxy will be viewed.
Processing the Asset
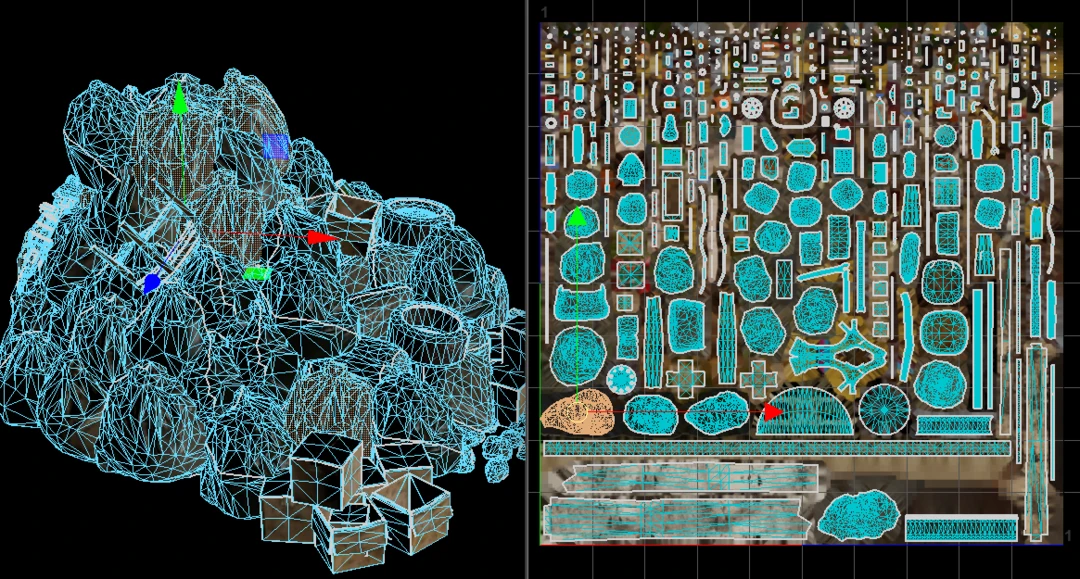
Now, we can process the asset and bring the result back into Maya. Below is the generated asset side-by-side with the original:
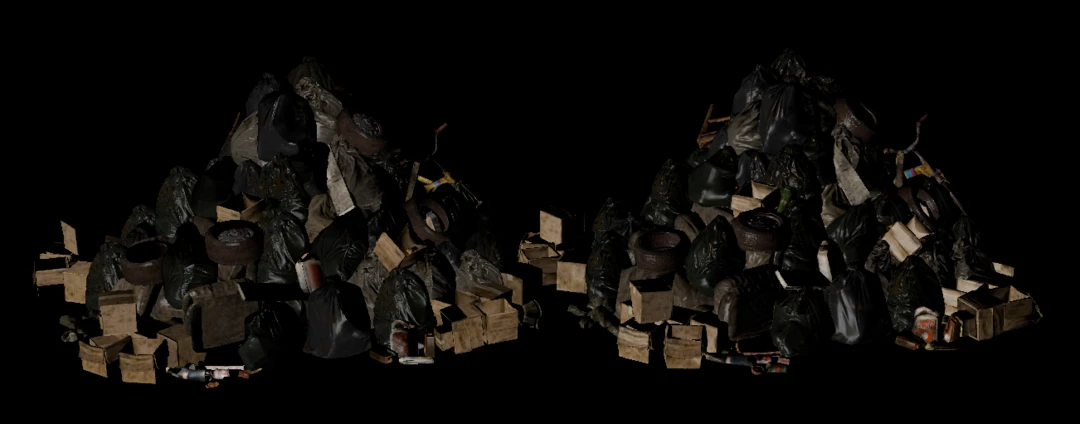
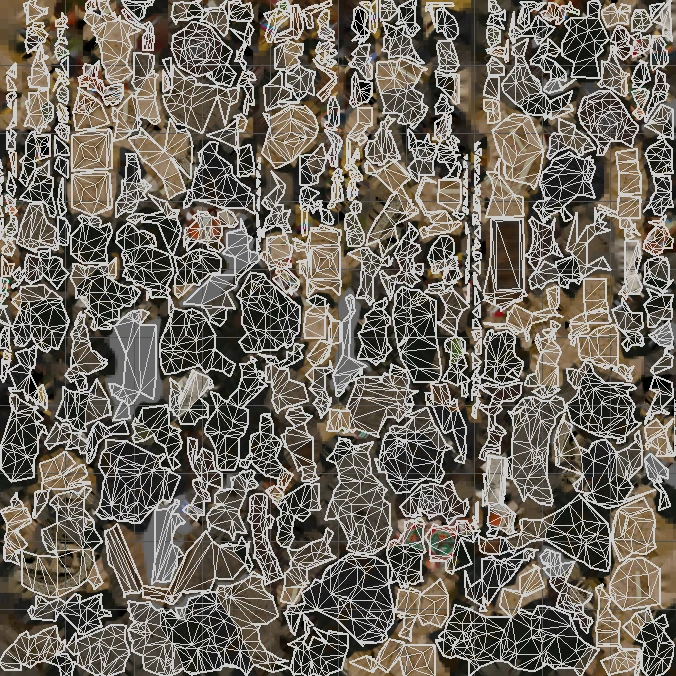
As we can see in the UV map each part of the mesh has unique UVs:
Aggregating the Materials
If we are not satisfied with the resulting UVs from remeshing and can accept a less optimized mesh — particularly if the asset is intended for closer camera views — we can use aggregated materials instead. This method reuses existing UVs, making it a more efficient use of texture space when there is a lot of repeated usage of texture areas.
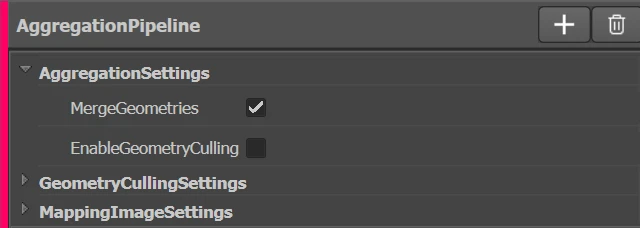
To set this up, we will create an Aggregation pipeline with the following settings:
Adding Material Casters
As with the remeshing pipeline, we will select the object and apply automatic casters. Again, we will remove all unnecessary channels, keeping only the diffuse and normal channels:
Processing the Asset
Texture size is set in the same way as we did for the remeshing pipeline. Below is the generated asset side-by-side with the original:
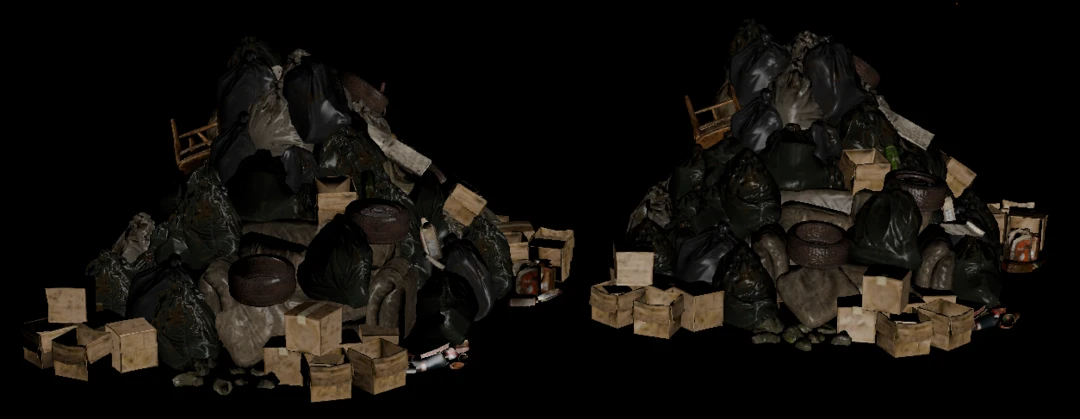
Now, we can observe that areas using the same texture space in the original asset continue to do so in the resulting UVs:
Moving to Script
Now that we have learned how to process our asset in Maya, we can start working towards a more automated approach. Using insights from Simple Maya Script and Scripting with Simplygon: Introduction, we’ll create a simple script that allows us to repeat the process across multiple assets.
The simplest approach is to export the desired pipeline, create a short Python script, and move it to a Maya shelf command for easy execution.
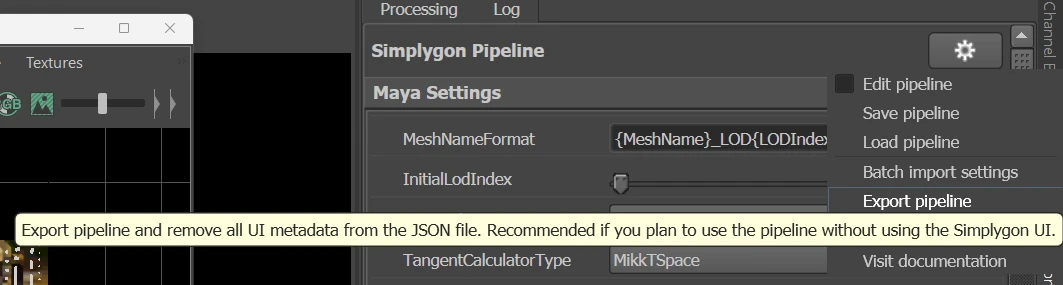
Exporting the Pipeline
First, export the pipeline settings to "c:/tmp/material_merging.json" by selecting the following option:
Creating the Python Script
Next, create the following Python script and save it in the Maya shelf:
# Copyright (c) Microsoft Corporation.
# Licensed under the MIT license.

import maya.cmds as cmds
from simplygon10 import simplygon_loader
from simplygon10 import Simplygon
import os

def export_selection(sg: Simplygon.ISimplygon, temp_file: str) -> Simplygon.spScene:
    """
    Exports the current selection into a Simplygon scene.
    :param sg: Simplygon instance
    :param temp_file: A file used to temporarily pass the data into Simplygon
    :return: A Simplygon scene containing the selection in the Simplygon format
    """
    cmds.Simplygon(exp=temp_file)
    scene = sg.CreateScene()
    scene.LoadFromFile(temp_file)
    return scene

def import_process_results(scene: Simplygon.spScene, temp_file: str) -> None:
    """
    Imports the processed results into the Maya scene.
    :param scene: Simplygon scene containing the processed data
    :param temp_file: A file used to pass data back to Maya
    """
    scene.SaveToFile(temp_file)
    # Lma = True ensures materials are mapped to existing ones in Maya
    cmds.Simplygon(imp=temp_file, lma=True)

def process_selection(sg: Simplygon.ISimplygon, settings_file: str, temp_file: str) -> None:
    """
    Uses the settings file to optimize the selected objects and return results to the scene.
    :param sg: Simplygon instance
    :param settings_file: Path to the settings file for processing
    :param temp_file: A temporary file to pass data back and forth
    """
    scene = export_selection(sg, temp_file)
    serializer = sg.CreatePipelineSerializer()
    pipeline = serializer.LoadPipelineFromFile(settings_file)
    pipeline.RunScene(scene, Simplygon.EPipelineRunMode_RunInThisProcess)
    import_process_results(scene, temp_file)

# Initialize Simplygon and process selection
sg = simplygon_loader.init_simplygon()
print(sg.GetVersion())
temp_file = "c:/tmp/tmp.sb"
settings_file = "c:/tmp/material_merging.json"
process_selection(sg, settings_file, temp_file)

# Cleanup temporary file
os.remove(temp_file)
del sg
Automating Material Merging
Now, we can apply this process across a large number of objects without having to manually configure the settings each time. However, keep in mind that the objects must have the same material setup as the one used when developing the pipeline.
If your objects contain different types of input materials, you will need to expand the script to analyze the input and dynamically set up the material casters programmatically. If you want to dig into how this is done you can read Automatic material casters with glTF in C++ which described the concepts that can be applied in this context as well.