Geometry Importance and Welding for low poly optimization
Written by Jesper Tingvall, Product Expert, Simplygon
Disclaimer: The code in this post is written using version 10.3.2100.0 of Simplygon and Unity 2022.3.37f1. If you encounter this post at a later stage, some of the API calls might have changed. However, the core concepts should still remain valid.
Introduction
In this blog we'll look at some settings that can help out when optimizing models to really low poly count. We'll look at geometry importance and weld distance.
Prerequisites
This example will use the Simplygon integration in Unity, but the same concepts can be applied to all other integrations.
Problem to solve
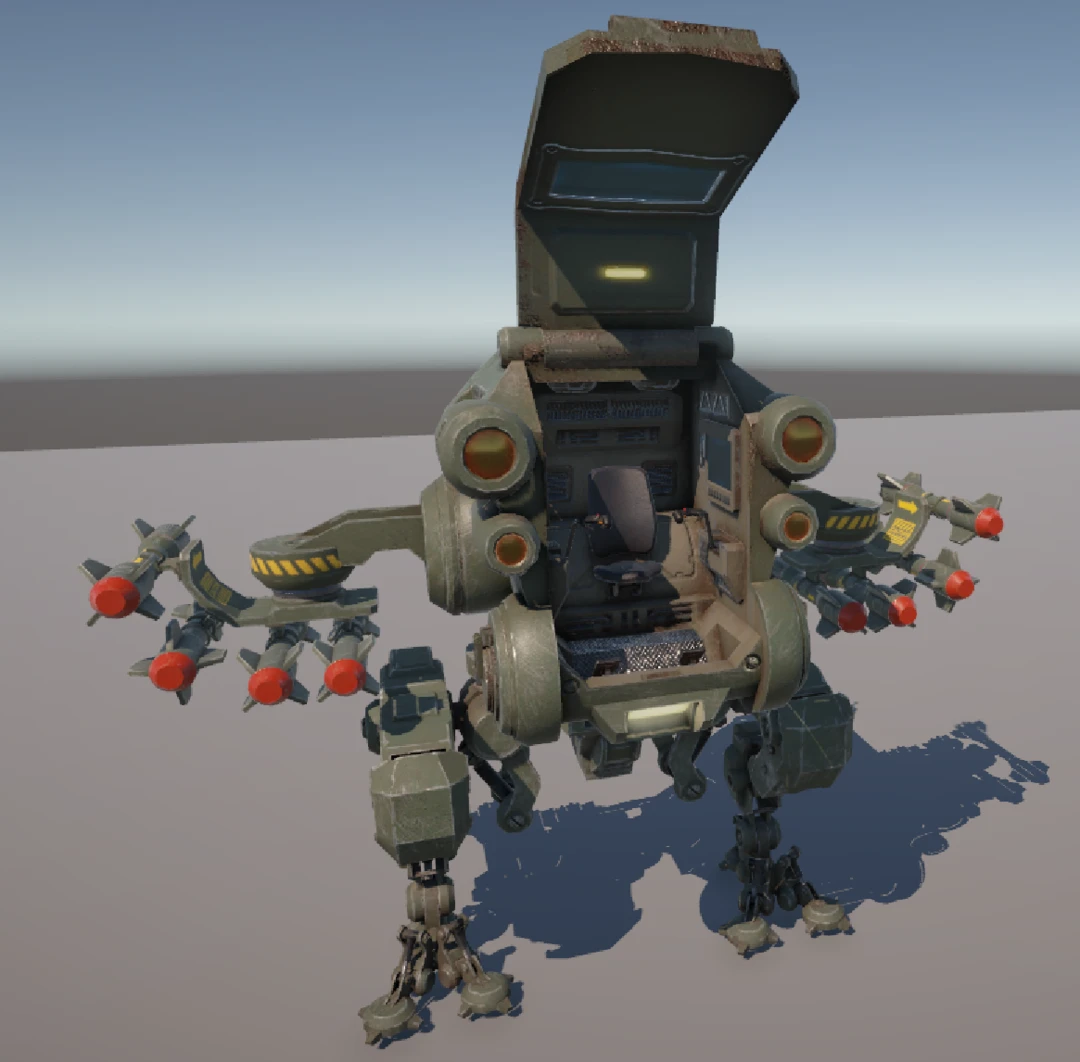
We have a model and want to create a low polygon version of it. Our original model is at 35k triangles, and we want to go down to 500 triangles.
Solution
We will use the triangle reducer in Simplygon's Unity plugin to optimize our model.
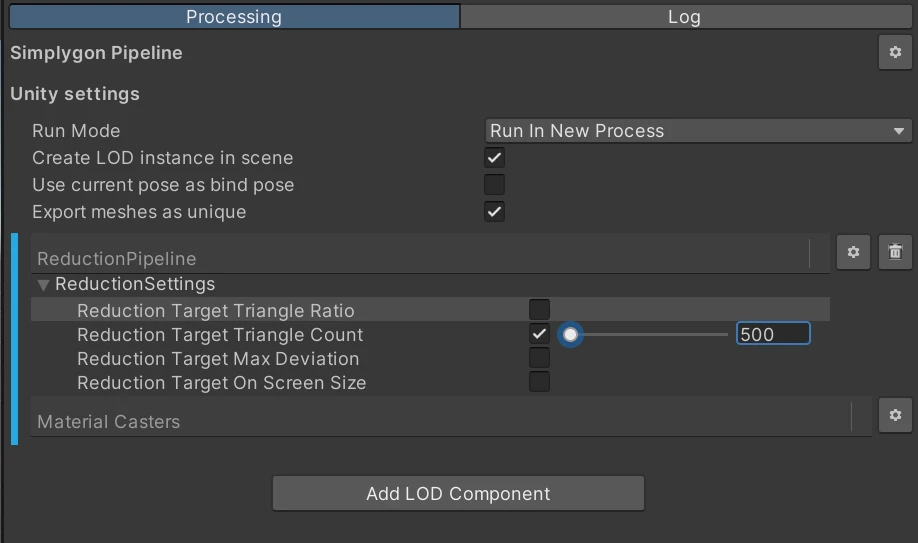
Basic reduction
We'll start with a basic reduction pipeline. We open the Simplygon window and add a reduction pipeline found under Add LOD Component → Template → Basic → Reduction. Here we set Reduction Target Triangle Count to 500.
After that we process the model and get this result.
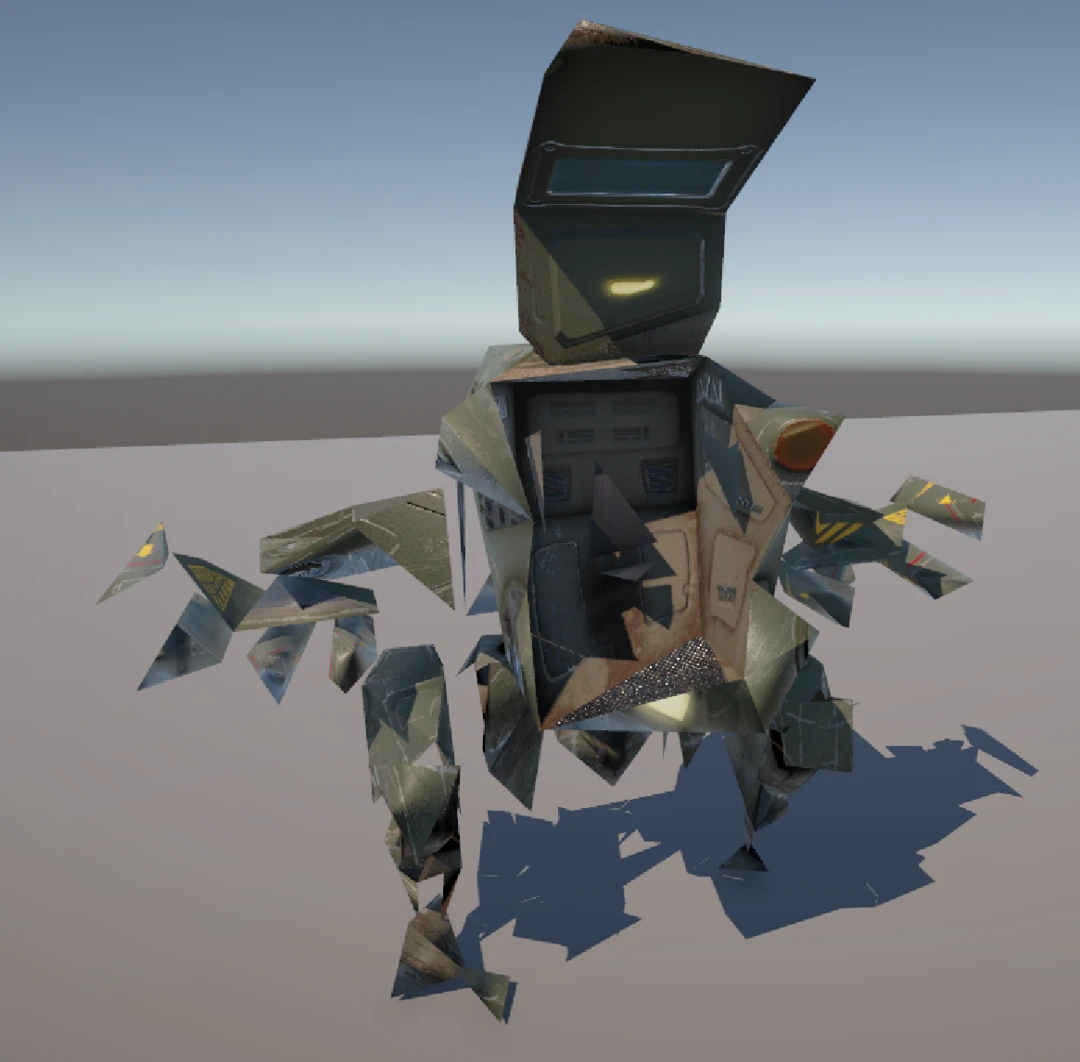
The output result looks quite broken. While the asset is intended to be viewed at distance, we have huge holes in the model and parts of one foot are missing.
Advanced reduction
We will now try to change some settings to improve the result. To do this we need to use an advanced reduction pipeline as these settings are hidden in the basic one. To add an advanced reduction pipeline, we go to Add LOD Component → Template → Advanced → Reduction.
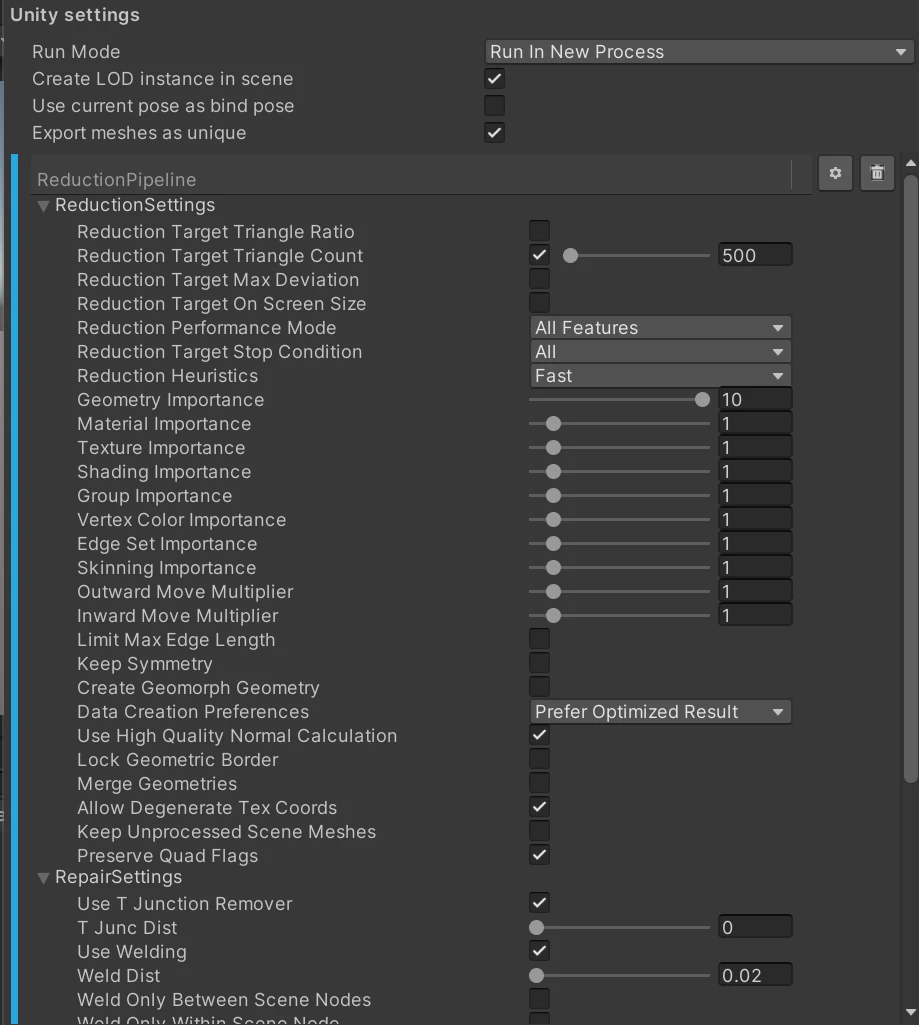
- We set Reduction Target Triangle Count to 500, same as before.
- To increase the importance of silhouette over other aspects like UV stretching, normals or skinning we will change feature importances. We will increase Geometry Importance to 10. Our 500 triangle asset will be viewed far away, so we do not expect texture stretching or changes in normals to do be that visible.
- We will also use welding. Welding is mostly done to repair broken meshes, but it can also be used to make meshes fit together better after optimization. What it does is merges vertexes that are at a certain distance from each other. It makes parts that are disconnected, but very close to each other, fit together. Do not go overboard with welding as this can result in strange looking models. We set WeldDist to 0.02.
After processing the model, we get this result. Keep in mind that we are viewing the model way closer than the intended distance. Whatever might seem a bit crude at this distance will most likely work well for far away viewing.
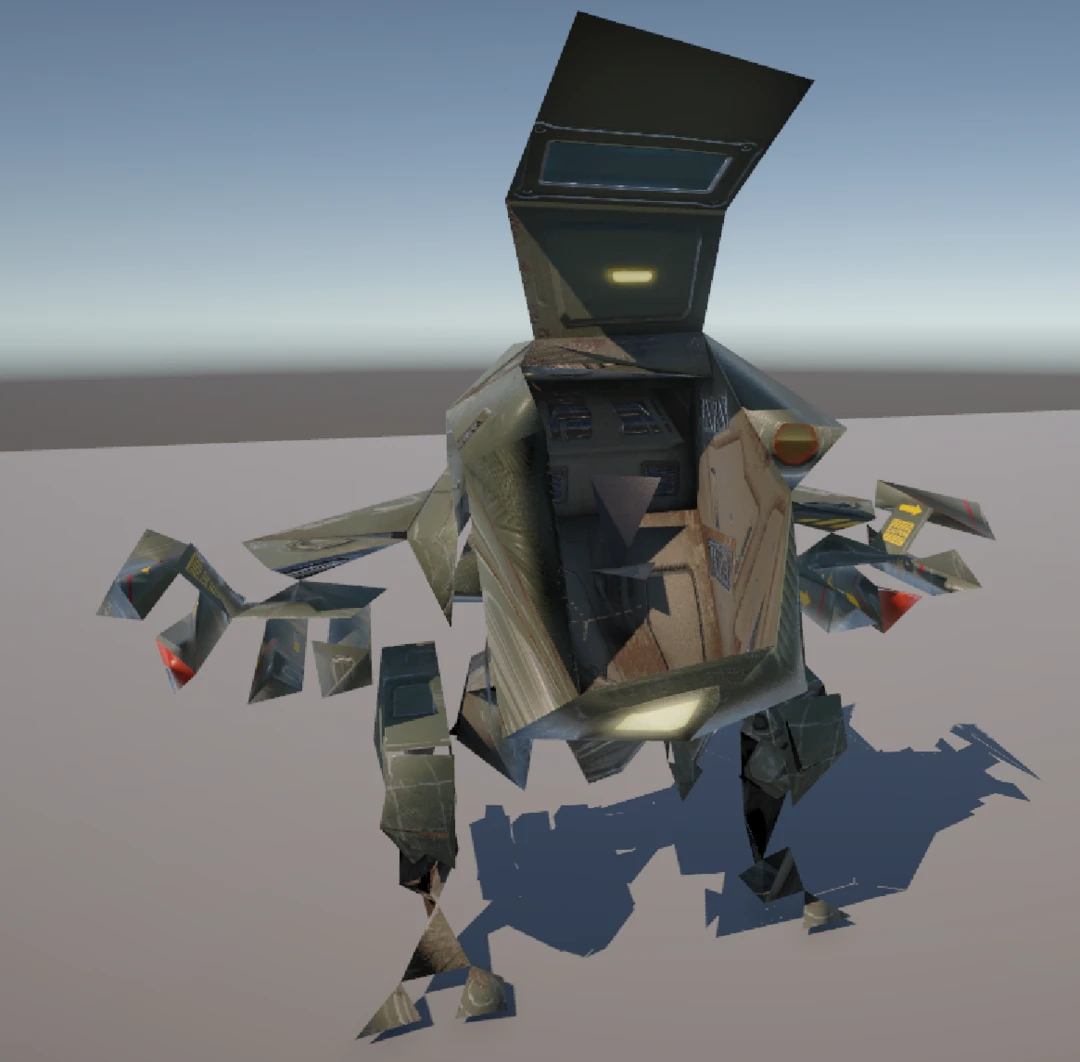
We still have a very low polygon model, but it fits together better then our first attempt. We can see that the foot is better preserved as well as we having less cracks in the model. We can also see that we have worse UV stretching inside the cockpit, but we do not expect that to be visible from far away.
Result
After optimization we can inspect the two models we optimized. The original model is to the right, first attempt is in the middle and our advanced reduction model is to the left. We can see that changing reduction settings did influence our result. Both resulting models have 500 triangles, but by changing settings we can allocate those triangles in a better way.
Next step
We have now found settings that work well for optimizing one model. If we want to optimize more models, we are quite quickly going to run into the issue of guessing which triangle count is suitable for which LOD switch distance. For that reason we suggest to use Reduction Target On Screen Size as it will scale better to a much more wide array of assets.
When optimizing models for a really low triangle count you often get better results from the remesher. It also solves the issue of overdraw and draw calls, which usually is something you want to address in distant models as well.