Optimizing 3D scans with Simplygon
Disclaimer: The code in this post is written on version 9.1 of Simplygon. If you encounter this post at a later stage, some of the API calls might have changed. However, the core concepts should still remain valid.
Introduction
3D scanning is great at producing massive amounts of content relatively cheap. However, the data is typically extremely heavy and not usable straight away in run-time environments, such as a game or a WebGL application. The problem of optimizing 3D scans is not a problem of optimizing one asset, but figuring out how to handle large quantities of assets. In this post we will provide a two step solution on how to quickly set up a pipeline that gets you started with optimizing your 3D scans as they are coming in.
Processing an example asset
For an experienced Simplygon user the best option might be to hit the API straight away when attacking this problem. But there is an alternate approach that reduces the needs for deep API knowledge, and it will get you quickly to your first optimization pipeline. First we use one of Simplygon's integrations to find the best settings for an example asset, then we'll use those settings when scripting a repeatable process.
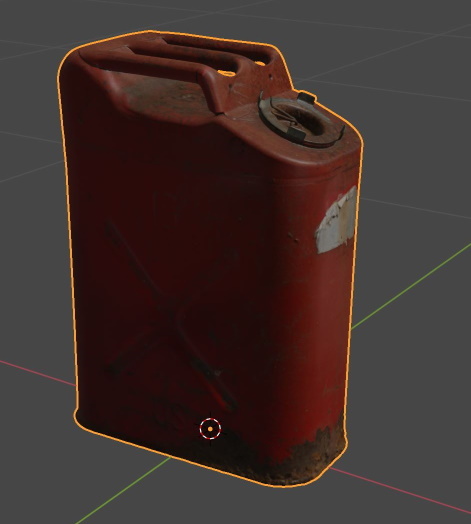
The asset
We will be using this asset for our little project. The mesh is representative asset for scan data, consisting of about 5 million polygons and a .glb file size of more than 900 Mb. Not something you want to use in a WebGL environment.
The approach we will be taking in this article starts in Blender, but it works the same way if you start in Maya, Max or Unity.
Setting up the remeshing pipeline
Simplygon's remesher is very good at handling scan data. It produces heavy optimizations and ensures that you get a two-manifold asset back. We will use the Basic Remeshing with Material Casters as a base point for our settings. Once we've loaded our asset and selected it we can choose to populate the material casters automatically. In our case we're going to cast the Base Color channel and also create a normal map into which Simplygon can project geometry changes. Here's our setup:
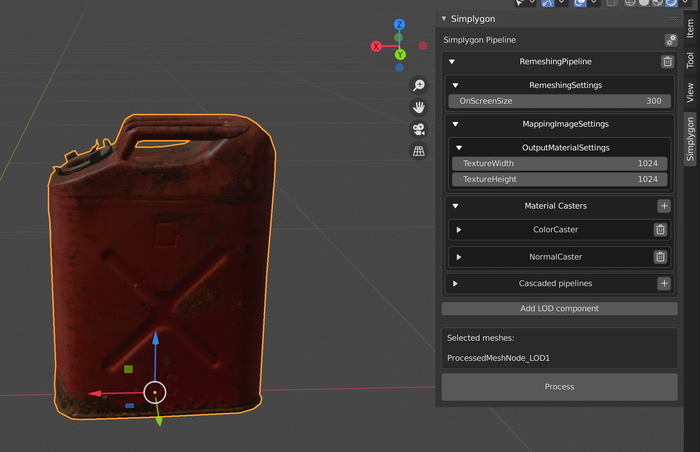
We use the default screen size (300 pixels), if you want to preserve more geometry data you can increase that number, at the cost of a larger resulting data file. You can also choose to generate larger output textures, but once again, at the cost of more data.
Now we can try our pipeline out. Once the result is returned into Blender you might have to adjust the roughness, specular and metallic values for your resulting material, to match the original materials. Here's the result of our processed asset:
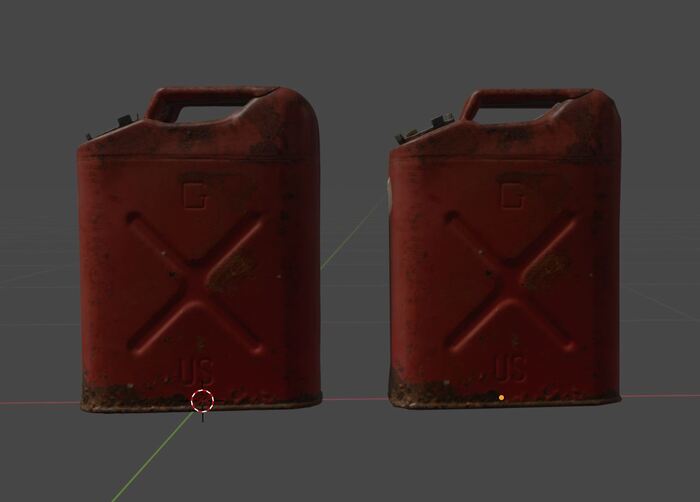
In the picture above, the fuel can on the right is the optimized version. This is what the resulting mesh and texture channels looks like.
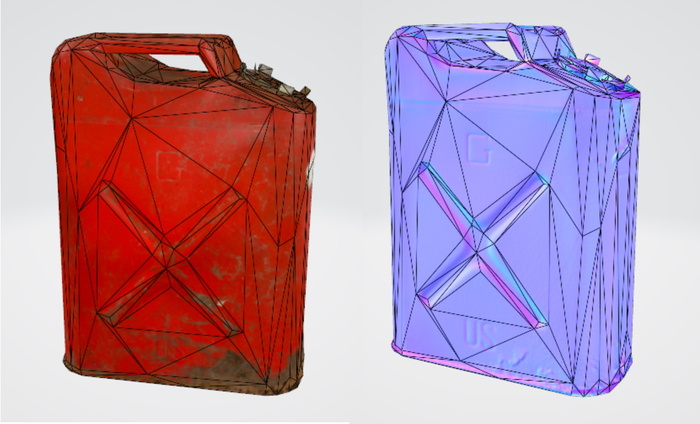
We now have a mesh which consists of 860 polygons, 2 1024x1024 textures and the glb is 2.4Mb, perfect for a WebGL application. You could further reduce footprint by setting the texture size to 512X512, at the cost of visual fidelity.
Making the process repeatable
We are satisfied with our results and now want to move on to make the pipeline repeatable across a catalogue of scan data.
Exporting the pipeline
The pipeline we have set up in Blender (or one of the other integrations) can be exported into a file, that we can load in scripts. Use this option in the UI to export it.
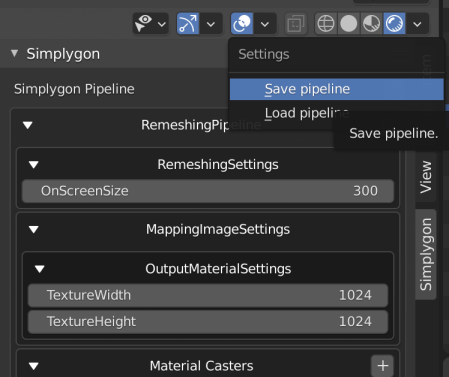
We'll setup a project directory where we will run our process, in there we store our pipeline as scan_pipeline.json and it's time to start scripting.
Scripting your scan data optimization pipe
It's trivial to script the pipeline, here's the whole script:
# Copyright (c) Microsoft Corporation.
# Licensed under the MIT license.

from simplygon import simplygon_loader
from simplygon import Simplygon
import glob,os


def process_assets(sg: Simplygon.ISimplygon, pipeline_file: str, input_dir: str, output_dir: str):
    # Load the pipeline file using a pipeline serializer
    serializer = sg.CreatePipelineSerializer()
    pipeline = serializer.LoadPipelineFromFile(pipeline_file)
    # Make output directory absolute
    output_dir = os.path.join(os.path.abspath(os.getcwd()), output_dir)
    os.chdir(input_dir)
    for input_path in glob.glob("*.glb"):
        # Calculate original file size in Mb
        size_before_opt = round(os.path.getsize(input_path) / (1024 * 1024), 1)
        # Get the file name
        asset_path_without_ext = os.path.splitext(input_path.replace('\\', '/'))[0]
        # Create the output path
        output_path = os.path.join(output_dir, asset_path_without_ext+"_optimization.glb")
        print("Processing {}".format(input_path))
        # Process the asset using our pipelien
        pipeline.RunSceneFromFile(input_path, output_path, Simplygon.EPipelineRunMode_RunInThisProcess)
        # Calculate result file size in Mb
        size_after_opt = round(os.path.getsize(output_path) / (1024 * 1024), 1)
        # Output some stats
        percent = round(100 * size_after_opt/size_before_opt, 1)
        print("Result export to {}".format(output_path))
        print("Original file size: {} Mb. Optimized file size: {} Mb ({}%)".format(size_before_opt, size_after_opt, percent))


def main():
    sg = simplygon_loader.init_simplygon()
    process_assets(sg, "scan_pipeline.json" ,"scan_data", "output")
    del sg

if __name__== "__main__":
    main()
This script loops through all the files in a folder called scan_data, processes each of the files with our exported pipeline and exports the result into the folder called output. That's it. With this script you have your first pipeline to process your scan data into something more lightweight.
Things to think about and potential expansions
Material channels
This example is built around glb. Simplygon's Blender plug-in uses glb as the interchange format which means that the pipeline file exported from Blender relies on glb materials. If you want to use another file format you need to make sure that the material casters are correctly setup. For example, if your source is in FBX files you need to change the name on this line from BaseColor to Diffuse in the pipeline file.
"ColorCasterSettings": {
    "MaterialChannel": "Basecolor",
Distribution
Since scan data tends to quite heavy the processing times might be quite long. If you have large amounts of data you can utilize Simplygon's built-in distribution to speed up the processes.