Introducing our high density reducer
Written by Jesper Tingvall, Product Expert, Simplygon
Disclaimer: This post is written using version 10.1.400.0 of Simplygon. If you encounter this post at a later stage, some of the API calls might have changed. However, the core concepts should still remain valid.
Introduction
In this post, we will take a look at the new high-density reducer we introduced in Simplygon 10.1. Its main intention is to be used with very high-poly sculpted models and 3D scanned assets. We will compare the process quality and time to our ordinary reducer.
Problem to solve
Our high density reducer is intended to solve the issue game developers face with ever-increasingly dense meshes in video games. Very dense meshes bring a wide array of challenges to development, both getting the game to run performantly and during development with editor startup time, version control being slow, and more. The source of these dense assets can either be sculpted via DCC tools or scanned from the real world.
While we can use our already existing reducer for this, it can take some time to process these assets as it is very meticulous. It is one kind of optimization problem to take a mesh from 200k triangles down to 20k triangles, another to go from 14 million triangles down to 4 million. Hence why we have created the high-density reducer intended to handle the latter case.
Using high density reducer via user interface
The easiest way to get started with out high density reducer is via the user interface. It can be found in all of our integrations under Advanded tab.
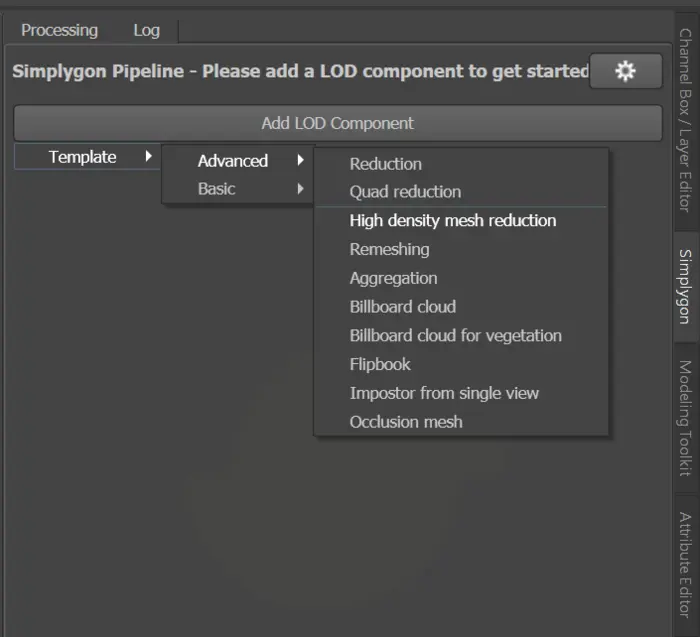
The main difference between a standard reducer and a high density reducer is that the latter has fewer settings and focuses on speed rather than customization. The high density reducer is limited to using max deviation or on screen size as reduction targets because these targets allow for more parallel work.

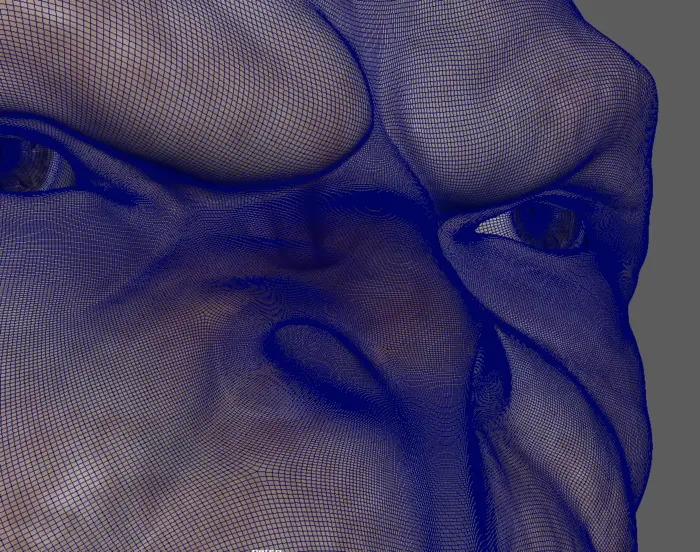
We will use the high density reduction pipeline from above to optimize this sculpted mesh.
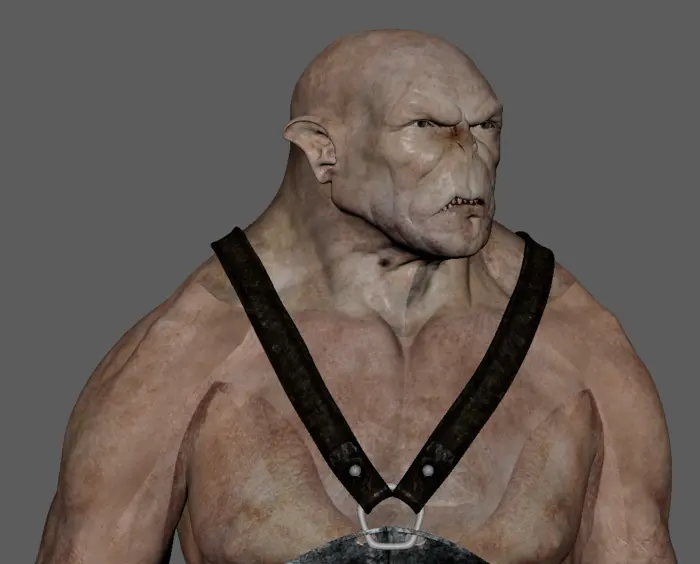
The asset is very high poly, 15.6 million triangles.
We will also optimize the same asset using a standard triangle reducer to compare the results. We will use the following screen size targets, from left to right.
- Original asset
- 20 000
- 2 000
- 200
High density reduction
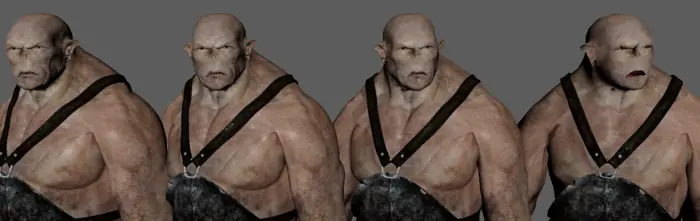
Standard reduction

Resulting triangles for different screen sizes and pipelines
| Pipeline | Screen size | Triangles |
|---|---|---|
| Original mesh | - | 15.6 m |
| High Density Reducer | 20 000 | 1.5m |
| Standard Reduction | 20 000 | 1.2m |
| High Density Reducer | 2 000 | 182k |
| Standard Reduction | 2 000 | 113k |
| High Density Reducer | 200 | 64k |
| Standard Reduction | 200 | 14k |
We can see that the standard reducer produces better results for lower screen sizes. The triangle count may also differ as the standard and high density reducer use different methods for measuring errors. This variation in triangle count is to be expected as the two reducers have different error measurement techniques.
At high density assets, the visual difference between the standard and high density reducer should be minimal. However, the main difference is the time it takes to optimize the mesh. We will discuss this in more detail in the next section.
Using high density reducer via script
It is also possible to access the high density reducer via scripting.
First we are going to create a high density reduction pipeline for a specific target screen size. Per default there is no reduction target set, which will result in an error when we try to run the pipeline. So we need to set OnScreenSizeEnabled to True as well as setting OnScreenSize before we can use the pipeline.
def Create_high_density_reduction_pipeline(sg, target_screen_size):
    pipeline = sg.CreateHighDensityMeshReductionPipeline()
    pipeline.GetHighDensityMeshReductionSettings().SetOnScreenSizeEnabled(True)
    pipeline.GetHighDensityMeshReductionSettings().SetOnScreenSize(target_screen_size)
    return pipeline
Once we have created the pipeline we can use it as any other pipeline. After initiating Simplygon we can use our Create_high_density_reduction_pipeline function and RunSceneFromFile to process an asset on disc and save as a new file. We also measure the processing time so we can compare the result with our ordinary reducer.
sg = simplygon_loader.init_simplygon()

print(f"Start processing {input_file} for screen size {target_screen_size}")

# Create pipeline
pipeline = Create_high_density_reduction_pipeline(sg, target_screen_size)

# Perform optimization
start_time = time.time()
pipeline.RunSceneFromFile(input_file, output_file, Simplygon.EPipelineRunMode_RunInNewProcess)
end_time = time.time()

print(f"Exported result to  {output_file}")
print(f"Total time (including import): {(end_time - start_time):.1f} s")
del sg
We will use this script to optimize and measure processing time.
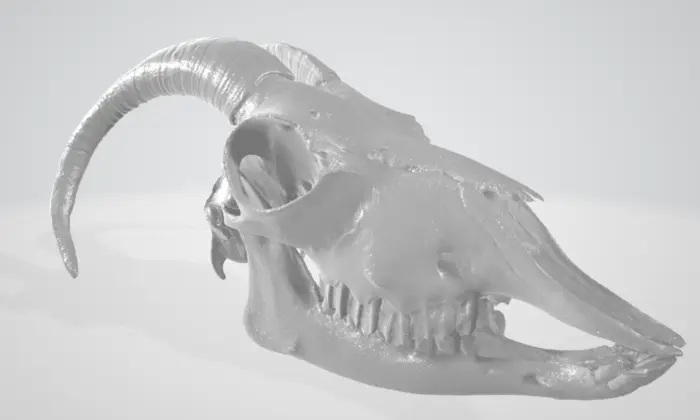
Using high density reducer for scanned assets
We are going to use this photo-scanned asset to test the high density reducer.
If we process it to a screen size of 200 using the above script, we get following result.
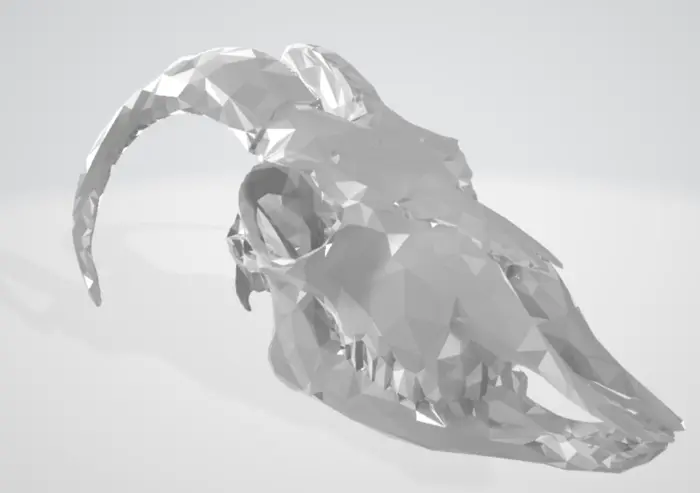
The results appear to be incorrect, particularly when compared to the output of the standard reducer at the same screen size.
The reason we get flat shaded triangles is that the original asset does not contain any normals, which is common for photoscanned assets. Our standard reducer detects this and generates new normals during preprocessing, which is why it produces the correct output without any additional action from us.
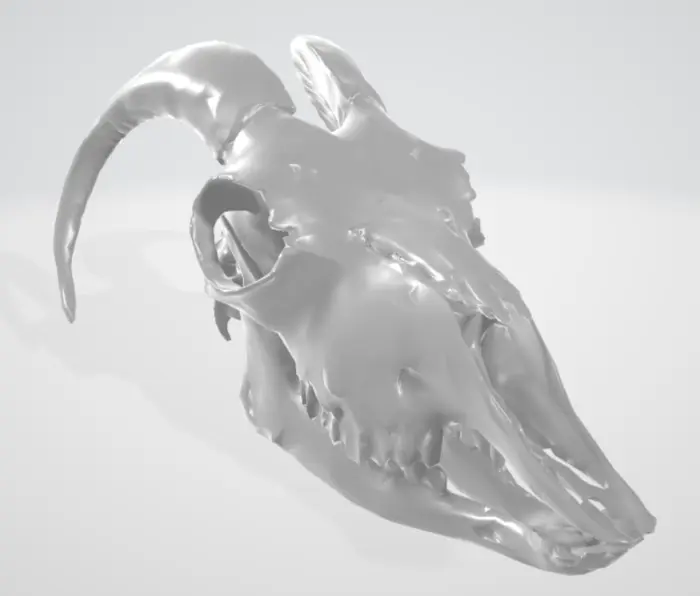
In fact, there is a whole array of preprocessing steps the standard reducer goes through to produce valid data. This includes welding, t-junction removal and finding duplicate triangles. To save time this is not done in the high density reducer. To solve this we recalculate the normals in Blender, we can after that process the asset and get expected output.
Result
After processing the asset for various screen sizes we can compare the result. Top row is with our ordinary reducer and bottom is with high density reducer. We use following screen size targets, from left to right.
- 5 000
- 2 000
- 200
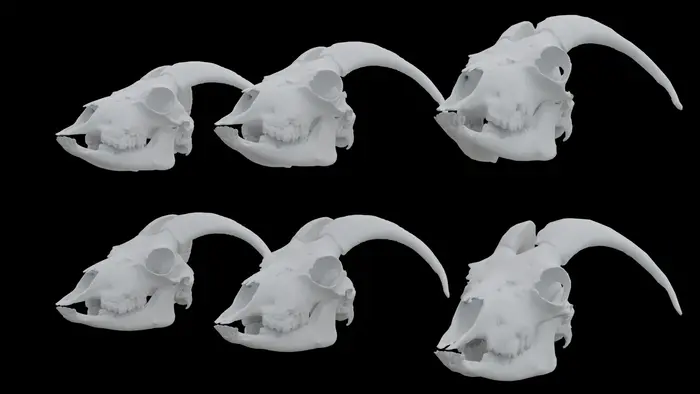
Resulting triangles and processing time for different screen sizes and pipelines
| Pipeline | Screen size | Triangles | Process time (including import and export) |
|---|---|---|---|
| Original mesh | - | 1.8m | - |
| High Density Reducer | 5 000 | 1.4m | 52 s |
| Standard Reduction | 5 000 | 1.3m | 124 s |
| High Density Reducer | 2 000 | 313k | 34 s |
| Standard Reduction | 2 000 | 340k | 116 s |
| High Density Reducer | 200 | 9.6k | 22 s |
| Standard Reduction | 200 | 15.3k | 125 s |
As shown in the table above, the high-density reducer is significantly faster than the standard reducer. In this specific case, the visual difference between them is also small. When dealing with high-density geometry, our high-density reducer is a powerful tool to speed up optimization.
Complete script
# Copyright (c) Microsoft Corporation.
# Licensed under the MIT license.

from simplygon10 import simplygon_loader
from simplygon10 import Simplygon
import time

input_file = 'skull.obj'

def Create_high_density_reduction_pipeline(sg, target_screen_size):
    pipeline = sg.CreateHighDensityMeshReductionPipeline()
    pipeline.GetHighDensityMeshReductionSettings().SetOnScreenSizeEnabled(True)
    pipeline.GetHighDensityMeshReductionSettings().SetOnScreenSize(target_screen_size)
    return pipeline

def Run_reduction(target_screen_size):
    output_file = f"skull_{target_screen_size}_pixels.obj"

    sg = simplygon_loader.init_simplygon()

    print(f"Start processing {input_file} for screen size {target_screen_size}")

    # Create pipeline
    pipeline = Create_high_density_reduction_pipeline(sg, target_screen_size)

    # Perform optimization
    start_time = time.time()
    pipeline.RunSceneFromFile(input_file, output_file, Simplygon.EPipelineRunMode_RunInNewProcess)
    end_time = time.time()

    print(f"Exported result to  {output_file}")
    print(f"Total time (including import): {(end_time - start_time):.1f} s")
    del sg

Run_reduction(5000)
Run_reduction(2000)
Run_reduction(200)