Billboard cloud mode: Outer shell
Disclaimer: The code in this post is written using version 9.1.282 of Simplygon. Should you encounter this post running a different version, some of the API calls might differ. However, the core concepts should still remain valid.
Overview
The goal of the billboard cloud processor is to replace objects in a scene with a view independent set of billboards. The Billboard mode: Outer shell makes the planes fit to the outer borders of objects, as opposed to Billboard mode: Foliage.
- Impostor overview (SimplygonSDK_9.1.282.0) - From the Simplygon 9 Documentation: Optimization concepts page which goes into explaining the Impostor processor and its settings.
- Impostor API (SimplygonSDK_9.1.282.0) - The complete code for generating the impostors in this post.
Outer shell
The way the billboards are mapped to a scene changes when the Billboard mode is set to Outer shell from when it's set to Foliage. The objects that should be represented are now deemed to be solid objects and the billboards should instead be fitted to the outer perimeters of the scene. Foliage is best represented by billboards that intersect and their view independence comes from the billboards preserving the perception of volume, depth and silhouette. But with more general objects that have more order and are less chaotic than vegetation, it's better to have planes that follow the outside of objects rather than intersect in the middle of the volume.
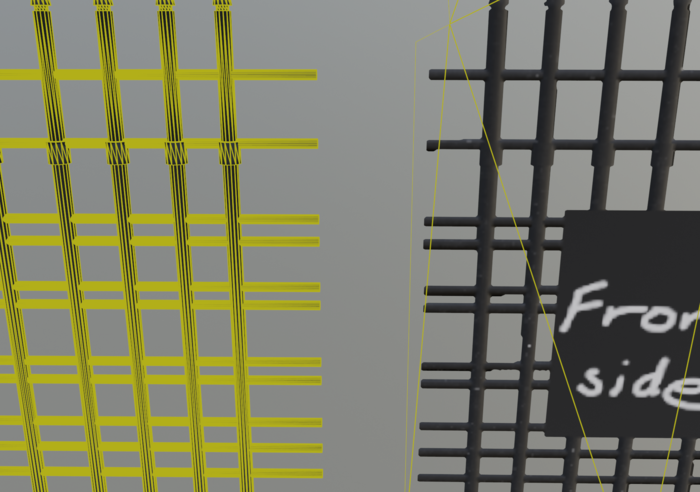
Objects consisting of flat parts are the best candidates. If the input mesh has lots of holes and unconnected parts it's even better, because those are the types of assets that can be hard to reduce and remesh. A fence for instance is a good candidate where there can be lots of spaces between the slats.
spImpostorProcessor impProc = sg->CreateImpostorProcessor();
impProc->SetScene( scene );
spImpostorSettings impSettings = impProc->GetImpostorSettings();
spBillboardCloudSettings bCSettings = impSettings->GetBillboardCloudSettings();
spMappingImageSettings mSettings = impProc->GetMappingImageSettings();
impSettings->SetImpostorType( EImpostorType::BillboardCloud );
bCSettings->SetBillboardMode( EBillboardMode::OuterShell );
bCSettings->SetBillboardDensity( 0.5f );
bCSettings->SetGeometricComplexity( 0.8f );
bCSettings->SetMaxPlaneCount( 10 );
mSettings->GetOutputMaterialSettings( 0 )->SetTextureWidth( 1024 );
mSettings->GetOutputMaterialSettings( 0 )->SetTextureHeight( 1024 );
impProc->RunProcessing();
Materials
As opposed to running with Billboard mode: Foliage you only get a single material for your output scene. Be sure to cast the opacity map with Dilation set to Zero and Fill mode set to NoFill.
spOpacityCaster opacityCaster = sg->CreateOpacityCaster();
opacityCaster->SetSourceMaterials( originalMaterialTable );
opacityCaster->SetMappingImage( mappingImage );
opacityCaster->GetOpacityCasterSettings()->SetOutputPixelFormat( EPixelFormat::R8 );
opacityCaster->SetOutputFilePath( opacityTexturePath );

// If dilation is not 0, the opaque pixels will dilate into the "empty area"
opacityCaster->GetOpacityCasterSettings()->SetDilation( 0 );

// If this is not set to NONE, it will fill the areas that should be
// transparent with potentially opaque values.
opacityCaster->GetOpacityCasterSettings()->SetFillMode( EAtlasFillMode::NoFill );

opacityCaster->RunProcessing();
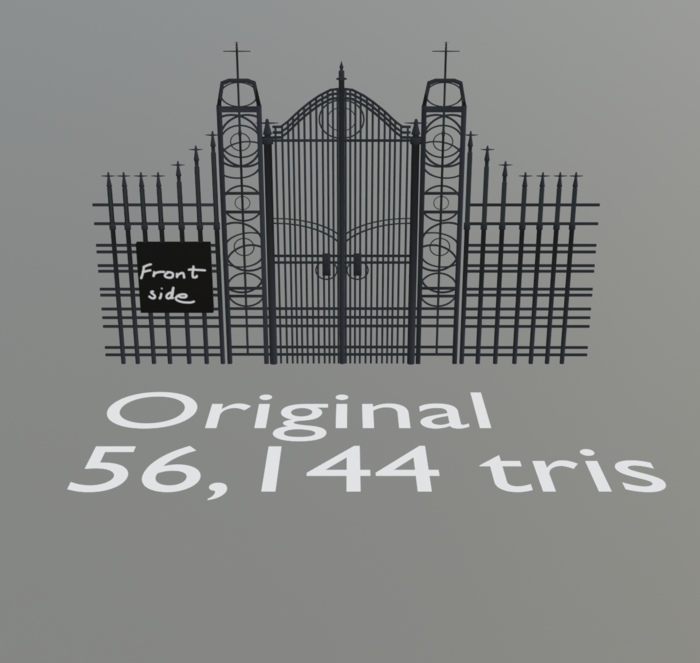
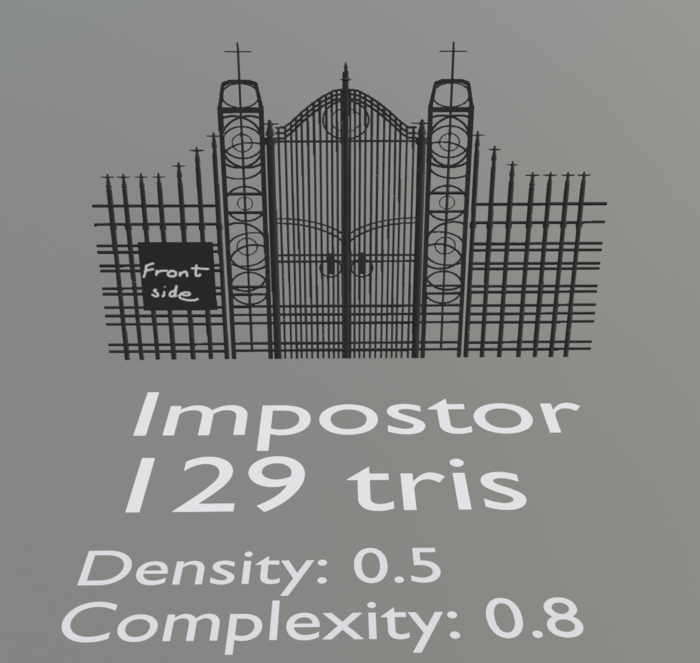
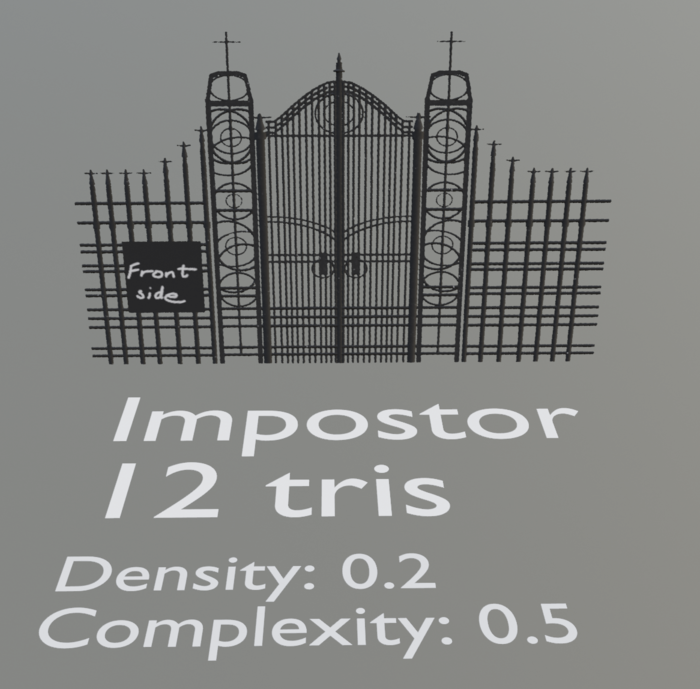
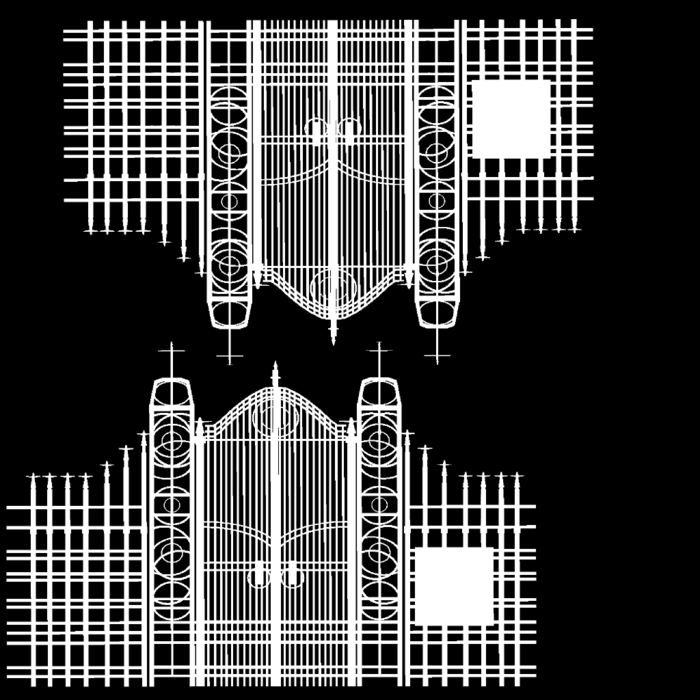
Gate mesh example
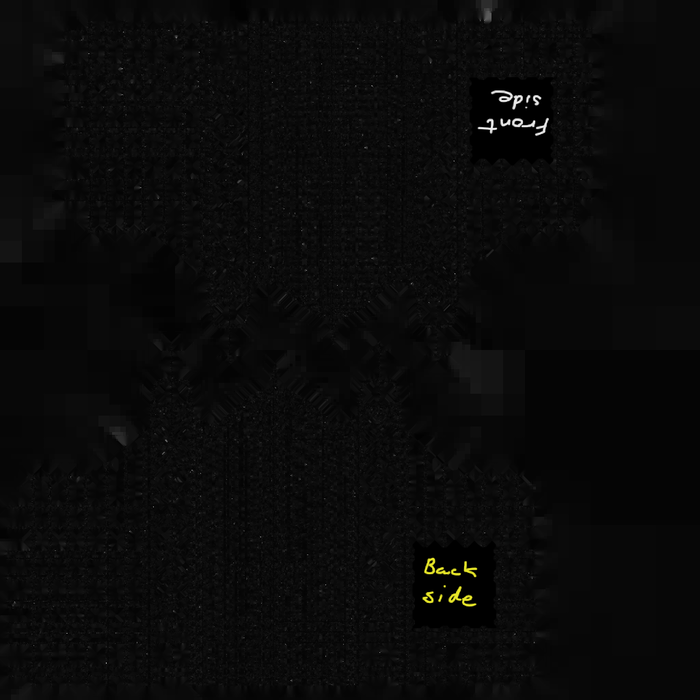
To illustrate an example of the outer shell we process a gate extracted from a more complicated scene. The sign saying "Front side" on one side and "Back side" on the other is meant to show that the face orientation is being kept on the billboards.
| Original scene | Impostor | Impostor |
|---|---|---|
 |
 |
 |
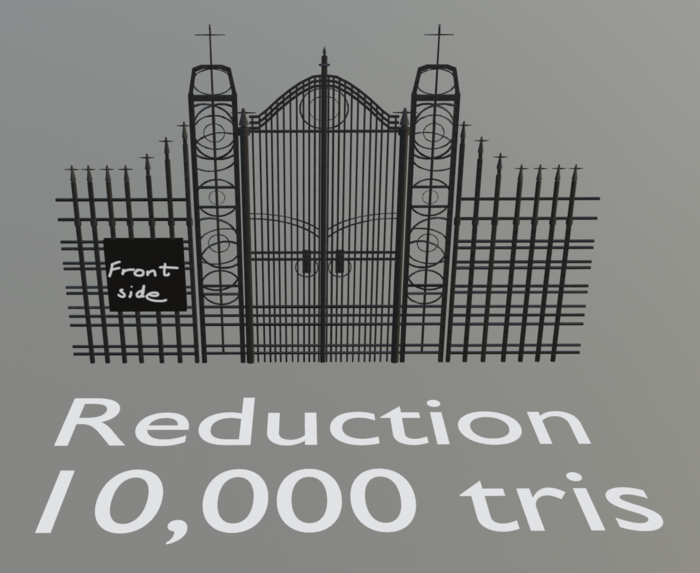
| The triangle count is higher because the geometry shape of the billboard more closely follows the original silhouette (projection). |
| |
|
And this is what the textures look like:
| Diffuse map | Normal map | Opacity map |
|---|---|---|
 |
 |
 |
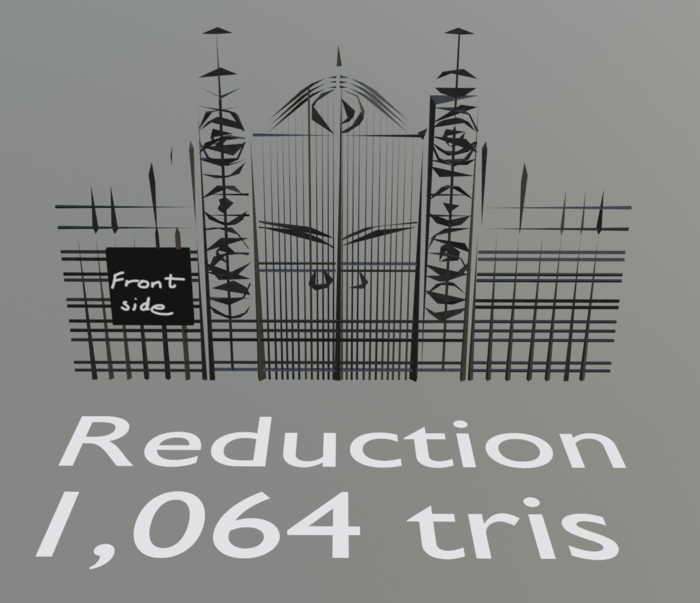
Gate mesh Reduction comparison
Heavily reducing these types of objects by collapsing geometry eventually fails because the slats are not connected. It will either shrink individual parts to unrecognizable shapes, or bridge the gaps with large spanning triangles that make equally unrecognizable shapes. Some small gaps can be helped by welding in the reducer, but for fence/gate-like meshes it will most likely weld within the individual parts more than between the parts that are separated. And welding with larger distances can generate very different topology.
| Reduced mesh | Reduced mesh | Reduced mesh |
|---|---|---|
 |
 |
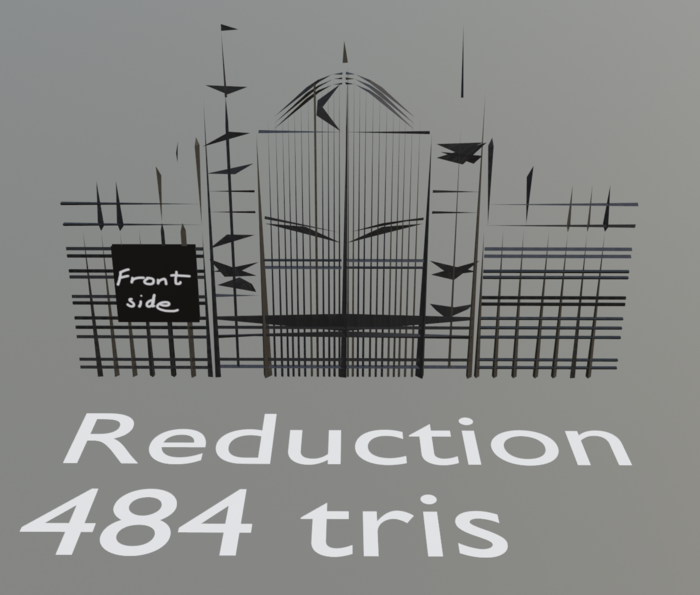 |
| Still very similar at 20% triangles. | Artifacts from reducing unconnected geometry. | More artifacts. |
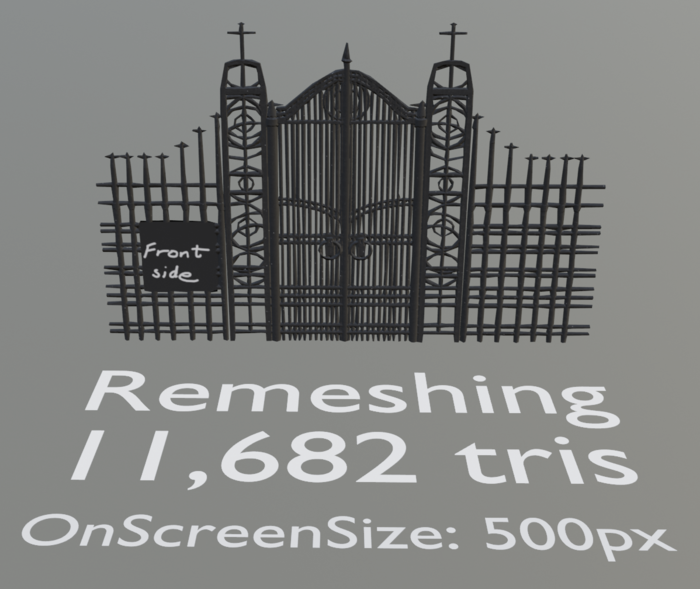
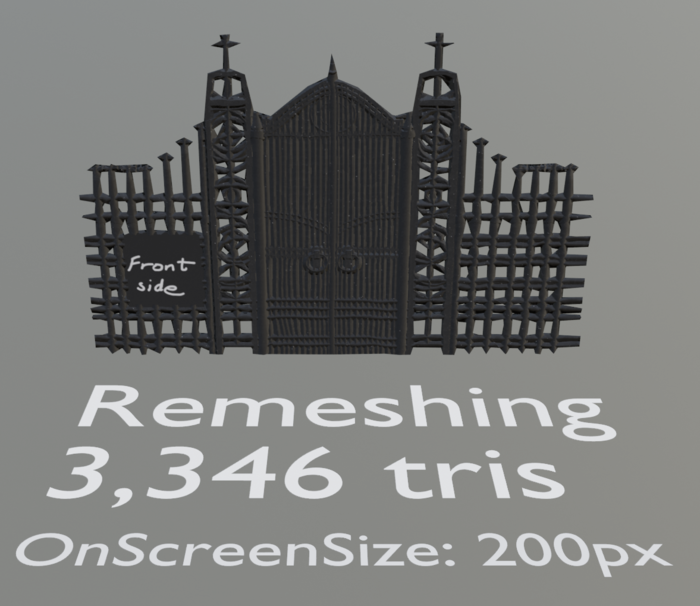
Gate mesh Remeshing comparison
Remeshing thin and flat parts with gaps and holes like gate or fence-like objects will (depending on whether the On screen size is low enough) generate two-manifolded objects that encapsulate the entire object without any gaps or holes. Usually the result becomes thicker and as such is not ideally representing thin meshes with holes.
| Remeshed mesh | Remeshed mesh | Remeshed mesh |
|---|---|---|
 |
 |
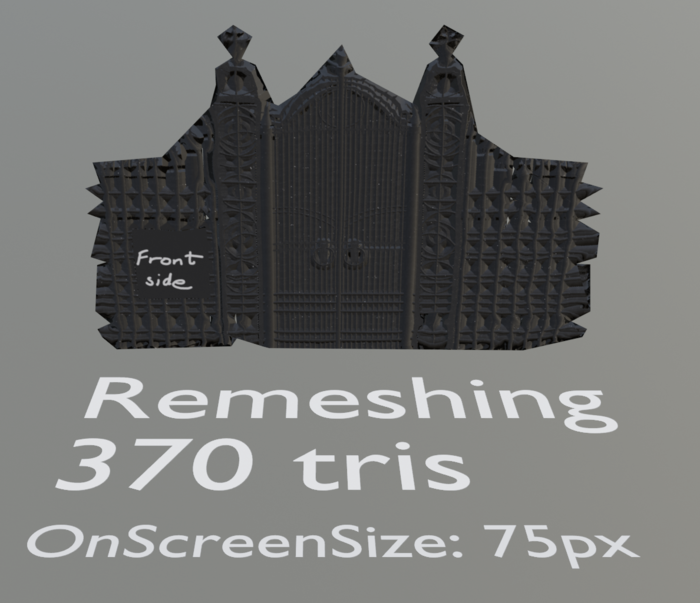 |
| Thicker at lower on screen sizes. |
All compared
Here's a looped comparison between all the examples switching between regular and a wireframe render mode.
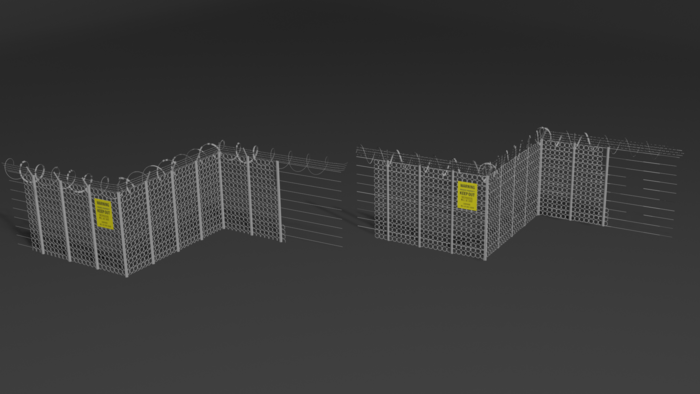
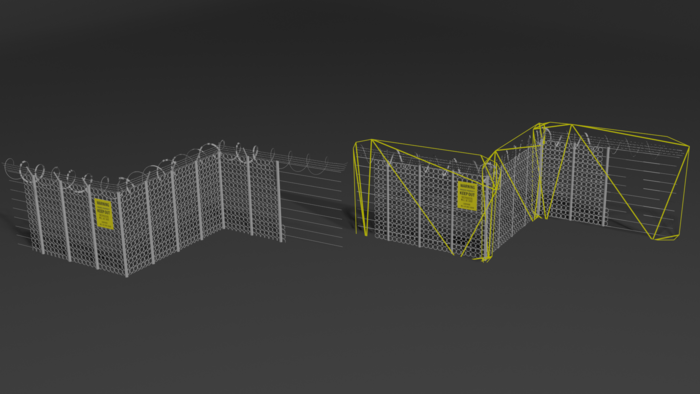
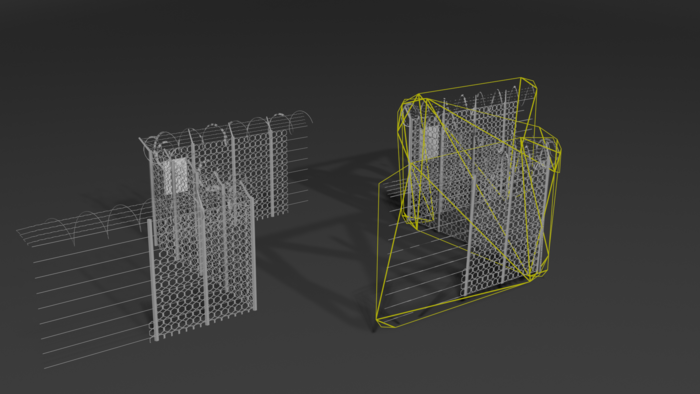
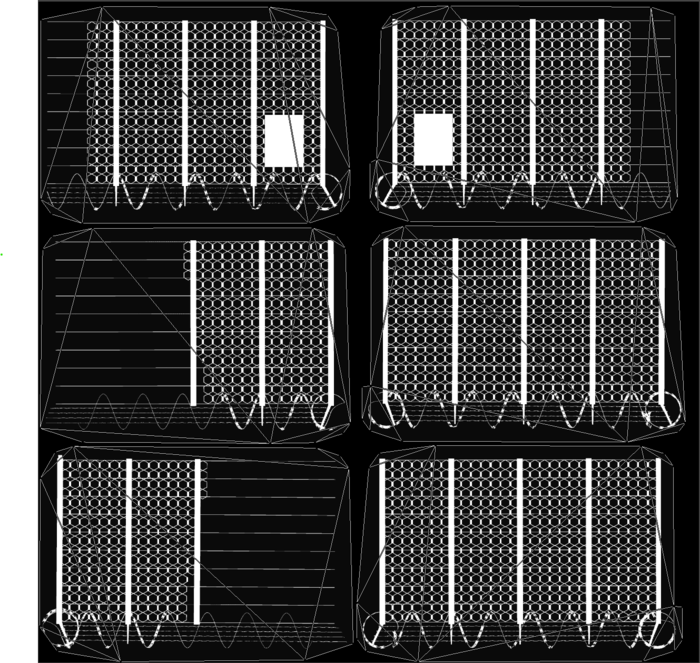
Fence mesh example
Here's another candidate. This mesh however is more complicated and less suited for the outer shell mode because it has lots of barbed wire geometry that doesn't stay flat within the other flat parts. To get the desired output geometry the Density setting should not be too large - because then we'll start getting billboards around the curved parts that stray too far from the walls. And the density should not be too low, cause then we might only get billboards for the two largest flat walls of the fence. The example was processed with the following values: Density: 0.4 and GeometricComplexity: 0.8.
 |
 |
|---|---|
| Original mesh and impostor compared. |
 |
 |
|---|---|
| Impostor rendered with wireframe. |
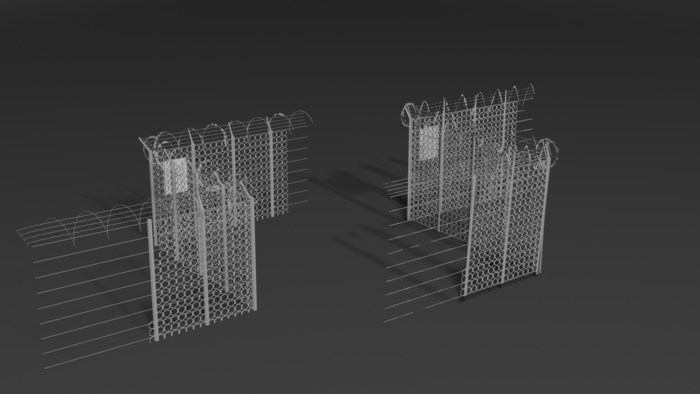
And this is what the opacity map and texture coordinates look like:
Code
The code for this example is available on the API-page here.