Low-poly character optimization
Written by Jesper Tingvall, Product Expert, Simplygon
Disclaimer: This post is written using version 10.2.10100.0 of Simplygon and 3ds Max 2022. If you encounter this post at a later stage, some of the API calls might have changed. However, the core concepts should still remain valid.
Introduction
In this introduction blog we'll look at how to optimize a low poly skinned character with the Simplygon plugin for 3ds Max.
Prerequisites
This example will use the Simplygon integration in 3ds Max, but the same concepts can be applied to all other integrations of the Simplygon API.
Problem to solve
We have a mobile game with lots of cute chibi characters. We want it to run well on both low end and high-end mobile phones so we want to generate some lighter variants of our characters. We could also use these lighter variants as Level of details if our game has characters at different distances from the camera. Our original asset has 3.7 k triangles.
It is common for people to think that low polygon art styled games do not benefit from asset optimization and level of details. This could not be further from the truth as the low poly art style is in many cases driven by it targeting low end devices. And on those devices every triangle count.
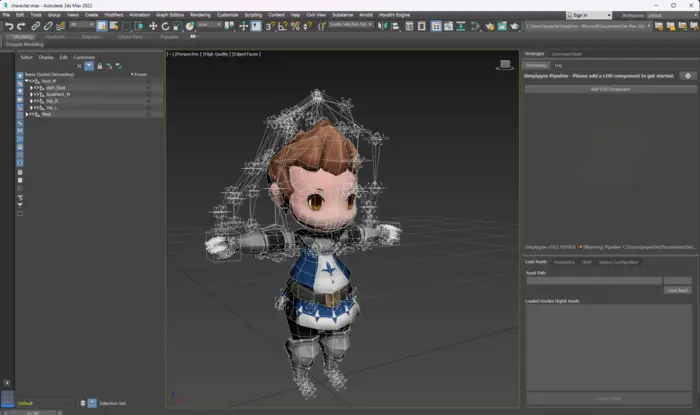
Solution
We are going to use the Simplygon plugin for 3ds Max to optimize our model. We'll use our reduction pipeline which reduces the number of triangles and vertices in the scene in a heuristic manner. In this process it takes different features into account like geometry, UVs and skinning data. That means our output will not only retain the skinning, but it will also use skinning information to retain more geometry in deformation zones.
LOD1 Reduction
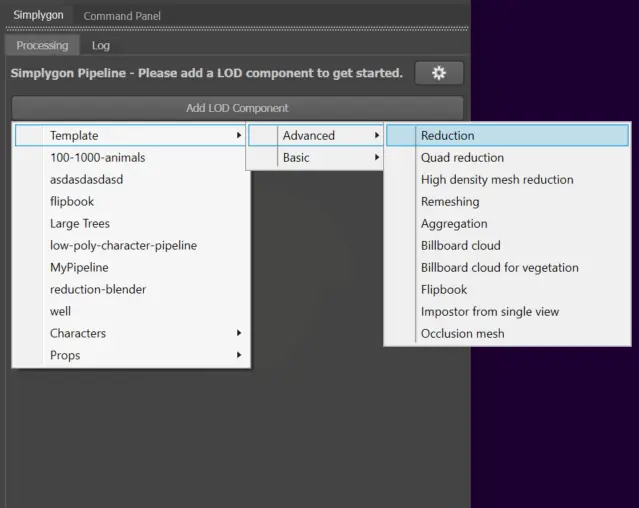
Each quality level of our model corresponds to one level of detail model. To create a level of detail variant of the model open up Simplygon UI in 3ds Max and click Add LOD Component. We are then going to pick Template → Advanced → Reduction. The reason why we pick Advanced → Reduction and not Basic → Reduction is that there are are some custom settings we want to use that are not exposed in the basic one.
Screen size
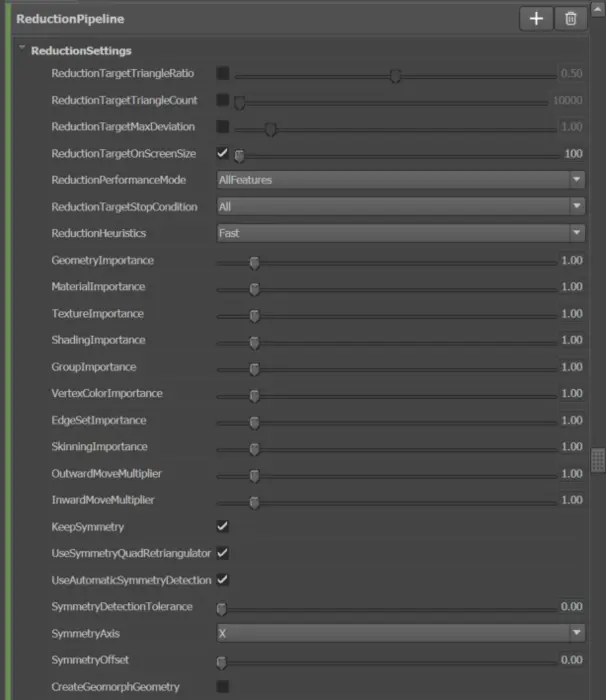
As a target metric we are going to use OnScreenSize. We strongly suggest to use that or maximum deviation as optimization targets over triangle ratio or triangle count. The reason is that different models have different tolerances towards optimization. This means that it is very hard to find a specific triangle ratio or count that would work for lots of different assets. Some of them will look fine, some could be optimized even more and some would require more geometry. More about this can be read in this blog.
When using screen size Simplygon gives around one pixel of visual error when the asset is rendered at that resolution. This is very conservative, especially for our low-poly art style where we can allow more errors, especially if we use it to generate a new LOD0 and no LOD transition is in play. After some experimentation we get that an screen size of 100 pixels gives a suitable graphic quality to triangle count. The benefit of using screen size is that we could very easily use the same reduction target for other assets and get graphic of same quality level.
Keeping symmetry
If we would process the model with the setting, we have now we would get an output where left and right side has not been optimized identical.
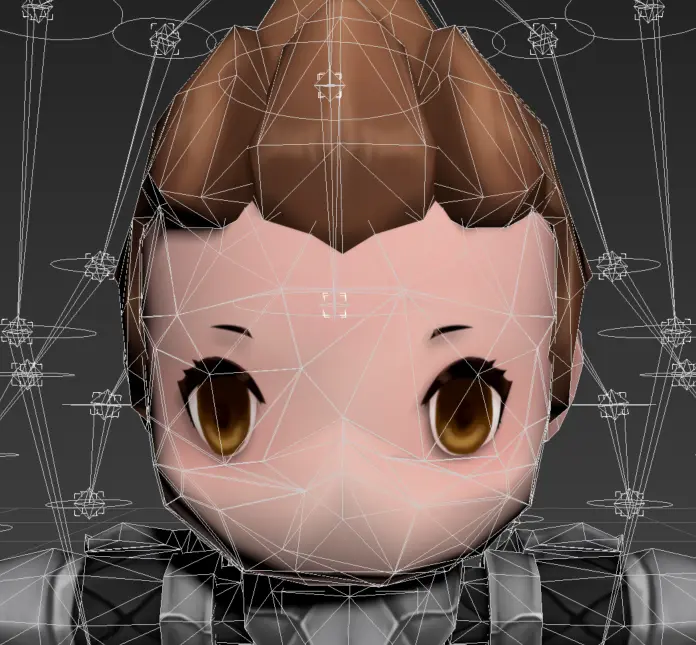
The character model we are working with is completely symmetrical. We would like the output to be this as well, especially since we are planning on using the optimized models as LOD0 on weaker platforms. Thus we'll tell Simplygon to optimize the model symmetrically, both how it is triangulated but also optimized. Can do this by enabling KeepSymmetry and UseAutomaticSymmetryDetection.
Cascaded LODs
We want to create additional quality levels for our character. We'll do this using cascaded pipelines. With cascaded pipeline the previous LOD level is used as input for the next LOD level. This speed up processing time as we are working with less and less data as well as minimizing visual difference between the different LOD levels. To add a cascaded pipeline to the reduction pipeline we created above be press the '+' button right of our pipeline and select Cascaded LOD → Template → Advanced → Reduction.

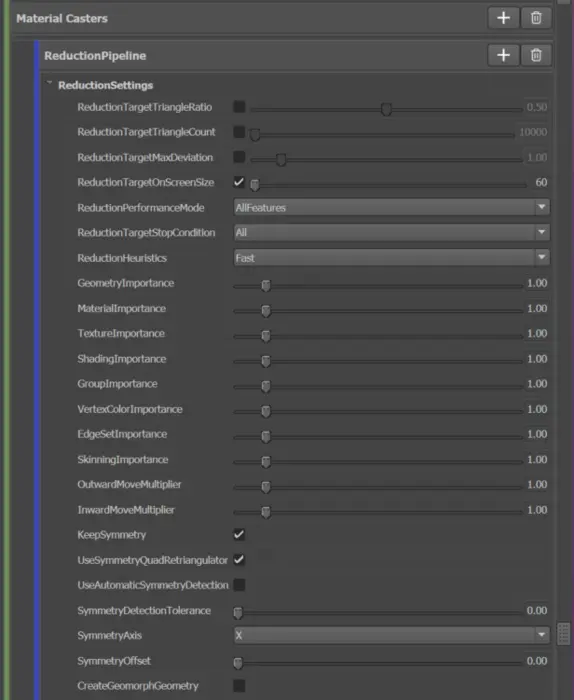
The setting we are going to use for LOD2 is almost same as for LOD1. We enable the same flags for keeping symmetry and set OnScreenSize to 60.
LOD3
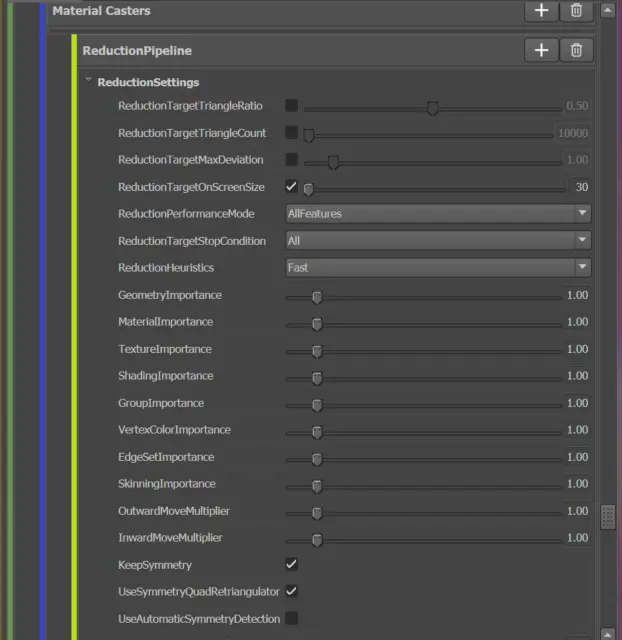
The last LOD level we are going to add is LOD3. We do this adding a cascaded pipeline to LOD2. Again we pick Template → Advanced → Reduction. We enable the symmetry flags and specify OnScreenSize to 30.
Processing
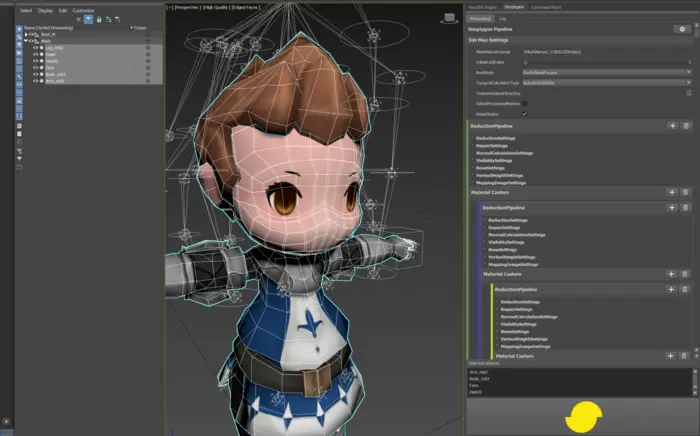
We are now ready to generate our LODs. We first select all the models in our scene which we want to process. We then press the yellow Simplygon Logo at the bottom of Simplygon's UI to start the process.
Result
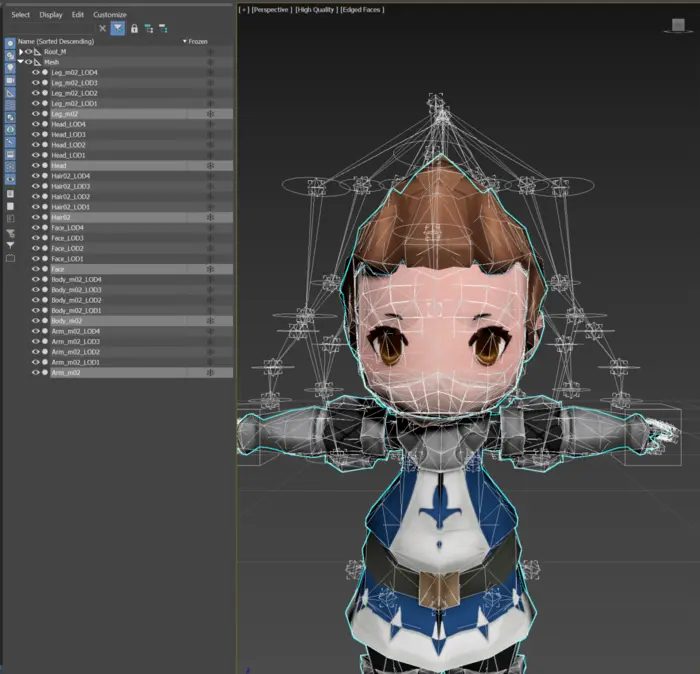
After processing the character we get 3 LODs back. The models are connected to the same skeleton as original asset.
| Asset | OnScreenSize | Triangle count |
|---|---|---|
| LOD0 | - | 3.7 k |
| LOD1 | 100 pixels | 2.8 k |
| LOD2 | 60 pixels | 2.1 k |
| LOD3 | 30 pixels | 1.0 k |
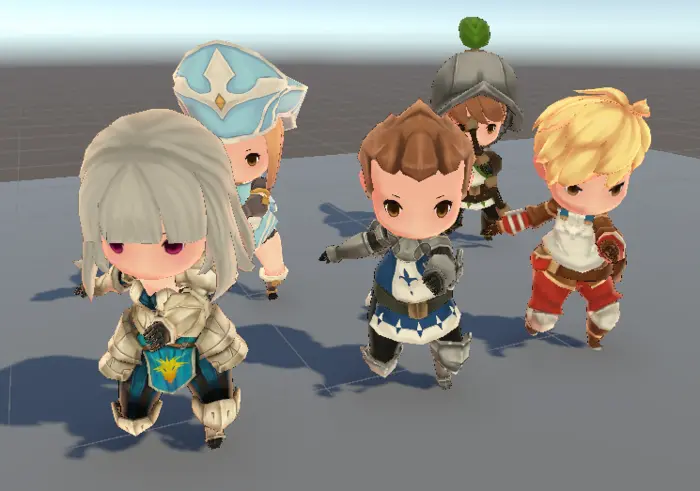
We suggest to always preview the generated model in engine with proper lighting, animation and shading. So let’s put our model into Unity and see how it looks.
We can see that our optimized assets work well. It is impressive that we can optimize an already low poly asset down to around 27% of original triangle count. Optimizing our 3d assets like this enables us to target a wider range of hardware and in the end increase our profits.
What's next?
You have not taken the first steps of automatically optimize your 3d assets. Here are some couple of things you could investigate next.
Automation
First up is the question on how to optimize more then one character. Because our game contains lots of them.
First step would be to read up on how to customize and share your pipelines so other in the team can utilize them as well. Naturally the next question is how to process assets without having to click around in an user interface. For that we suggest reading into automating your asset pipeline.
Quad reduction for LOD1
To keep the topology of our LOD1 closer to the original we could investigate using our new quad reducer to generate LOD1. It works by removing quad strips and will give us a model with clean quad topology back. This would probably not work very well for LOD2 and LOD3 as limiting Simplygon to only removing quad strips will make it struggle to push models down to lower poly count.
Optimizing further
If we would want to optimize the model even further, for example with a screen size of 20 pixels, the output would look strange.
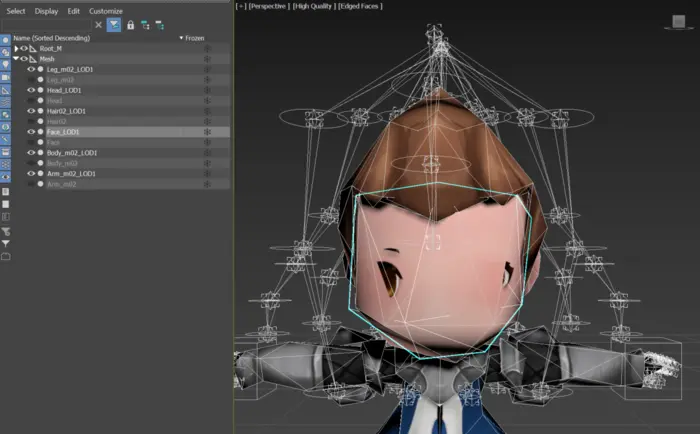
The reason for this is that our character's eyes and face is in separate geometry rendered with a transparent shader that is covering just above our face.
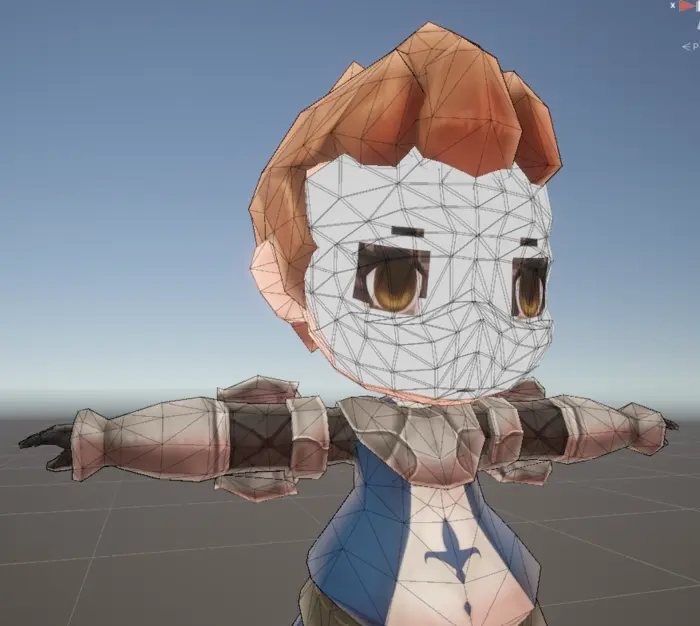
To enable us to push our optimization further we could investigate protecting features using vertex locks and weights. We could for example mark the face as more important than the rest of the model in order to preserve it better.
We could also change the last step of our LOD chain to remeshing. Remeshing would create a new watertight very low poly model to which the material can be baked. That would solve the clipping issues in the face area. Remeshing would also have the benefit of giving us a even more optimized watertight mesh with only one material. So, we would address not only triangle count but also overdraw and draw calls.
