Character optimization with quad reduction
Written by Jesper Tingvall, Product Expert, Simplygon
Disclaimer: This post is written using version 10.2.10100.0 of Simplygon and 3ds Max 2022. If you encounter this post at a later stage, some of the API calls might have changed. However, the core concepts should still remain valid.
Introduction
In this introduction blog we'll look at how to optimize a skinned character with the quad reducer.
Prerequisites
This example will use the Simplygon integration in 3ds Max, but the same concepts can be applied to all other integrations of the Simplygon API that has quad reducer support.
Problem to solve
We have a skinned character and would want to optimize it. Our primary use case is to bring the model to a slightly less powerful platform, so we just want to optimize it a little bit. We also want the quad topology of our asset to remain after optimization.
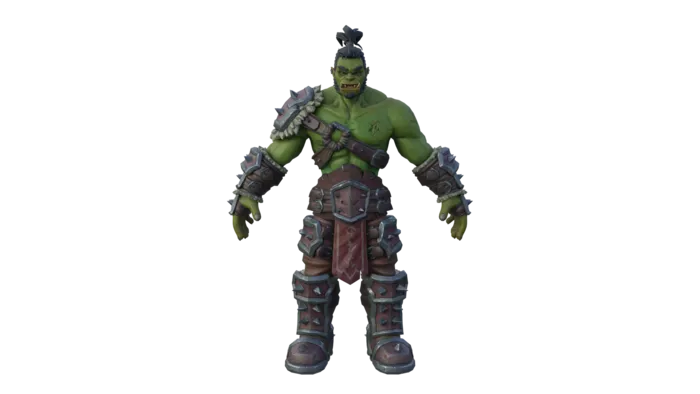
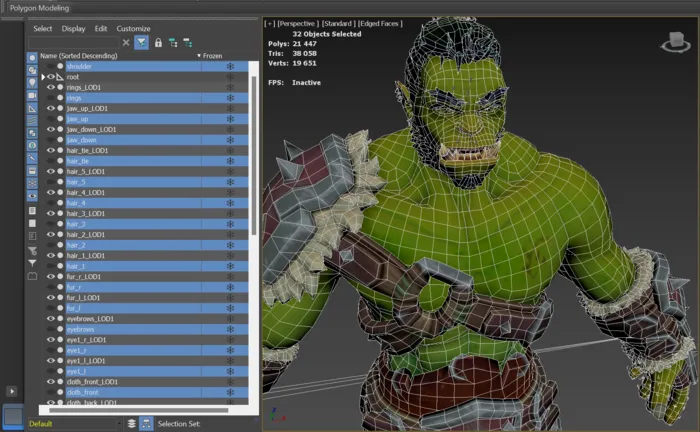
Our example asset is an orc character with 38 k triangles.
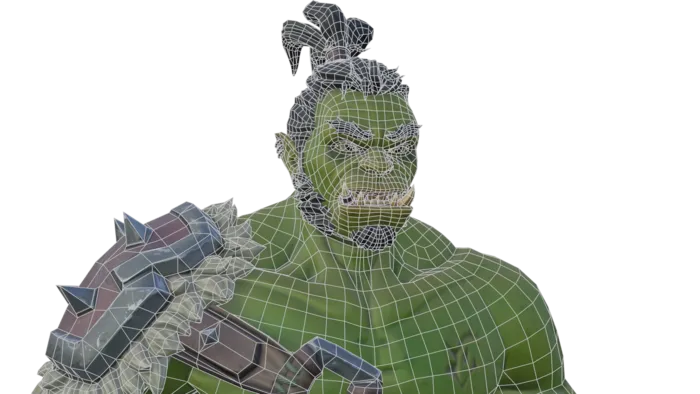
It is constructed out of quads.
Solution
As we want to keep the quad topology we'll use the quad reducer introduced in Simplygon 10. The quad reducer works by removing entire quad strips. This results in a geometry that is similar to the original model.
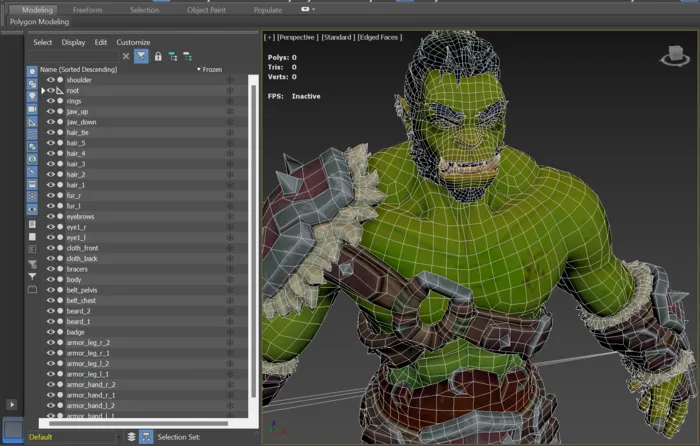
We load our character model into 3ds Max and are going to use Simplygon's 3ds Max Simplygon plugin to optimize it.
Quad reduction
Each quality level of our model corresponds to one level of detail model. To create a level of detail variant of the model open up Simplygon UI in 3ds Max and click Add LOD Component. We are then going to pick Template → Basic → Quad Reduction.
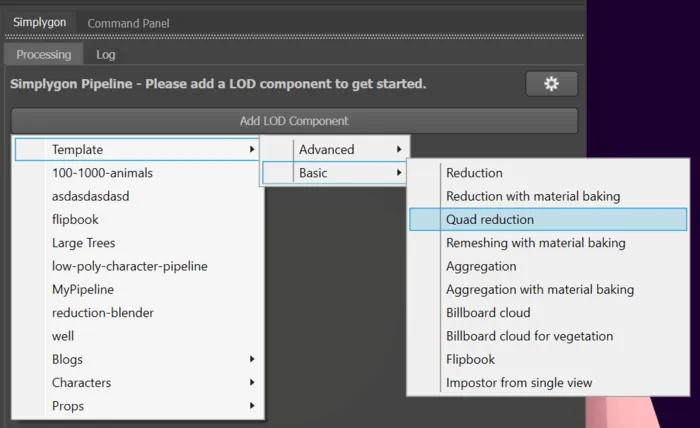
As reduction target the basic quad reduction pipeline uses screen size. Here we put in the rendering size in pixels where we want the visual difference of the model to be around 1 pixel. If we would have picked Template → Advanced → Quad reduction we would gotten some more reduction targets. We strongly suggest using either max deviation or screen size as a reduction target. This blog covers different types of targets in more detail and how to combine them.
One thing to look out for with the quad reducer is that it can only optimize triangles in assets containing both quads and triangles when it is using either screen size of max deviation as target.
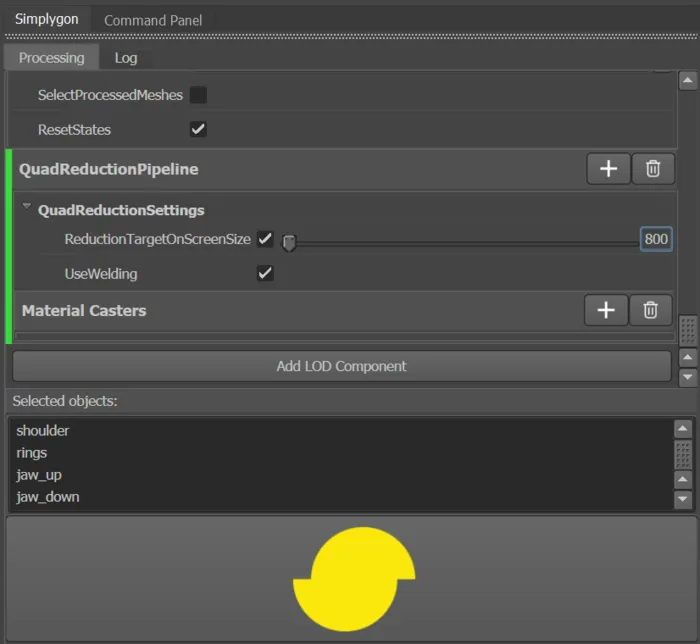
We set the screen size to 800 pixels. That means that if we render the asset in 800x800 pixels we get around one pixel of error.
We are now ready to generate our LODs. We first select all the models in our scene which we want to process. We then press the yellow Simplygon Logo at the bottom of Simplygon's UI to start the process.
Result
The quad reducer retains skinning information, so the models are rigged to the original skeleton.
Let's try with some another screen size as well and see how it looks with a simple animation.
| Asset | OnScreenSize | Triangle count |
|---|---|---|
| LOD0 | - | 38 k |
| LOD1 | 800 pixels | 32 k |
| LOD2 | 500 pixels | 28 k |
For this asset we can go down to around 74% of original triangle count and still have it look good even close up. Most of the optimization has been done on the hair parts which perhaps was a little bit to dense in the original asset. The optimized models will come in handy when shipping the game to less powerful platforms where we can use them as LOD0.
When to use the triangle reducer and quad reducer
We have now kept the triangle count quite close to the original. Say that we instead want to optimize the asset down to around only 20% or less of the original triangle count. We use the advanced quad reduction pipeline with a reduction target polygon ratio of 0.2. The result showcase that we have now pushed the asset under what the quad reducer can tolerate. The limit the quad reducer works within, that it can only remove quad strips, is here preventing it from optimizing the model in a more clever way.
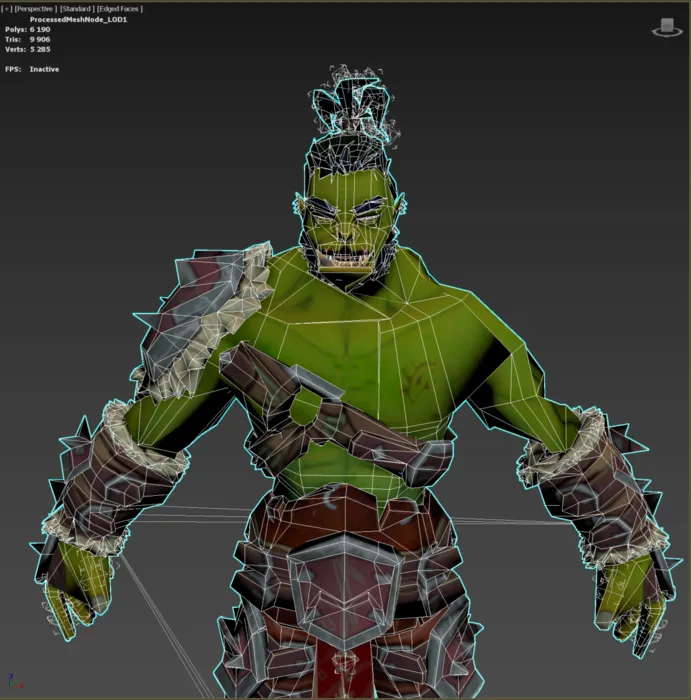
Let's see how the same asset would look like when we use the triangle reducer. We optimize it down to a reduction target triangle ratio of 0.2.
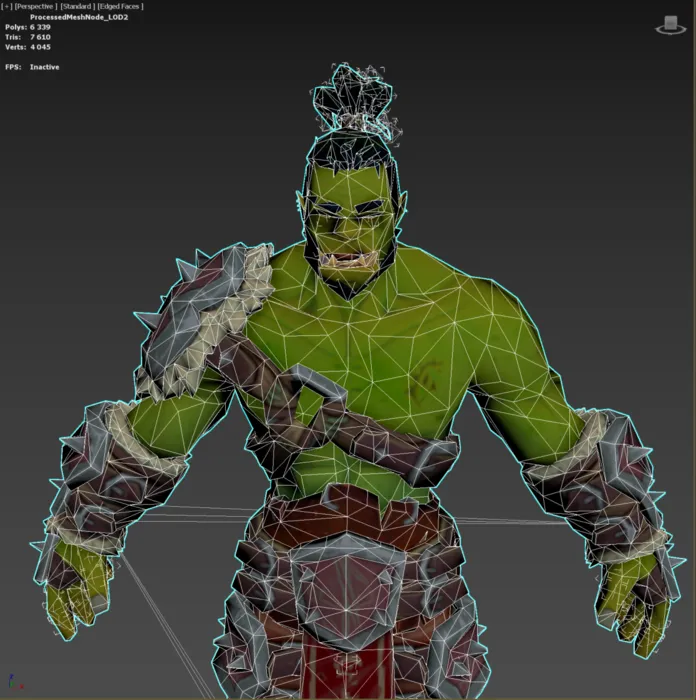
As it is now only 20% of original triangle count it is intended for far away viewing. But we can see that the freedom of not only removing quad strips, but individual triangles allow it to perform better when it comes to push assets down to a low triangle ratio. If this is what we are after consult this blog post regarding how to use the triangle reducer to optimize assets with our triangle reducer in 3ds Max.
If we would use quad reducer as part of a LOD chain we suggest using it to generate the first LOD levels, then switch to the triangle reducer.
As a side note, the triangle reducer also has a point where it starts to struggle. This is because it is limited to work upon existing connectivity in the mesh. So if we wanted to push our character down even more we could find a point where we would get better results from using Simplygon's remesher.
Scripting
It is also possible to use the quad reduction pipeline in 3ds Max through scripting. To export the mesh from 3ds Max with quad data you need to enable quad mode with sgsdk_SetQuadMode(True) before exporting. Without that flag enabled the model will become triangulated.
Below is a script for optimize the selected models in 3ds Max with our quad reducer to an ReductionTargetOnScreenSize of 800.
# Copyright (c) Microsoft Corporation.
# Licensed under the MIT license.

from simplygon10 import simplygon_loader
from simplygon10 import Simplygon
from pymxs import runtime as rt

export_path = 'C:/Temp/ExportedScene.sb'
processed_path = 'C:/Temp/ProcessedScene.sb'


def reduce_with_weights(sg: Simplygon.ISimplygon, screen_size: int, scene: Simplygon.spScene):
    reduction_pipeline = sg.CreateQuadReductionPipeline()

    # Set reduction target
    reduction_settings = reduction_pipeline.GetQuadReductionSettings()
    reduction_settings.SetReductionTargetOnScreenSize(screen_size)
    reduction_settings.SetReductionTargetOnScreenSizeEnabled(True)

    reduction_pipeline.RunScene(scene, Simplygon.EPipelineRunMode_RunInThisProcess)


def export_selection_from_max(sg: Simplygon.ISimplygon, temp_path: str) -> Simplygon.spScene:
    if not rt.sgsdk_ExportToFile(temp_path, False):
        return None

    scene_importer = sg.CreateSceneImporter()
    scene_importer.SetImportFilePath(temp_path)

    if scene_importer.Run() == Simplygon.EErrorCodes_NoError:
        return scene_importer.GetScene()
    return None


def import_to_max(sg: Simplygon.ISimplygon, scene: Simplygon.spScene, temp_path: str):
    scene_exporter = sg.CreateSceneExporter()
    scene_exporter.SetExportFilePath(temp_path)
    scene_exporter.SetScene(scene)
    scene_exporter.Run()
    rt.sgsdk_ImportFromFile(processed_path, True, True, True)


def main():
    sg = simplygon_loader.init_simplygon()

    sg.SetGlobalDefaultTangentCalculatorTypeSetting(Simplygon.ETangentSpaceMethod_Autodesk3dsMax)
    rt.sgsdk_SetQuadMode(True)
    scene = export_selection_from_max(sg, export_path)

    reduce_with_weights(sg, 800, scene)
    import_to_max(sg, scene, processed_path)
    del sg

if __name__== "__main__":
    main()
What's next?
There are some couple of things you could investigate next.
Automation
After creating a good character optimization pipeline first step would be to read up on how to customize and share your pipelines. After that you can investigate how to automate your asset pipeline.
Guide optimization with vertex weights
Right now, when our model is optimized, every part has same quality. In most cases some parts are more important than others. For characters, faces are the most important part. You can use vertex weights to mark these areas as extra important. A video of how this is done in Maya can be seen here. The concept is same in 3ds Max.
