LOD0 character optimization using quad reduction and material baking
Written by Jesper Tingvall, Product Expert, Simplygon
Disclaimer: The code in this post is written using version 10.4.338.0 of Simplygon and 3ds Max 2025. If you encounter this post at a later stage, some of the API calls might have changed. However, the core concepts should still remain valid.
Introduction
In this blog post, we will create a character optimization pipeline inside 3ds Max. It will feature quad reduction and material merging. With vertex weighting, geometric quality and UV scaling can be controlled by the artist painting vertex colors.
Prerequisites
This example will use the Simplygon plugin for 3ds Max, but the same concepts can be applied to all other integrations of the Simplygon API.
Problem to solve
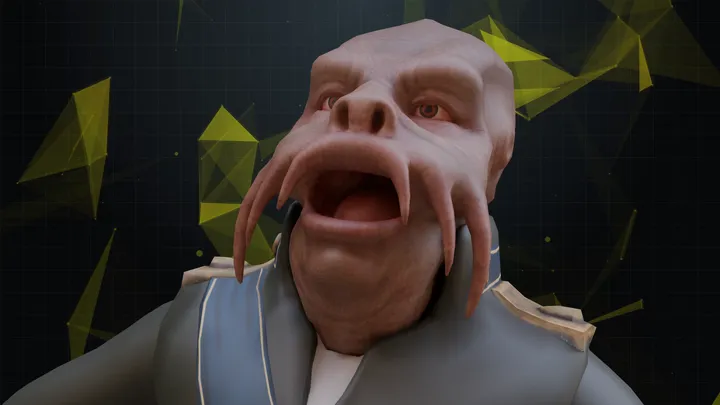
We want to optimize character models before importing them into our game engine. Our primary intention with this is to enforce a specific quality standard for our assets. The standard we want to enforce is that the asset should use only one material and be optimized to render at a certain screen size. One reason for this could be that we have a game targeting multiple platforms, and on certain platforms, we want the LOD0 model to be more optimized.
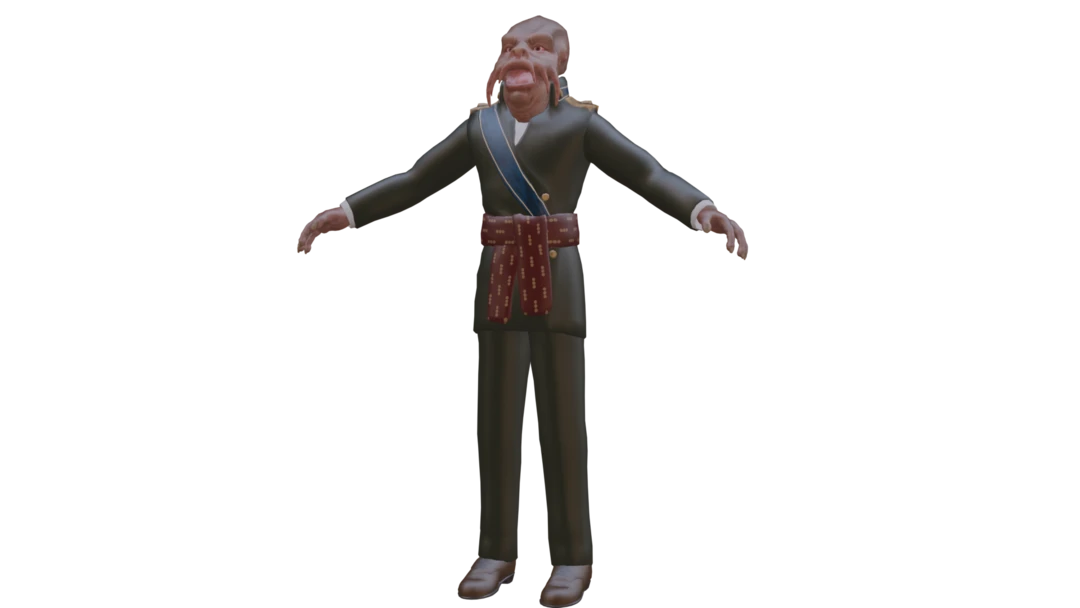
The asset contains three different materials. We want to merge all these into one material.
- Skin
- Eyes
- Clothing
Since we want the topology to be similar to our original asset, we will use the quad reducer. However, it does not support material casting out of the box. Let us look at how to solve that.
Solution
The solution is to use both a quad reduction and aggregation pipeline. To allow our artists to control the important areas, we are going to use vertex weighting to control both the reduction and UV chart scaling. We will package all of these features into a 3ds Max script that also handles exporting and importing from our DCC tool.
Vertex paint asset
We instruct our artists to paint the important areas of the model with vertex colors. Different color channels influence different things; in this example, red controls geometry quality and green controls texture importance.
For a character asset, the important areas are where we pay most attention. This is the area around the eyes, nose, and mouth. We paint these areas white and keep the rest of the model as gray (RGB values 0.5, 0.5, 0.5). White (RGB 1.0, 1.0, 1.0) has both high red and green components, meaning that the face will be allocated both higher geometry importance and UV size.
Reduction
The first step is to use quad reduction to optimize the geometry. We use screen size as the reduction target. That way, we can easily reason about how much quality our asset should have by thinking about how large we need to render it on screen. A screen size of 800, as used in this example, means that when we render the character at a size of 800 pixels, we should get around 1 pixel of error. In many cases, this is very conservative, and we could probably use the same asset at a screen size of 1600 pixels or 2400 pixels.
def reduce_with_weights(sg : Simplygon.ISimplygon, screen_size : int, scene : Simplygon.spScene):
    reduction_pipeline = sg.CreateQuadReductionPipeline()
    reduction_settings = reduction_pipeline.GetQuadReductionSettings()
    reduction_settings.SetReductionTargetOnScreenSize(screen_size)
    reduction_settings.SetReductionTargetOnScreenSizeEnabled(True)
We use vertex weights with UseVertexWeightsInReducer and configure it to use the red color component. If we want to increase how much vertex colors influence the model, we can change WeightsFromColorMultiplier. The behavior of vertex weights is different depending on whether we are using screen size / max deviation or triangle count / triangle ratio as the reduction target.
- If you are using screen size / max deviation, then vertex weights only influence the model locally. Areas painted brighter will be allocated more triangles, as errors in those areas will be taken more into account.
- If you are using triangle ratio / triangle count, then changing vertex weights on one part of the model can affect the entire model. Since we are optimizing against a fixed number of triangles, we will 'steal' triangles from other, less prioritized areas of the model.
    weight_settings = reduction_pipeline.GetVertexWeightSettings()
    # Make sure that the reducer uses the weights
    weight_settings.SetUseVertexWeightsInReducer(True)
    # Specify the weight channel
    weight_settings.SetWeightsFromColorName("0") # First vertex color in 3ds Max. For more information: https://simplygon.com/posts/5e2be092-97e2-4f96-9f91-723e96fad510
    weight_settings.SetWeightsFromColorComponent(Simplygon.EColorComponent_Red)
    # Set how much the weights should influence the reducer. 10 is max.
    weight_settings.SetWeightsFromColorMultiplier(4)

    reduction_pipeline.RunScene(scene, Simplygon.EPipelineRunMode_RunInThisProcess)
It is important to note that quad reduction is primarily intended to optimize the asset just a little bit. If you want to perform heavy reduction of the asset, then triangle reduction is a better tool. This blog on Character optimization with quad reduction goes into further details on this.
Aggregation
To merge the materials, we will use an aggregation pipeline. Here, we enable UseVertexWeightsInTexcoordGenerator and set it so that the green color channel influences UV scaling.
def aggregate(sg : Simplygon.ISimplygon, texture_size : int, gutter_space : int, scene : Simplygon.spScene):
    # Create the aggregation pipeline.
    sgAggregationPipeline = sg.CreateAggregationPipeline()

    # Merge all geometries into a single geometry.
    sgAggregationSettings = sgAggregationPipeline.GetAggregationSettings()
    sgAggregationSettings.SetMergeGeometries( True )

    # User vertex weights to scale UV islands
    weight_settings = sgAggregationPipeline.GetVertexWeightSettings()
    weight_settings.SetUseVertexWeightsInTexcoordGenerator(True)
    weight_settings.SetWeightsFromColorName("0") # Use second vertex color in 3ds Max. For more information: https://simplygon.com/posts/5e2be092-97e2-4f96-9f91-723e96fad510
    weight_settings.SetWeightsFromColorComponent(Simplygon.EColorComponent_Green)
    weight_settings.SetWeightsFromColorMultiplier(4)
We also set up a mapping image and specify that we want to generate our new UV map by aggregating the old UV charts. This is done by setting TexCoordGeneratorType to chart aggregator.
    # Generates a mapping image which is used after the aggregation to cast new materials to the new
    # aggregated object.
    sgMappingImageSettings = sgAggregationPipeline.GetMappingImageSettings()
    sgMappingImageSettings.SetGenerateMappingImage( True )
    sgMappingImageSettings.SetApplyNewMaterialIds( True )
    sgMappingImageSettings.SetGenerateTangents( True )
    sgMappingImageSettings.SetUseFullRetexturing( True )
    sgMappingImageSettings.SetTexCoordGeneratorType( Simplygon.ETexcoordGeneratorType_ChartAggregator )
    sgMappingImageSettings.SetTexCoordName("MaterialLOD")
With ChartAggregatorMode, we can tell the chart aggregator how the different UV charts should be scaled relative to each other. We set this to surface area. In this mode, the size of the geometry determines UV scaling, with larger objects being given larger size. To this scale, we apply the vertex-weighted scale, so both are taken into account.
    # Enable the chart aggregator and reuse UV space.
    sgChartAggregatorSettings = sgMappingImageSettings.GetChartAggregatorSettings()
    sgChartAggregatorSettings.SetChartAggregatorMode( Simplygon.EChartAggregatorMode_SurfaceArea )
    sgChartAggregatorSettings.SetSeparateOverlappingCharts( False )
    sgChartAggregatorSettings.SetOriginalChartProportionsChannel("base_color")
With TextureWidth and TextureHeight, we set the output texture size. GutterSpace determines how tightly we will pack the UV charts.
    # Setting the size of the output material for the mapping image. This will be the output size of the
    # textures when we do material casting in a later stage.
    sgOutputMaterialSettings = sgMappingImageSettings.GetOutputMaterialSettings(0)
    sgOutputMaterialSettings.SetTextureWidth( texture_size )
    sgOutputMaterialSettings.SetTextureHeight( texture_size )
    sgOutputMaterialSettings.SetGutterSpace(gutter_space)
We add one color caster for our base_color channel. The channel name and settings are specific for casting the base color in 3ds Max. For more information on how to figure out the correct settings, read the blog How to find correct settings for a scripted pipeline. Once we have configured the aggregation pipeline and the color caster, we process the scene.
    # Add diffuse material caster to pipeline. 3ds Max specific settings.
    sgDiffuseCaster = sg.CreateColorCaster()
    sgDiffuseCasterSettings = sgDiffuseCaster.GetColorCasterSettings()
    sgDiffuseCasterSettings.SetMaterialChannel( "base_color" )
    sgDiffuseCasterSettings.SetOpacityChannel("transparency")
    sgDiffuseCasterSettings.SetOpacityChannelComponent(0)
    sgDiffuseCasterSettings.SetOutputImageFileFormat( Simplygon.EImageOutputFormat_PNG)
    sgDiffuseCasterSettings.SetOutputPixelFormat(Simplygon.EPixelFormat_R8G8B8)
    sgDiffuseCasterSettings.SetOutputSRGB(True)
    sgAggregationPipeline.AddMaterialCaster( sgDiffuseCaster, 0 )

    # Start the aggregation pipeline.
    print("Start the aggregation pipeline.")
    sgAggregationPipeline.RunScene(scene, Simplygon.EPipelineRunMode_RunInThisProcess)
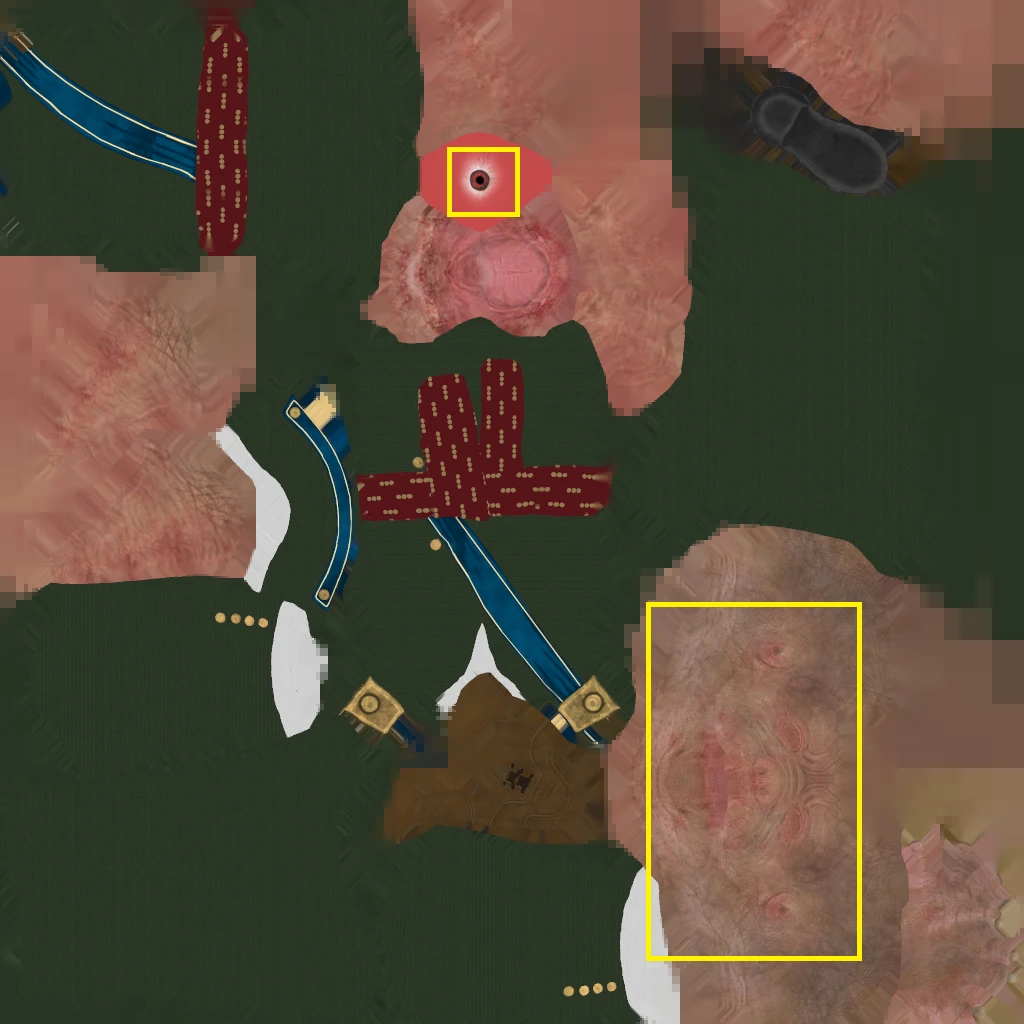
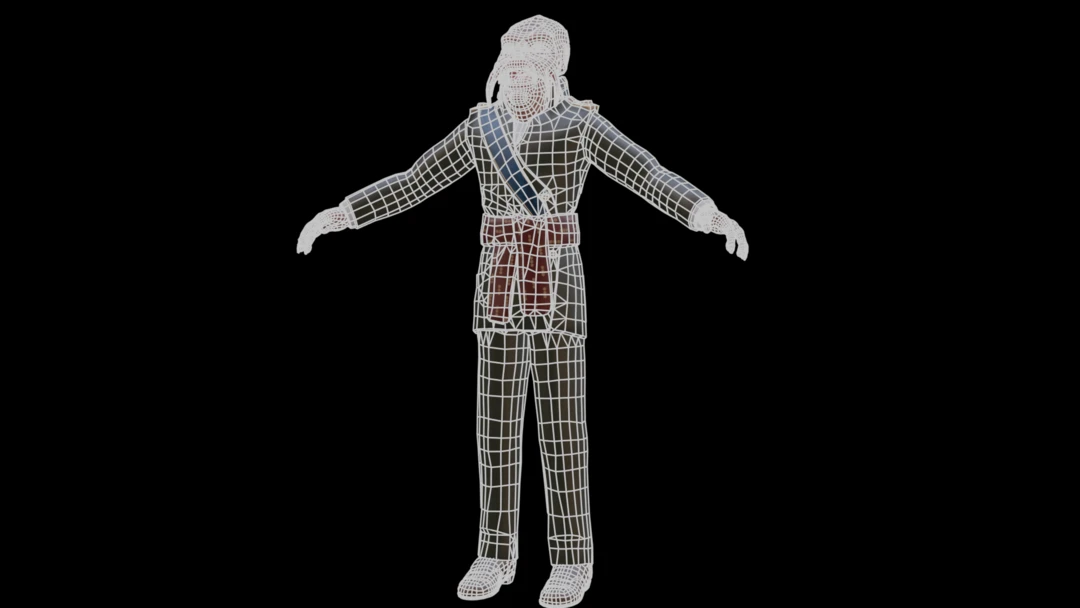
Let us look at the effects of using vertex weights for UV scaling. Here is the output texture, first without using vertex weights.
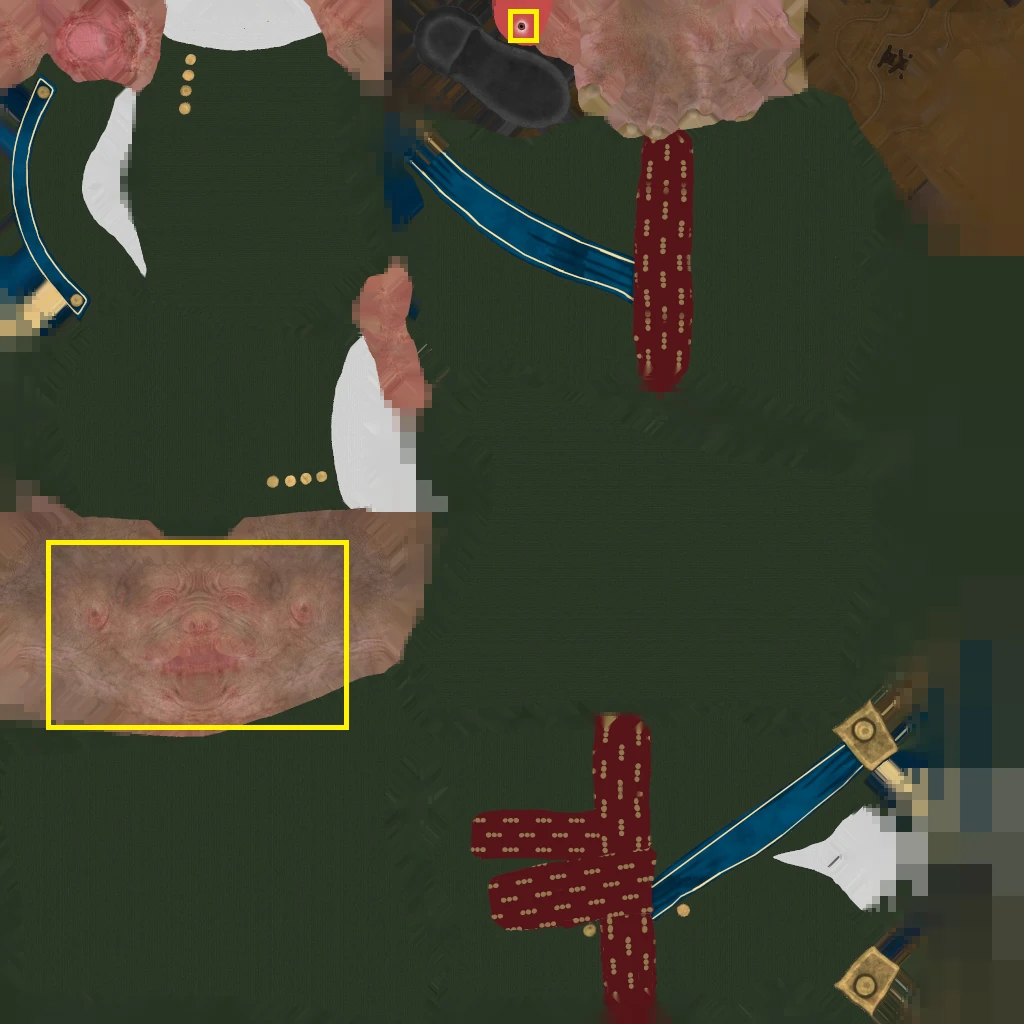
Here it is with vertex weights. We can see that the highlighted eye and face texture is much larger. Because we have colored triangles in that UV chart with a lighter color, those are scaled up. It is important to note that we are not deforming the UV charts; the UV chart has the same shape as in the input model, but it is scaled differently.
Putting it all together
Now let's put it all together. We start by setting up the correct settings for quad export from 3ds Max (see Character optimization with quad reduction).
After that, we export the selected asset from 3ds Max and load it as a Simplygon scene. We then run quad reduction and then aggregation on this scene. Lastly, we export the scene back into 3ds Max.
def main():
    sg = simplygon_loader.init_simplygon()
    print(sg.GetVersion())

    sg.SetGlobalDefaultTangentCalculatorTypeSetting(Simplygon.ETangentSpaceMethod_Autodesk3dsMax)
    rt.sgsdk_SetQuadMode(True)

    # Export form 3ds Max to Simplygon
    scene = export_selection_from_max(sg, export_path)

    # Process asset
    reduce_with_weights(sg, 800, scene)
    aggregate(sg, 1024, 1, scene)

    # Export from Simplygon and import into 3ds Max
    import_to_max(sg, scene, processed_path)

    del sg
Result
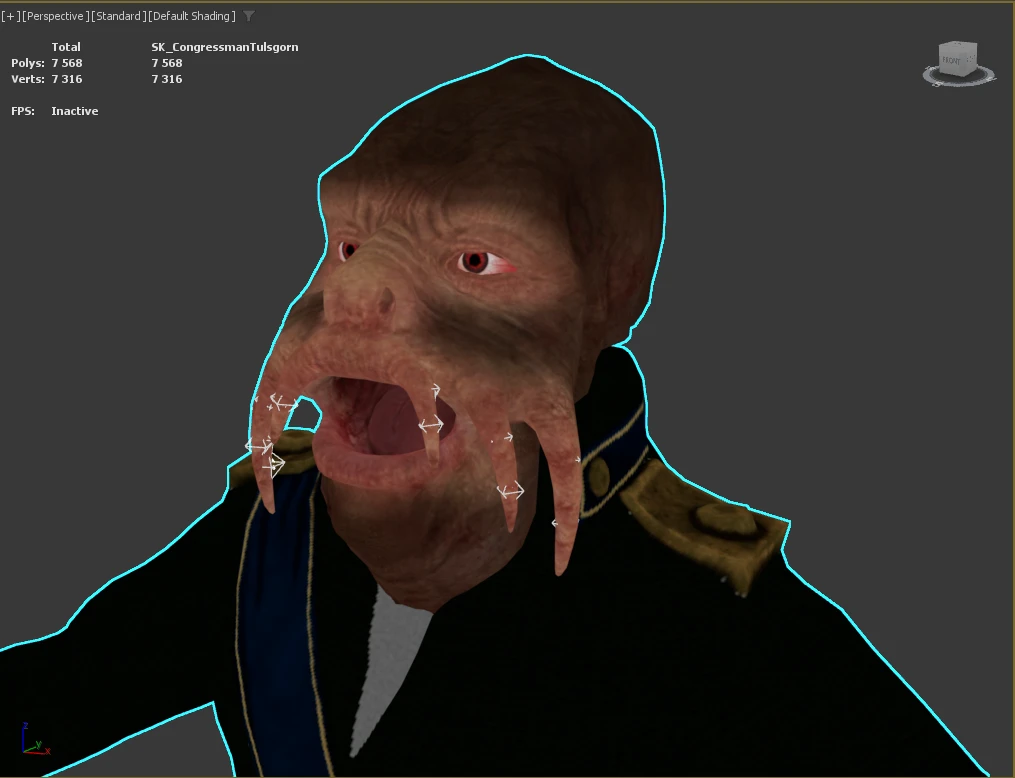
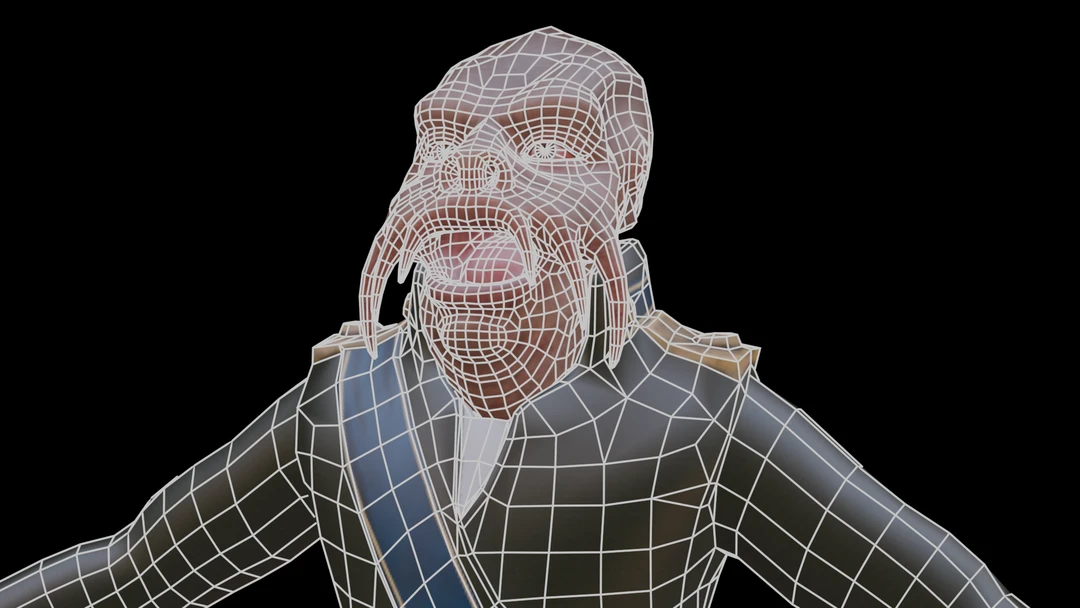
Let us look at the optimized asset with and without vertex weights. The body is optimized in the same way, which makes perfect sense as we did not influence that with vertex color.

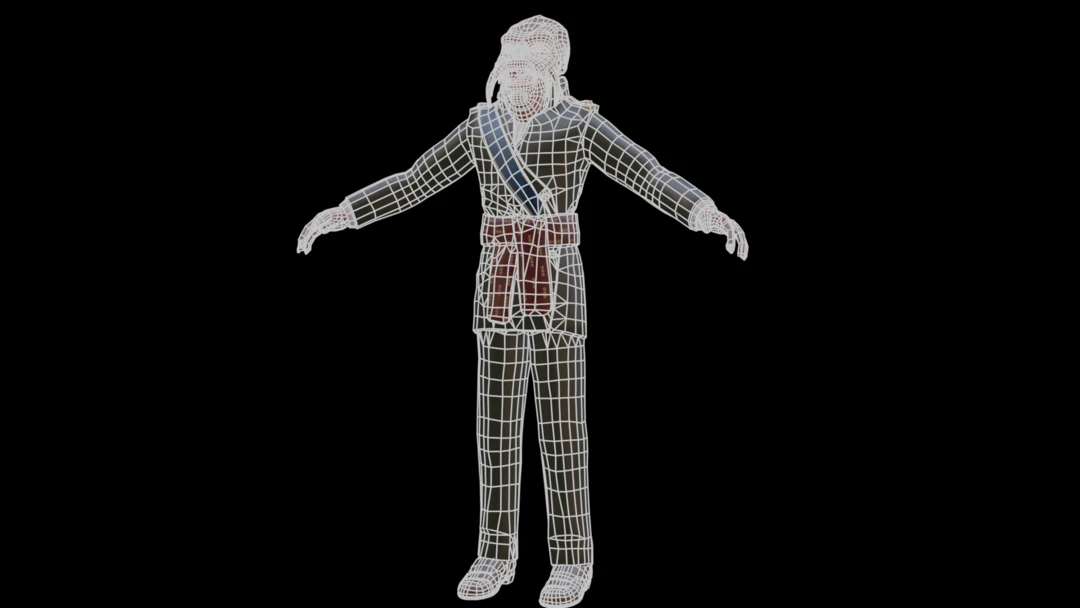
Let us zoom in closer on the face. Here, we can see that we get additional geometry around the eyes and mouth when vertex weights are taken into account.
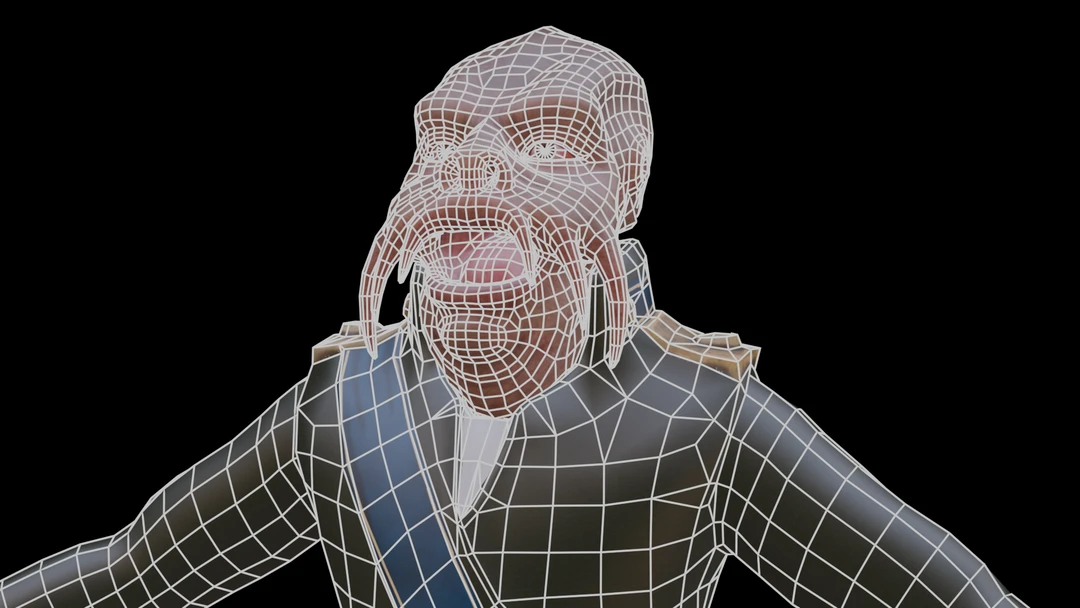

As we saw earlier in the texture, the face and eyes are allocated relatively more texture space with vertex weights.
We can also compare the stats of our optimized assets. We can see that we get a slightly increased triangle count when using vertex weighting, but those are in areas we care about. We could also do the inverse and ask our artists to mark areas we do not care about as less important by using darker colors.
| Model | Triangle count | Material count | Texture references |
|---|---|---|---|
| Original | 14 k | 3 | 3 x 4k textures |
| No vertex weighting use | 10 k | 1 | 1 x 1k texture |
| With vertex weighting | 11 k | 1 | 1 x 1k texture |
Next step
We have now created a LOD0 optimization of our character model. Depending on how the assets will be used, it can be a good idea to also generate LOD models. These can be created using the triangle reducer.
We can also start to look at how to automate our asset pipeline, so we are not bound by having to run a script from inside 3ds Max.
Complete scripts
# Copyright (c) Microsoft Corporation.
# Licensed under the MIT license.

from simplygon10 import simplygon_loader
from simplygon10 import Simplygon
from pymxs import runtime as rt

export_path = 'C:/Temp/ExportedScene.sb'
processed_path = 'C:/Temp/ProcessedScene.sb'


def reduce_with_weights(sg : Simplygon.ISimplygon, screen_size : int, scene : Simplygon.spScene):
    reduction_pipeline = sg.CreateQuadReductionPipeline()
    reduction_settings = reduction_pipeline.GetQuadReductionSettings()
    reduction_settings.SetReductionTargetOnScreenSize(screen_size)
    reduction_settings.SetReductionTargetOnScreenSizeEnabled(True)

    weight_settings = reduction_pipeline.GetVertexWeightSettings()
    # Make sure that the reducer uses the weights
    weight_settings.SetUseVertexWeightsInReducer(True)
    # Specify the weight channel
    weight_settings.SetWeightsFromColorName("0") # First vertex color in 3ds Max. For more information: https://simplygon.com/posts/5e2be092-97e2-4f96-9f91-723e96fad510
    weight_settings.SetWeightsFromColorComponent(Simplygon.EColorComponent_Red)
    # Set how much the weights should influence the reducer. 10 is max.
    weight_settings.SetWeightsFromColorMultiplier(4)

    reduction_pipeline.RunScene(scene, Simplygon.EPipelineRunMode_RunInThisProcess)


def aggregate(sg : Simplygon.ISimplygon, texture_size : int, gutter_space : int, scene : Simplygon.spScene):
    # Create the aggregation pipeline.
    sgAggregationPipeline = sg.CreateAggregationPipeline()

    # Merge all geometries into a single geometry.
    sgAggregationSettings = sgAggregationPipeline.GetAggregationSettings()
    sgAggregationSettings.SetMergeGeometries( True )

    # User vertex weights to scale UV islands
    weight_settings = sgAggregationPipeline.GetVertexWeightSettings()
    weight_settings.SetUseVertexWeightsInTexcoordGenerator(True)
    weight_settings.SetWeightsFromColorName("0") # Use second vertex color in 3ds Max. For more information: https://simplygon.com/posts/5e2be092-97e2-4f96-9f91-723e96fad510
    weight_settings.SetWeightsFromColorComponent(Simplygon.EColorComponent_Green)
    weight_settings.SetWeightsFromColorMultiplier(4)

    # Generates a mapping image which is used after the aggregation to cast new materials to the new
    # aggregated object.
    sgMappingImageSettings = sgAggregationPipeline.GetMappingImageSettings()
    sgMappingImageSettings.SetGenerateMappingImage( True )
    sgMappingImageSettings.SetApplyNewMaterialIds( True )
    sgMappingImageSettings.SetGenerateTangents( True )
    sgMappingImageSettings.SetUseFullRetexturing( True )
    sgMappingImageSettings.SetTexCoordGeneratorType( Simplygon.ETexcoordGeneratorType_ChartAggregator )
    sgMappingImageSettings.SetTexCoordName("MaterialLOD")

    # Enable the chart aggregator and reuse UV space.
    sgChartAggregatorSettings = sgMappingImageSettings.GetChartAggregatorSettings()
    sgChartAggregatorSettings.SetChartAggregatorMode( Simplygon.EChartAggregatorMode_SurfaceArea )
    sgChartAggregatorSettings.SetSeparateOverlappingCharts( False )
    sgChartAggregatorSettings.SetOriginalChartProportionsChannel("base_color")

    # Setting the size of the output material for the mapping image. This will be the output size of the
    # textures when we do material casting in a later stage.
    sgOutputMaterialSettings = sgMappingImageSettings.GetOutputMaterialSettings(0)
    sgOutputMaterialSettings.SetTextureWidth( texture_size )
    sgOutputMaterialSettings.SetTextureHeight( texture_size )
    sgOutputMaterialSettings.SetGutterSpace(gutter_space)

    # Add diffuse material caster to pipeline. 3ds Max specific settings.
    sgDiffuseCaster = sg.CreateColorCaster()
    sgDiffuseCasterSettings = sgDiffuseCaster.GetColorCasterSettings()
    sgDiffuseCasterSettings.SetMaterialChannel( "base_color" )
    sgDiffuseCasterSettings.SetOpacityChannel("transparency")
    sgDiffuseCasterSettings.SetOpacityChannelComponent(0)
    sgDiffuseCasterSettings.SetOutputImageFileFormat( Simplygon.EImageOutputFormat_PNG)
    sgDiffuseCasterSettings.SetOutputPixelFormat(Simplygon.EPixelFormat_R8G8B8)
    sgDiffuseCasterSettings.SetOutputSRGB(True)
    sgAggregationPipeline.AddMaterialCaster( sgDiffuseCaster, 0 )

    # Start the aggregation pipeline.
    print("Start the aggregation pipeline.")
    sgAggregationPipeline.RunScene(scene, Simplygon.EPipelineRunMode_RunInThisProcess)


def export_selection_from_max(sg: Simplygon.ISimplygon, temp_path: str) -> Simplygon.spScene:
    if not rt.sgsdk_ExportToFile(temp_path, False):
        return None

    scene_importer = sg.CreateSceneImporter()
    scene_importer.SetImportFilePath(temp_path)

    if scene_importer.Run() == Simplygon.EErrorCodes_NoError:
        return scene_importer.GetScene()
    return None


def import_to_max(sg: Simplygon.ISimplygon, scene: Simplygon.spScene, temp_path: str):
    scene_exporter = sg.CreateSceneExporter()
    scene_exporter.SetExportFilePath(temp_path)
    scene_exporter.SetScene(scene)
    scene_exporter.Run()
    rt.sgsdk_ImportFromFile(processed_path, True, True, True)


def main():
    sg = simplygon_loader.init_simplygon()

    sg.SetGlobalDefaultTangentCalculatorTypeSetting(Simplygon.ETangentSpaceMethod_Autodesk3dsMax)
    rt.sgsdk_SetQuadMode(True)

    # Export form 3ds Max to Simplygon
    scene = export_selection_from_max(sg, export_path)

    # Process asset
    reduce_with_weights(sg, 800, scene)
    aggregate(sg, 1024, 1, scene)

    # Export from Simplygon and import into 3ds Max
    import_to_max(sg, scene, processed_path)

    del sg

if __name__== "__main__":
    main()